I’ve pulled together 16 Halloween makeup looks that actually stop traffic—think neon skeleton glow, cyberpunk chrome eyes, and a vamp siren sculpted sharp enough to cut. I’ll show you the exact textures, pigments, and placements that make them pop under flash or streetlight, plus the adhesives and accents that won’t budge.
If you want wet-shine gloss, razor contour, or holographic drama, I’ve got the blueprint—starting with the one look that photographs like a filter.
Neon Skeleton Glow-Up
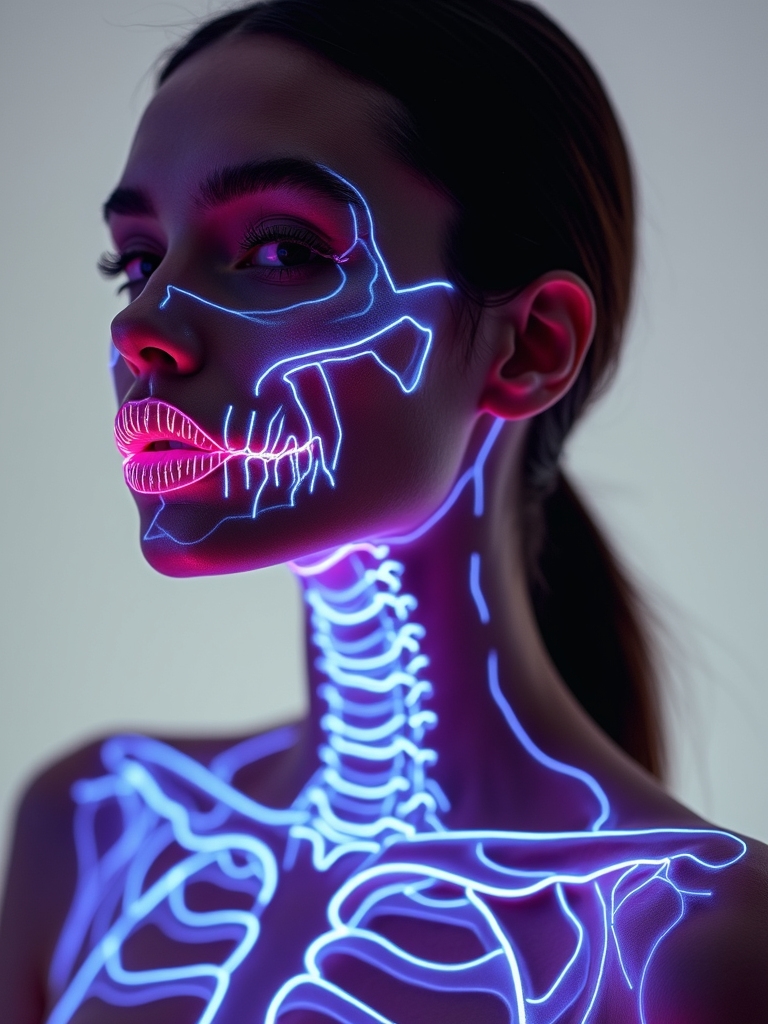
Let’s crank up the lights and turn a classic skeleton into a neon showstopper. I map cheekbones, jawline, and teeth with white cream, then trace over with UV liners—electric pink, slime green, atomic blue.
I blend black matte around hollows for contrast. I pop highlighter on high points, set with translucent powder, and snap on UV gloss. Under blacklight, it’s pure rave bones. Skulls can be stylized with dramatic shading to emphasize skull anatomy and create a more realistic or exaggerated effect.
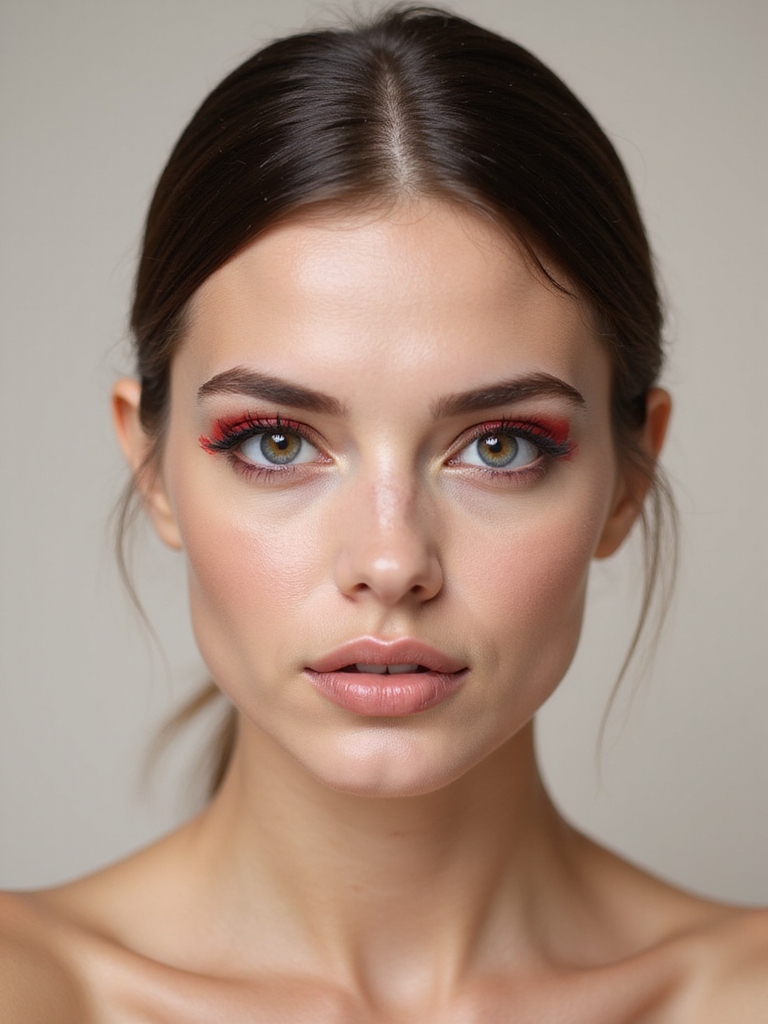
Glamorous Vampire Siren
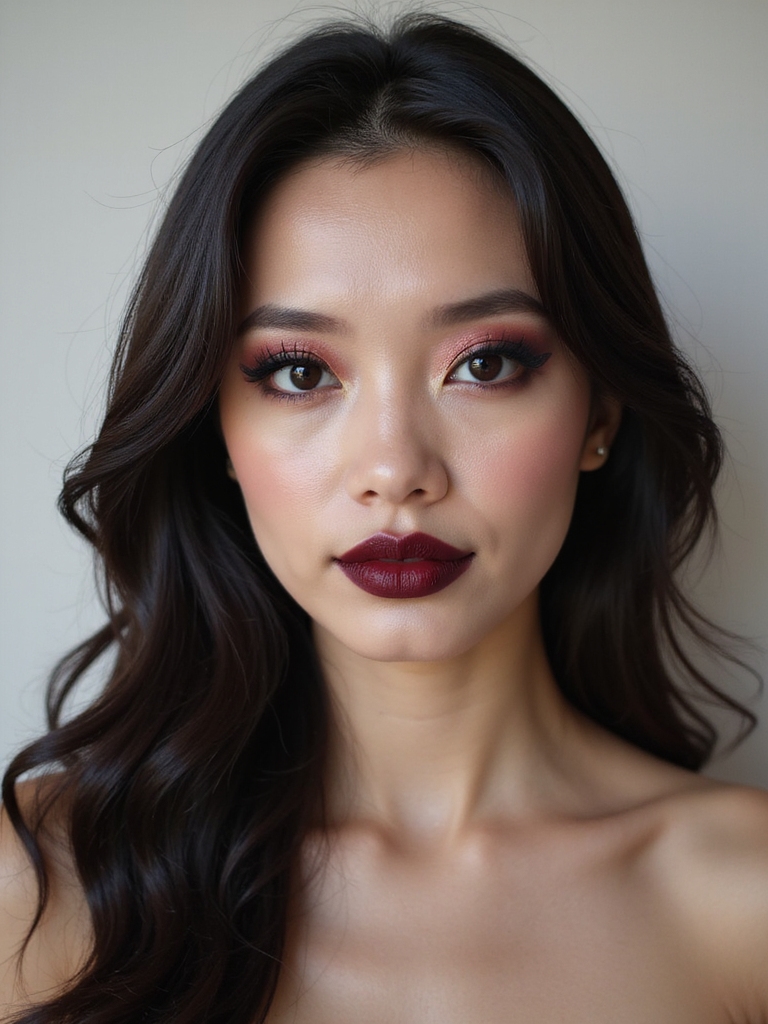
While the moon’s high and the drama’s higher, I sculpt a seductive vampire look that drips with glamour, not gore. I buff satin foundation, carve razor-sharp cheekbones, and smoke oxblood shadow winged to filigree.
I tightline, stack lashes, and gloss a bitten-berry lip. A micro-pearled highlight hits temples and cupid’s bow. Finish with a slicked bun, jeweled ear cuffs, and a velvet choker. The look is built around classic vampire makeup techniques that emphasize contrast and sculpting.
Eerie Ethereal Ghost
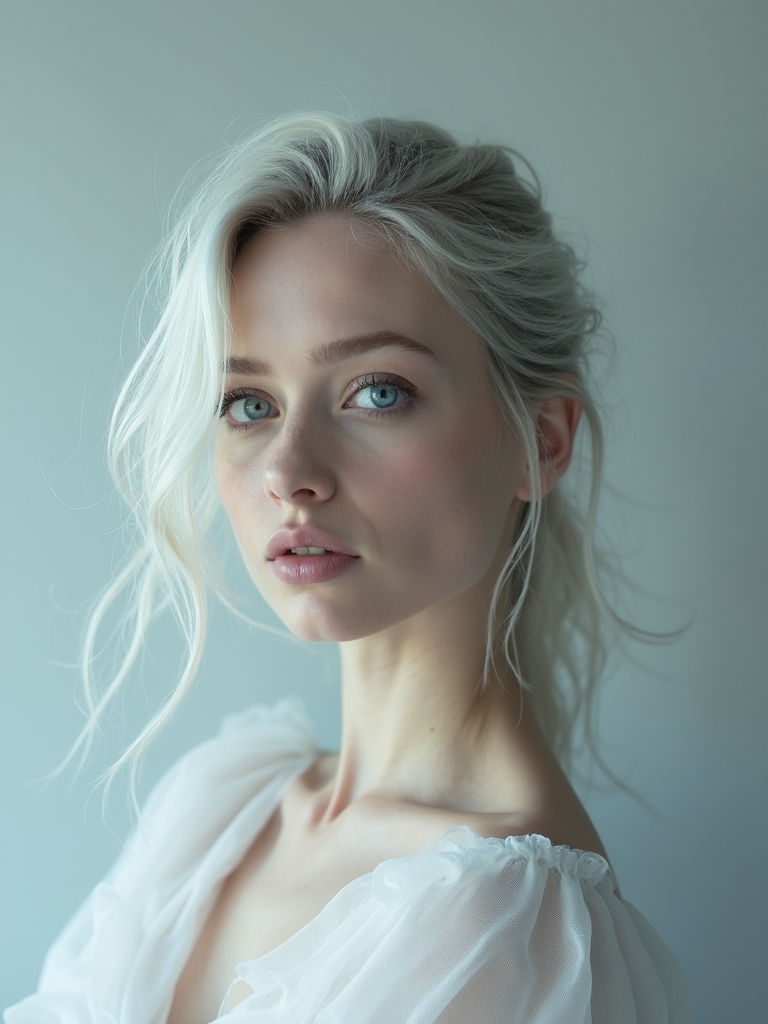
Let’s craft an Eerie Ethereal Ghost that looks weightless and haunting: I’ll start with a translucent porcelain base that blurs warmth without chalkiness.
Then I’ll hollow the eyes with smoky greys and cool taupes, and finish with a wispy mist contour along temples and jaw for a barely-there, floating effect.
Ready to look otherworldly? This look pairs well with spooky makeup looks that elevate your Halloween night and complete the eerie atmosphere.
Translucent Porcelain Base
Because an eerie glow starts with skin, I create a translucent porcelain base that looks otherworldly, not chalky.
I prep with hydrating essence, then blur with a sheer, cool-toned foundation. I spot-conceal, set strategically, and add a whisper of pearl.
- Ice-blue primer for lift
- Sheer, neutralizing foundation
- Pinpoint concealer only
- Finely milled, luminous powder
Ethereal looks benefit from techniques that emphasize a soft glow to keep the finish dreamy rather than heavy.
Hollowed Spectral Eyes
From soft shadow to stark contrast, I sculpt hollowed spectral eyes that read ethereal, not sunken.
I map a crescent under the brow bone and inner socket with cool taupe, then haze charcoal through the outer third.
I tap pearlescent highlight at the tear duct.
Feather a smoke along lower lashes, keep edges airy, and anchor with wispy mascara.
Finish with a translucent setting veil.
A classic Smokey Eye technique blends shades seamlessly for depth and drama.
Wispy Mist Contour
Those haunted eyes set the tone; now I pull that ghostly aura through the cheeks with a wispy mist contour. I sheer out cool-toned cream along hollows, then veil with translucent powder so edges feel foggy, not streaky. You’ll look weightless, uncanny, and camera-ready.
- Map hollows with grey-lilac cream.
- Feather upward with a damp sponge.
- Soften with translucent powder.
- Tap pearl highlighter on tops.
Cyberpunk Android Chic
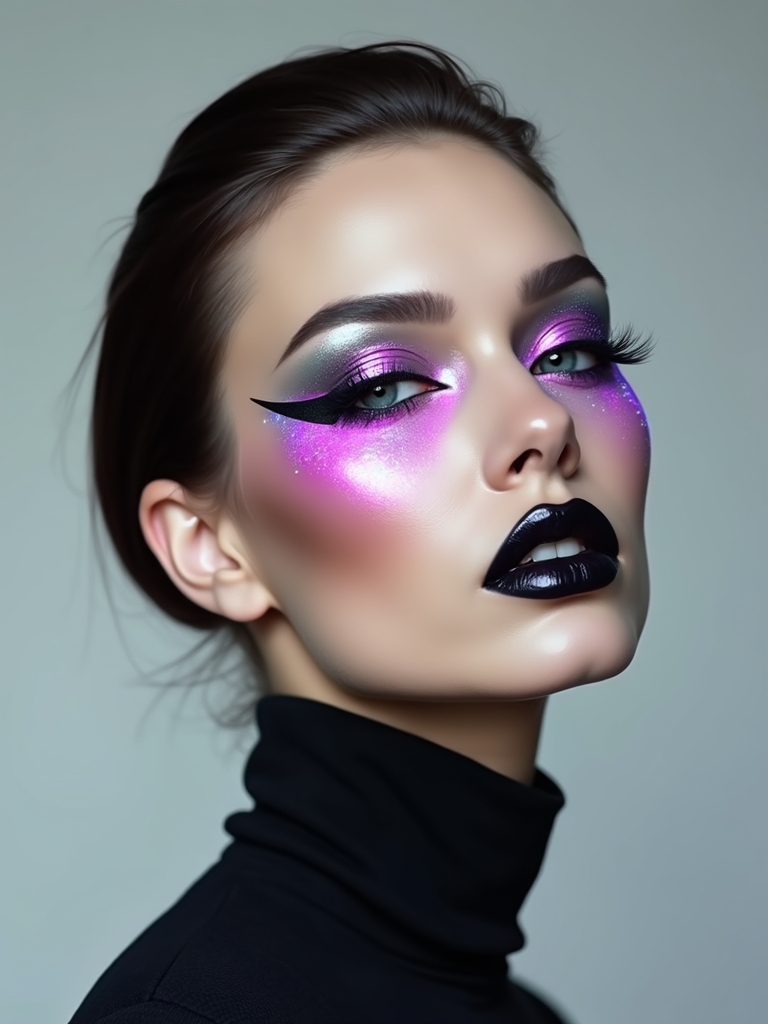
In a flash of neon and chrome, I’m building a Cyberpunk Android look that’s equal parts sleek and subversive.
I buff a satin base, then map faux circuitry with silver liner along temples and jaw. Holographic highlighter hits cheekbones, inner corners, Cupid’s bow. I stamp chrome shadow on lids, add ultraviolet wings, and stack spiky lashes.
Finish with vinyl-black lips, metallic ear cuffs, and adhesive rhinestones that read: future, loaded.
Classic Cat-Eye Catwoman
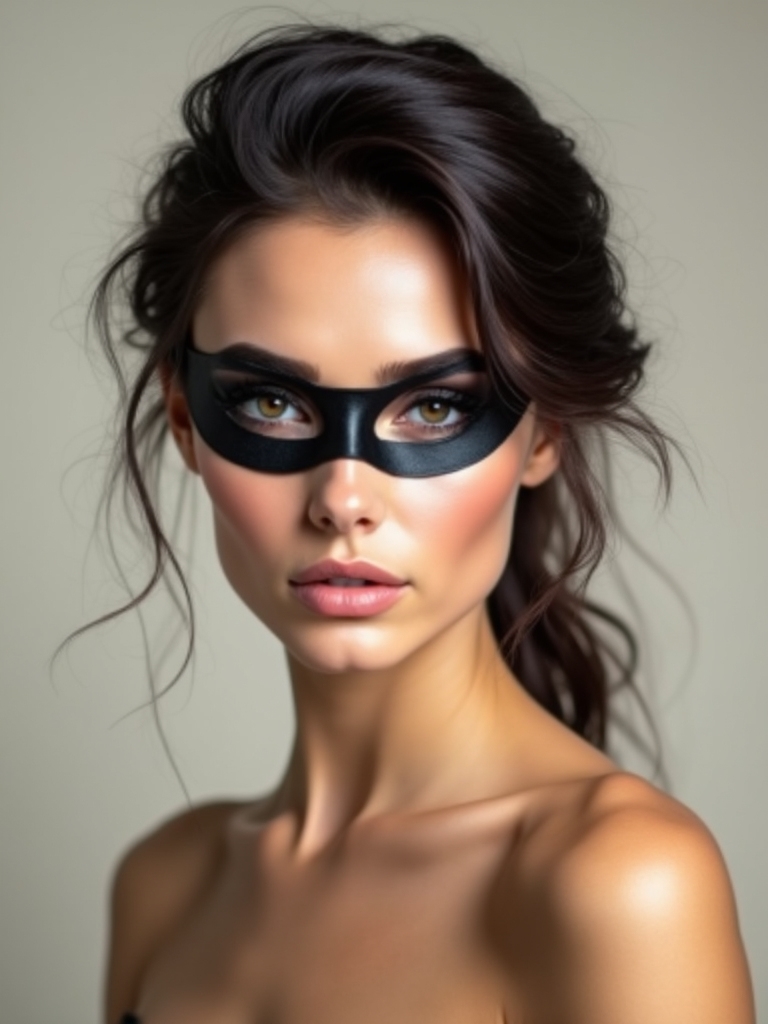
Neon fades to noir as I swap android chrome for Catwoman polish—sharp, stealthy, and feline. I’m carving ink-black wings that slice clean, pairing them with glossy onyx lips and a whisper of highlight.
You’ll stalk the room, sleek and in control. Do it fast, stay precise, own the gaze.
- Map wings with pencil
- Lock with gel liner
- Tightline waterline
- Add feline flicks
Beetlejuice Green Glam
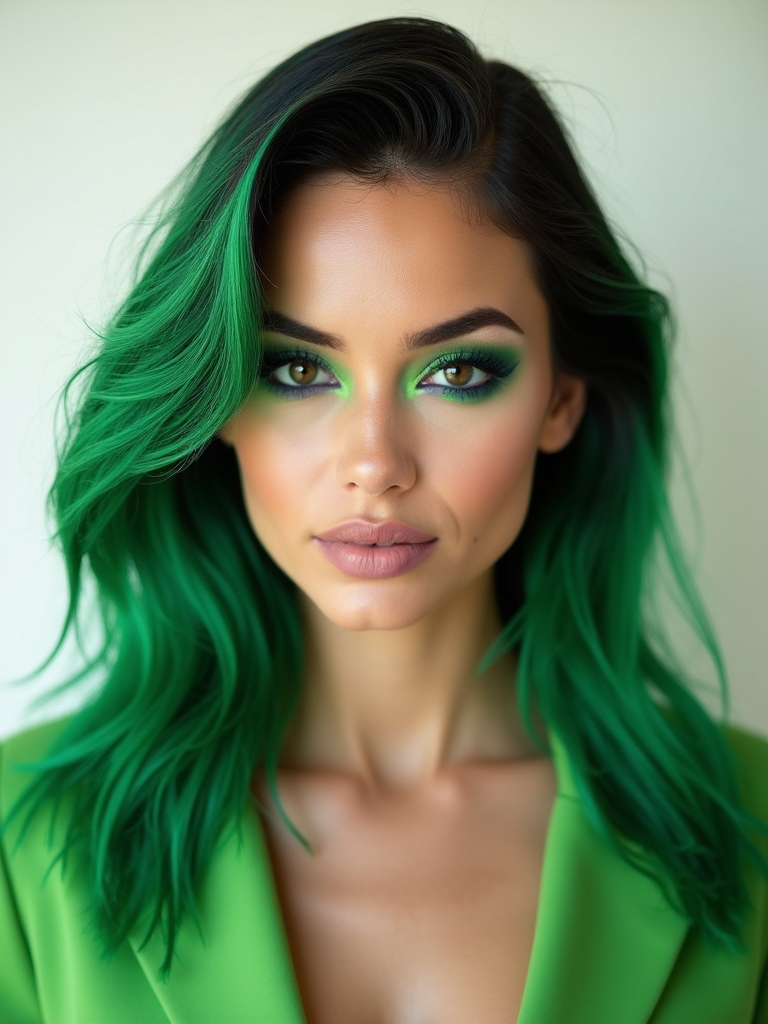
Let’s go full Beetlejuice: I sweep electric slime-green across my lids, then carve a stark striped contour for that ghostly, graphic edge.
To amp it up, I tap in subtle purple bruise accents at the inner and outer corners.
Grab your neon, black, and plum—let’s make this look unapologetically undead-chic.
Electric Slime-Green Lids
Swipe on slime-green and watch the room tilt your way—this Beetlejuice-coded lid is bold, glossy, and wickedly wearable. I pack neon pigment, buff edges, then slick a vinyl topper for that wet-shine finish.
Keep cheeks muted; let lids do the flex. Pair with inky mascara and a crisp wing. Ready to light up the dark?
Do this:
- Prime lids.
- Press pigment.
- Gloss lightly.
- Lock with mist.
Stark Striped Contour
Carve in those Beetlejuice stripes and turn contour into a statement.
I map bold, graphic lines along cheekbones, temples, and jaw with a cool taupe, then interlace razor-thin neon-green stripes for that ghoulish glam.
I keep spacing even, blend edges softly, and leave the stripes crisp.
Set with translucent powder, pop on a matte nude lip, and let the angles do the haunting.
Purple Bruise Accents
Dial up the Beetlejuice vibe by faking fresh “bruise blooms” that make the neon pop. I tap plum, wine, and sickly yellow around eyes and temples, then blur edges so it looks convincingly tender against electric green.
- Stipple cream purples, anchor with mustard.
- Feather edges with a fluffy brush.
- Add micro-veins using a fine liner.
- Seal with soft-focus powder; mist for longevity.
Glitter-Drenched Ghoul
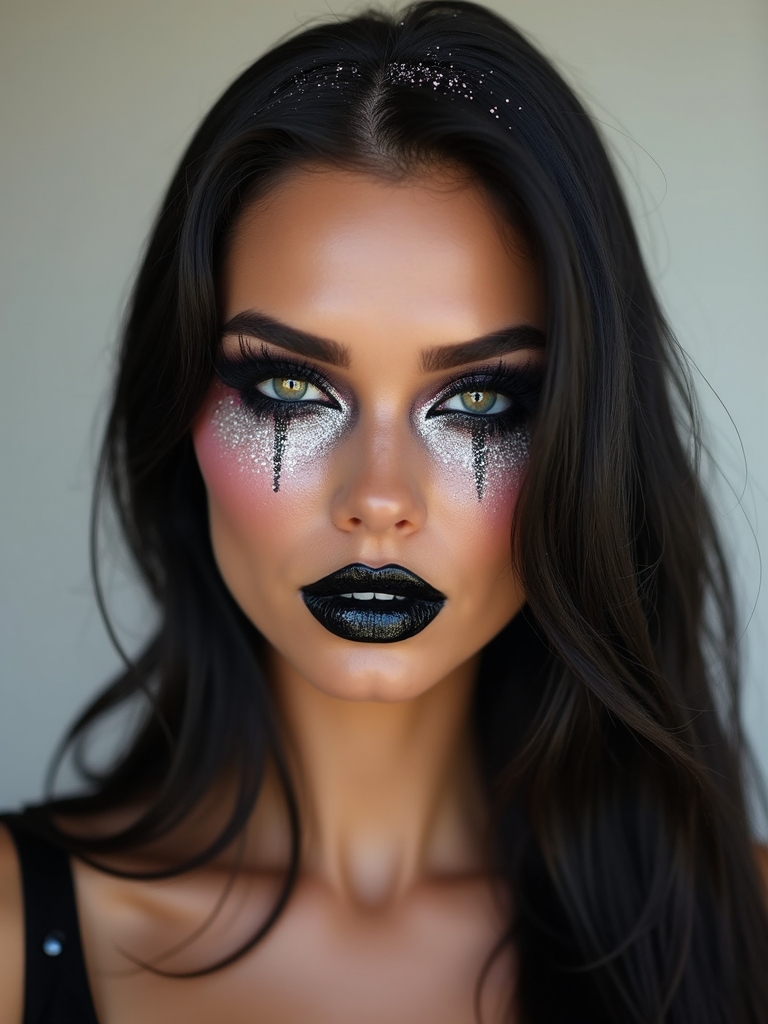
Let’s crank up the haunt with a Glitter-Drenched Ghoul that’s equal parts eerie and editorial.
I start with pale, matte skin, then carve sharp hollows using cool-toned contour. I tap glitter gel along temples, cheekbones, and cupid’s bow, letting it cascade like stardust. Smoke out the eyes, add inky liner, and press silver flakes near tear ducts.
Finish with blurred gray lips and a glassy highlight.
Siren of the Sea Scales
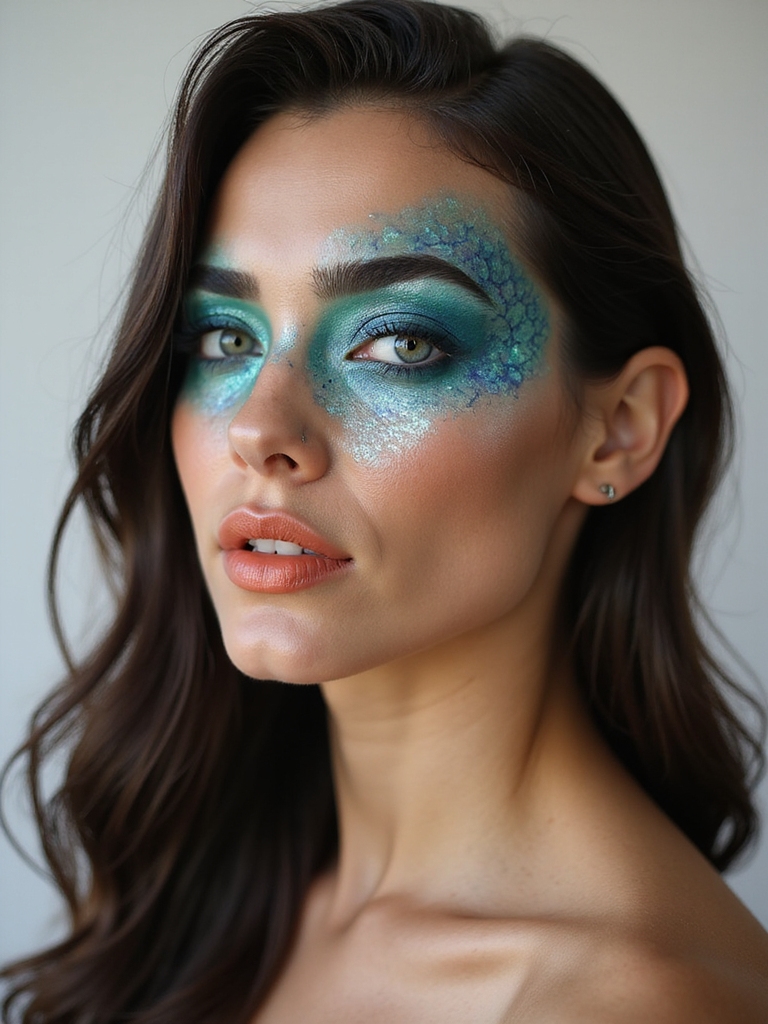
I’m bringing siren energy with shimmering scale patterns you can stamp on using fishnet and a metallic highlighter.
Let’s layer an oceanic color palette—teal, sapphire, and iridescent lilac—so your skin catches light like water.
To seal it, I’ll press gloss and setting spray for a dewy, wet-look finish that lasts all night.
Shimmering Scale Patterns
Often the simplest trick makes the biggest splash: I press fishnet tights over my temples and cheekbones, then buff a shimmery teal or iridescent shadow through the mesh to stamp instant scales.
I anchor the edges with highlighter and seal with mist so the pattern doesn’t blur. Want crisp, photogenic texture fast? Try these moves:
- Stretch the net tight.
- Tap, don’t swipe.
- Layer strategically.
- Lock with setting spray.
Oceanic Color Palette
Tidepool glamour starts with a tight oceanic palette: inky navy for depth, petrol teal for drama, sea-glass mint for highlights, and pearly shell for lift.
I map navy along the outer socket, flick a thin wing, then buffer teal into the crease. Tap mint on inner corners, shell on brow bone. Anchor with cool-toned contour, smoky liner, and a diffused blue-gray brow.
Dewy, Wet-Look Finish
With that oceanic color story in place, I lock in a dewy, wet-look sheen that reads siren—not sweaty. I mist a gripping setting spray, then press balmy highlights across high points for tidal gleam.
I seal scales with glossy gel, avoiding creases. You’ll glow like seafoam under moonlight.
- Tap clear balm over temples and lids.
- Gloss collarbones.
- Mist again.
- Add pearl drops.
Celestial Galaxy Witch
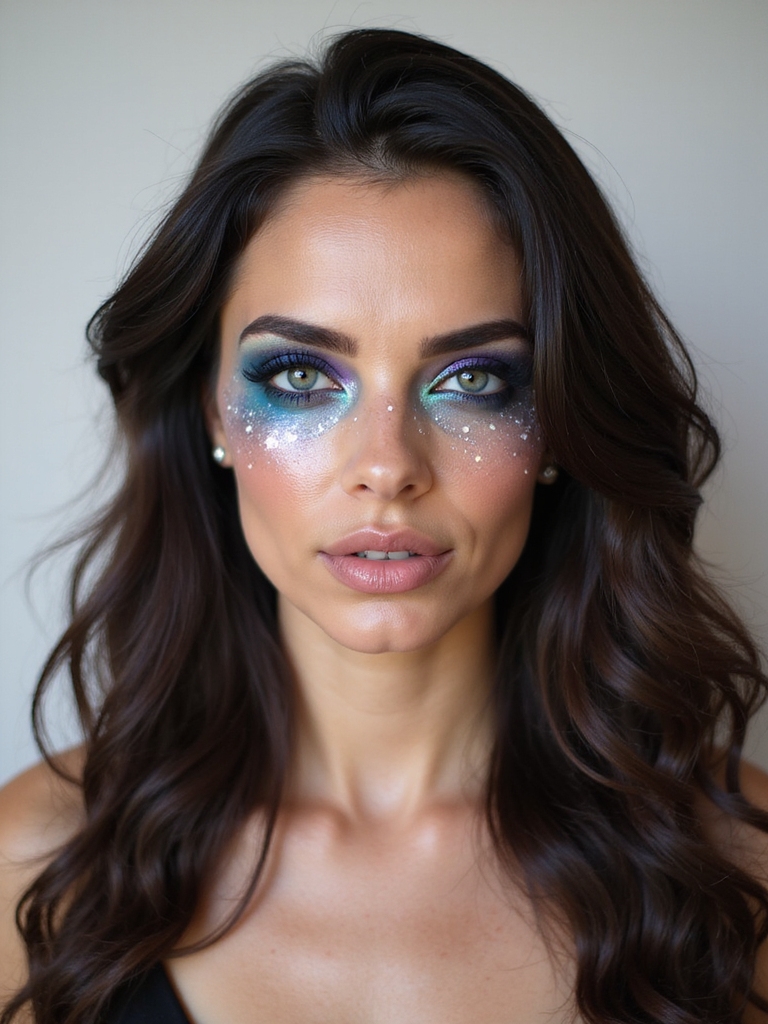
Stargazer-meets-sorceress glam turns a simple witch into a Celestial Galaxy Witch, and I’m here to help you nail it.
Sweep midnight shadow over lids, then tap duochrome shimmer on centers.
Flick a sharp wing.
Freckle on tiny silver stars and dots across cheeks and temples.
Glow with violet highlighter.
Finish with inky lips, a glossier center, and a mist of holographic setting spray.
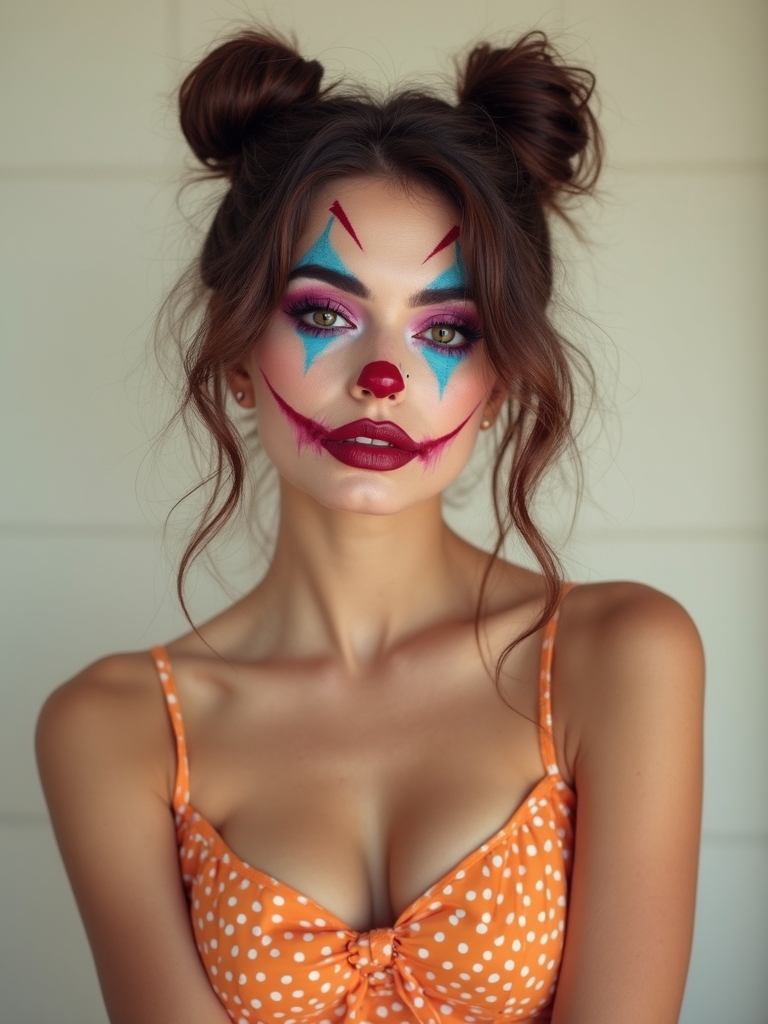
Pop Art Comic Book Face
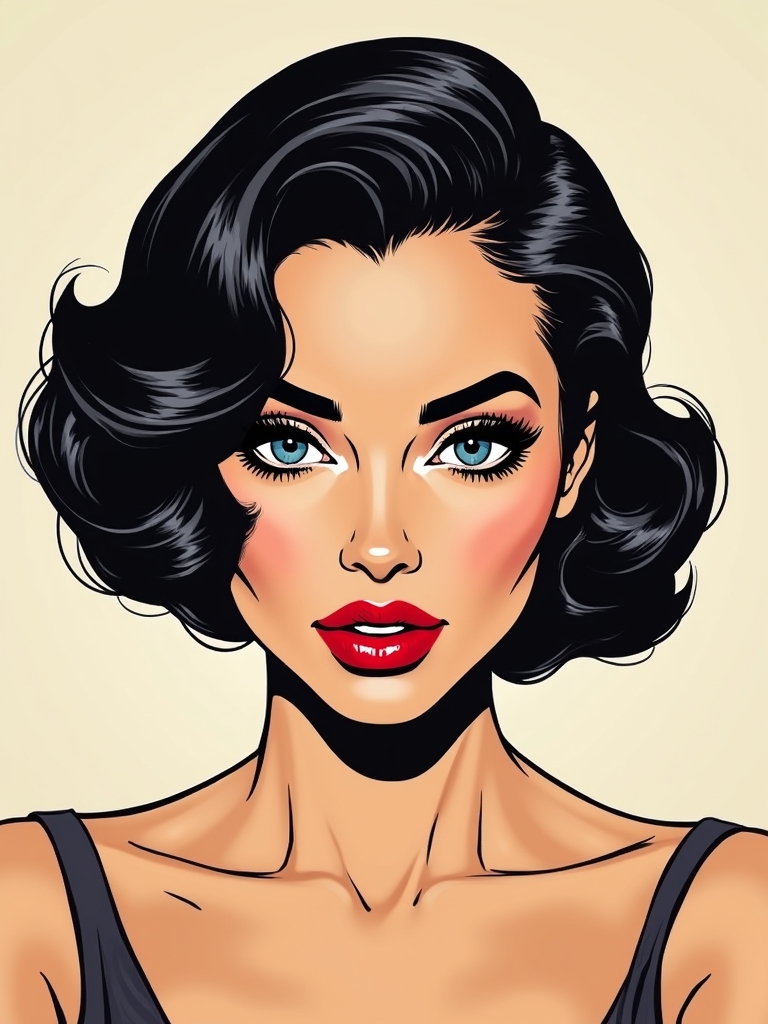
Ready to swap starry mystique for bold-panel drama? I’m dialing up a Pop Art Comic Book Face that looks ripped from vintage pages—graphic, bright, and camera-loving. Think crisp black outlines, Ben-Day dots, and a glossy lip highlight. You’ll nail it fast.
- Map bold black contour lines with liquid liner.
- Stamp red dots evenly across cheeks.
- Overdraw tears in cyan.
- Add white highlights for shine.
Haunted Doll With Cracks
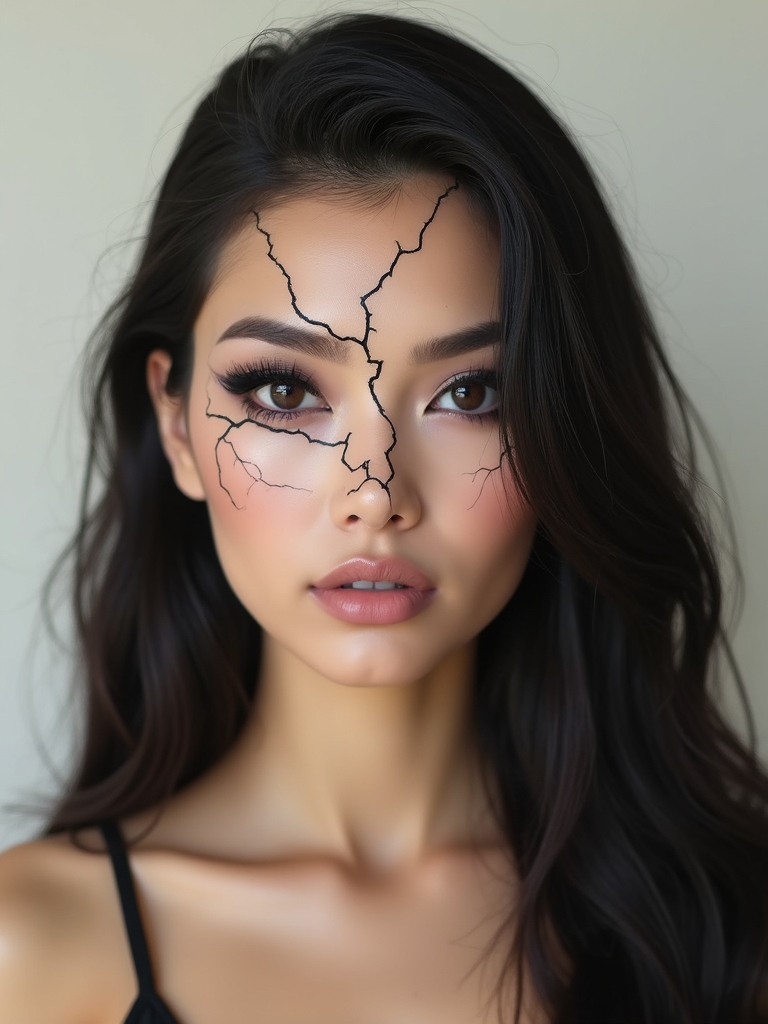
Although she looks sweet at first glance, my Haunted Doll comes cracked, glossy-eyed, and just unsettling enough to stop a room.
I start with porcelain-smooth foundation, then sketch hairline fractures with a fine liner and smudge-shadow for depth. Add dolly blush, exaggerated lower lashes, and a tight cupid’s bow. Glossy, milky contacts, a satin bow, and a stiff-curled wig seal the eerie, collector’s-shelf vibe.
Wicked Forest Nymph
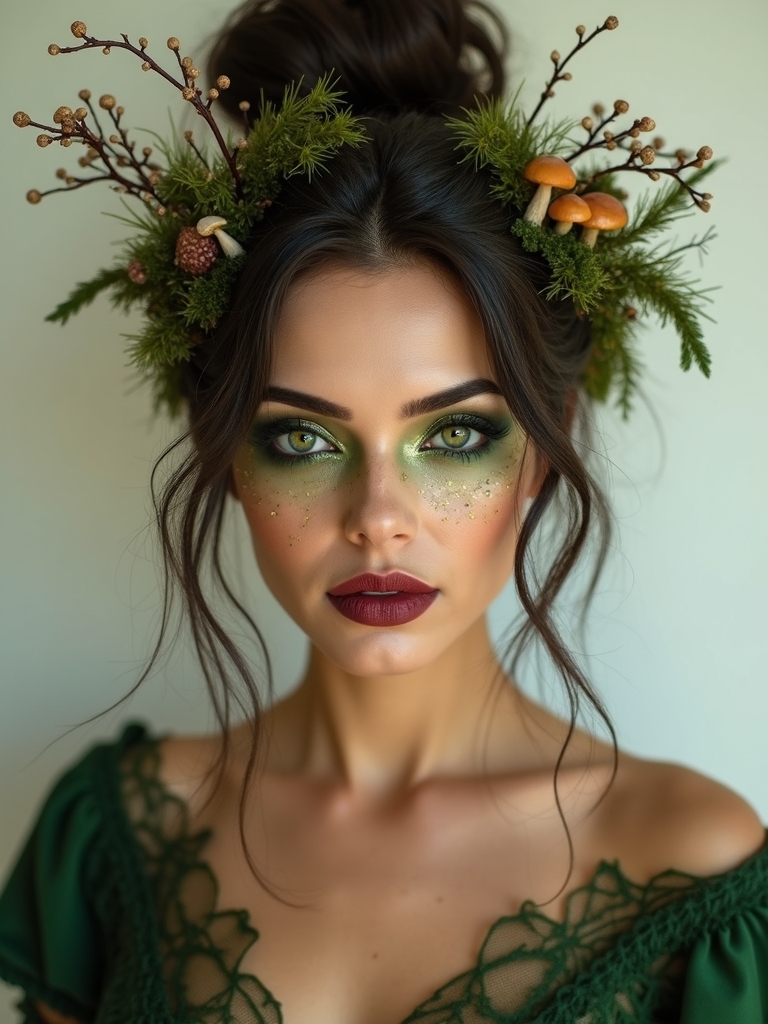
I’m taking you full forest-core with a mossy green complexion that reads ethereal, not sickly.
Let’s sculpt cheekbones with olive and chartreuse, then glaze the high points with a dewy highlight so the skin looks damp and alive.
I’ll sketch twisted vine details along the temples and collarbones—thin, snaking strokes, tiny thorns, and a hint of metallic sap to make them glint under party lights.
Mossy Green Complexion
Enchantment starts with a mossy green complexion that looks plucked from a shadowed forest. I build a dewy, dimensional base that feels ethereal, not costume-y. Think breathable coverage, cool undertones, and subtle luminosity that photographs beautifully.
Ready to glow? Here’s how I nail the hue and finish fast.
- Prime with hydrating, grip primer.
- Sheer olive foundation.
- Sage cream contour.
- Pale gold cream highlight.
Twisted Vine Details
Let’s weave in twisted vines that slither across the skin and sell the wicked forest nymph vibe. I sketch thin, asymmetrical tendrils with a fine brush, starting at temples and crawling to collarbones.
I shade one side with deep green, highlight the other with pearly shimmer, then dot “dew” using clear gloss. Add thorny flicks, tiny leaves, and a few black-speck freckles. Seal everything.
Cinematic Slashed FX
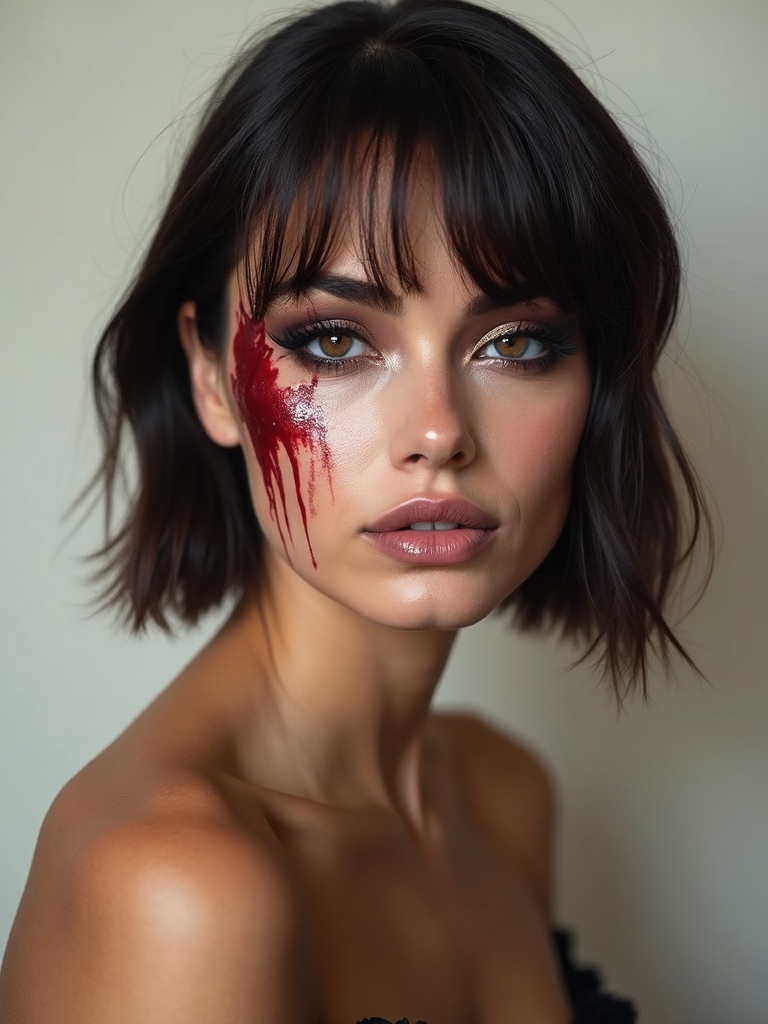
Although it looks intense, a Cinematic Slashed FX is totally doable with the right products and a steady plan. I map the cut, build depth, then finish glossy so it reads ultra-real on camera.
You’ll nail it fast with this kit-driven approach.
- Outline with a nude pencil; tear the shape.
- Layer scar wax; blend edges.
- Paint reds/browns; add veining.
- Seal, then gloss with fake blood.
Fiery Demon Contour
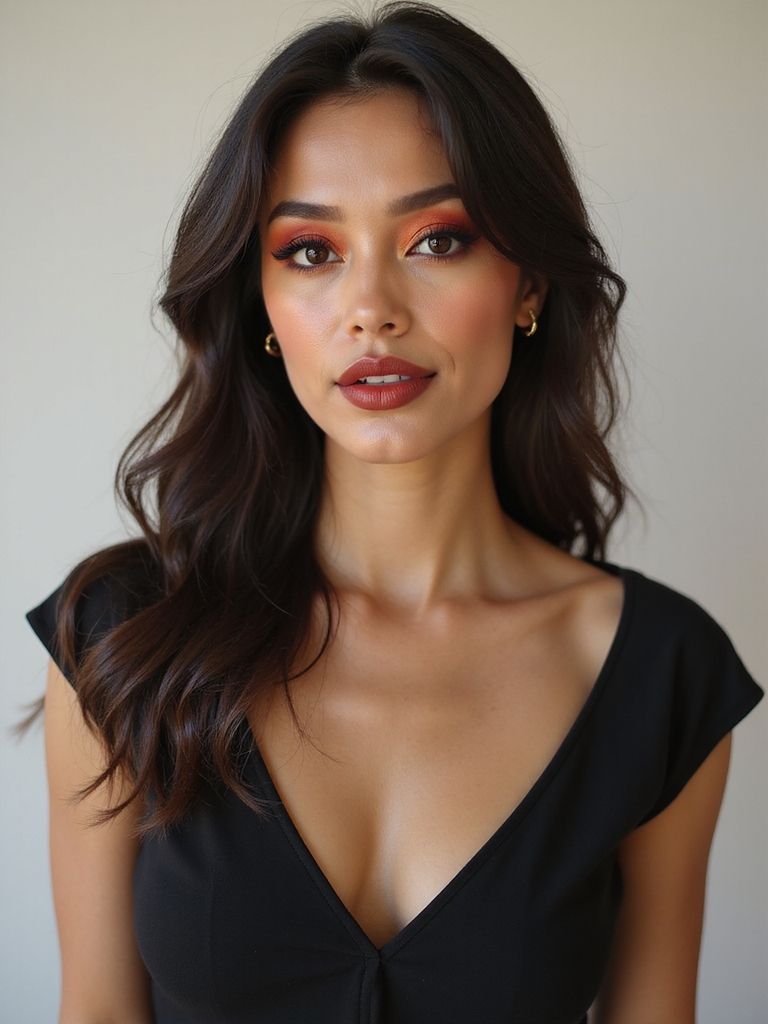
Ignite your bone structure with a Fiery Demon Contour that sculpts sharp, infernal angles and a heat-flushed glow. I map a deep brick contour under cheekbones, temples, and jaw, then feather crimson upward.
I pop orange on the apples and bridge, tap gold on high points, and smoke berry under eyes. Seal with setting spray.
Pair with razor brows and a scorched ombré lip.
Poisoned Apple Princess
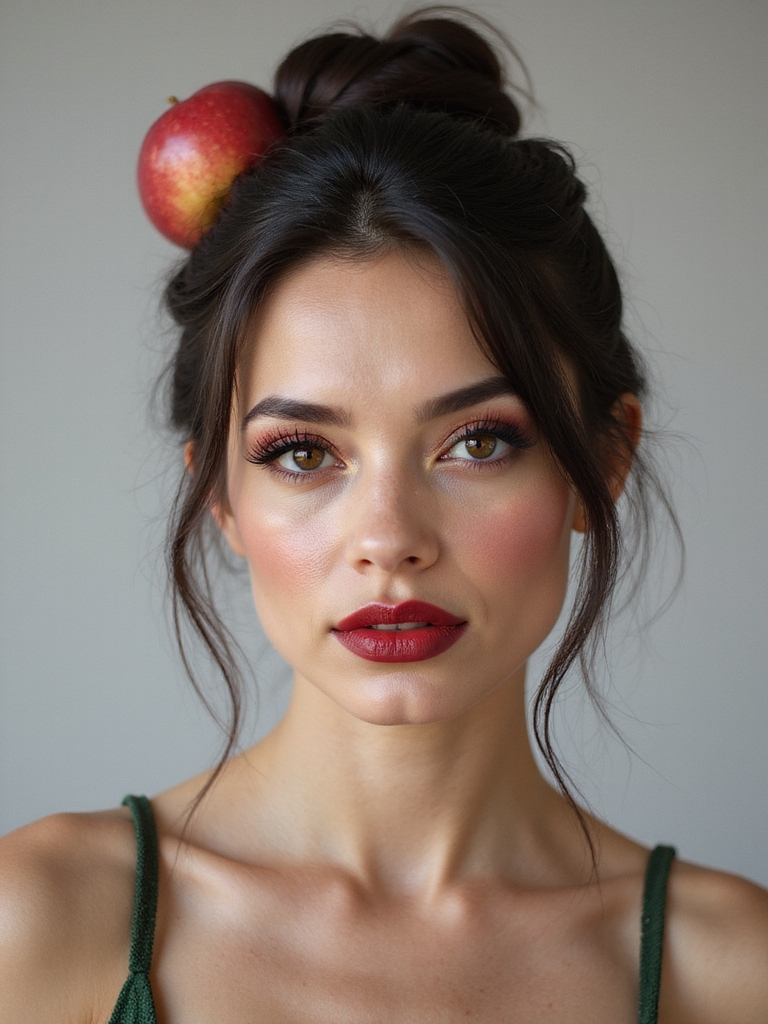
Fairytale danger meets glassy glam in my Poisoned Apple Princess look, where sweetness hides a bite. I sculpt dewy skin, then paint a high-gloss crimson lip that whispers “don’t believe me.” Emerald liner and cherry blush sharpen the story.
You’ll glow like royalty with a secret.
- Mirror-skin base: serum highlighter
- Greedy cherry blush drape
- Emerald wing and tightline
- Poison-apple vinyl lip
Ready to steal the spotlight? Pick a look, grab your pigments, and let’s paint the night. I’m talking neon bones, chrome eyes, razor‑sharp contour, and glossy, glazed finishes that photograph like a dream.
Layer strategically, lock it in with setting spray, and don’t skimp on embellishments—studs, glitter, decals. Test your base, light yourself well, and lean into contrast. You’ve got the inspo and the receipts. Now go make Halloween your runway and tag me when you slay.