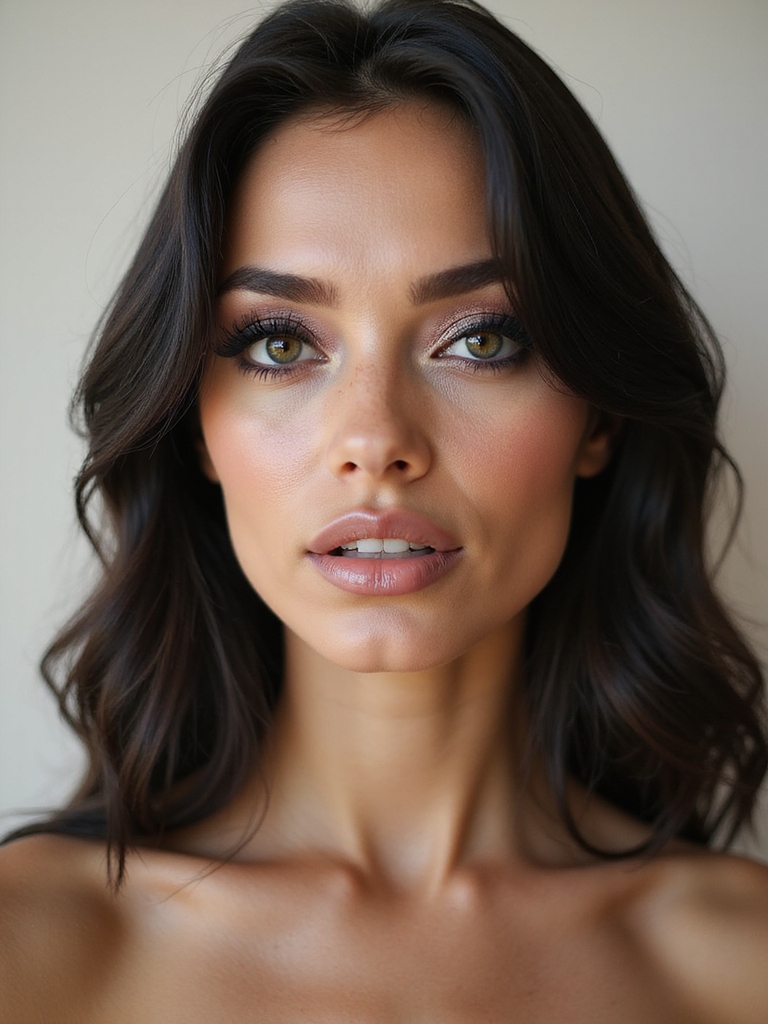
A teenager sat in my chair one October convinced she wanted full gore, then changed her mind the second I showed her a graphic, high-contrast skull in the mirror. Cool, she breathed, not scary. That is the magic of great skull makeup: it can be creepy, beautiful, futuristic, or downright fierce, all from the same starting sketch on your own features.
Where a costume kit gives you one flat option, real skull makeup is a canvas. These fifteen ideas push it in every direction, graphic and clean, glittered and glam, neon and glowing, cracked and gruesome. Each one comes with how to build it, a rough cost, and the single choice that gives it that bold, cool edge. Save the ones that match the energy you want to walk in with.
Before You Pick Up a Brush
- The base kit is small: a white cream, a black liner or paint, gray for shading, and setting spray. A palette runs about $8 to $15.
- Contrast and clean edges are what make a skull look bold instead of muddy, so opaque white and true black matter most.
- Decide your energy first: graphic and cool, glam and sparkling, or gory and cracked. The decoration changes, the placement stays the same.
Crisp Graphic Skull Contouring
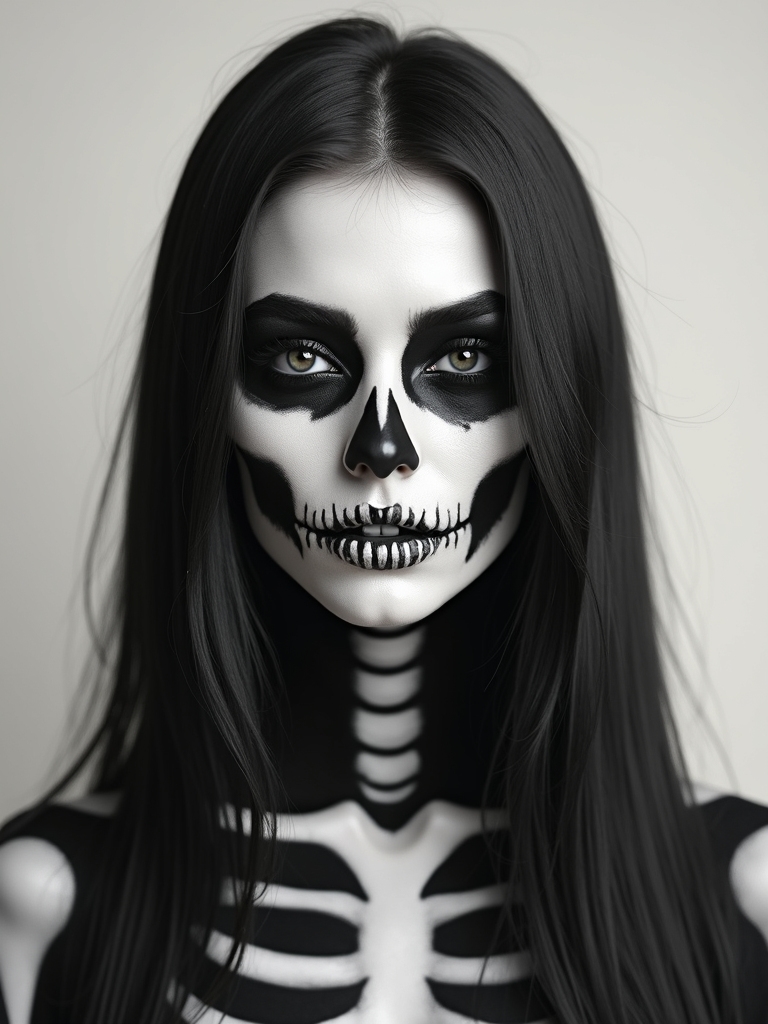
The coolest skull is often the simplest: crisp, graphic contouring with hard edges and zero fuss. You treat the face like a poster, blocking white over the whole face, then carving the sockets, nose triangle, and tooth grid in flat, sharp black. The edges are everything. Sloppy borders look like a mess; clean ones look like design. This is the version I push first, because the clean look hides nothing and teaches you control.
- Block opaque white first and powder it so the black does not drag or bleed.
- Use an angled brush and gel liner for the sharpest possible socket edges.
- Keep the teeth even and boxy; uneven ones tip the whole thing into amateur.

A Neon Floral Sugar Skull
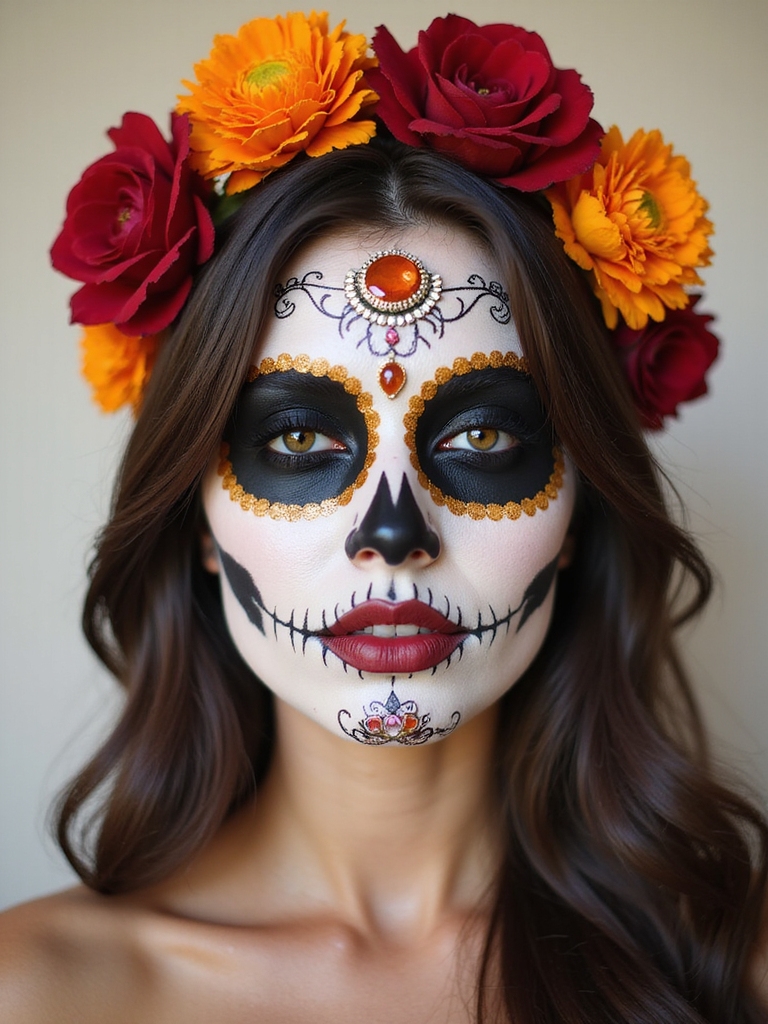
Bright neon florals turn the traditional sugar skull electric, layering hot pink, lime, and orange blooms over the white base. The sugar skull comes from Dia de los Muertos and carries real meaning, so wear it as celebration and craft, not a throwaway costume. The neon palette keeps it modern while the petal-rimmed eyes and dotted swirls honor the original form.
- Outline the eye sockets as flower petals before filling the rest with color.
- Dot symmetrical patterns on the forehead and chin with the end of a brush.
- Lean on cosmetic neon cream paints for color that stays bold under any light.
📋Your Skull Makeup Kit
- ✓An opaque white base and a true black gel or cream for sharp contrast.
- ✓Gray for shading, plus any color or topper your chosen style needs.
- ✓Setting powder, setting spray, and an oil cleanser for a gentle removal.
Haunted Smoky Hollow Eyes
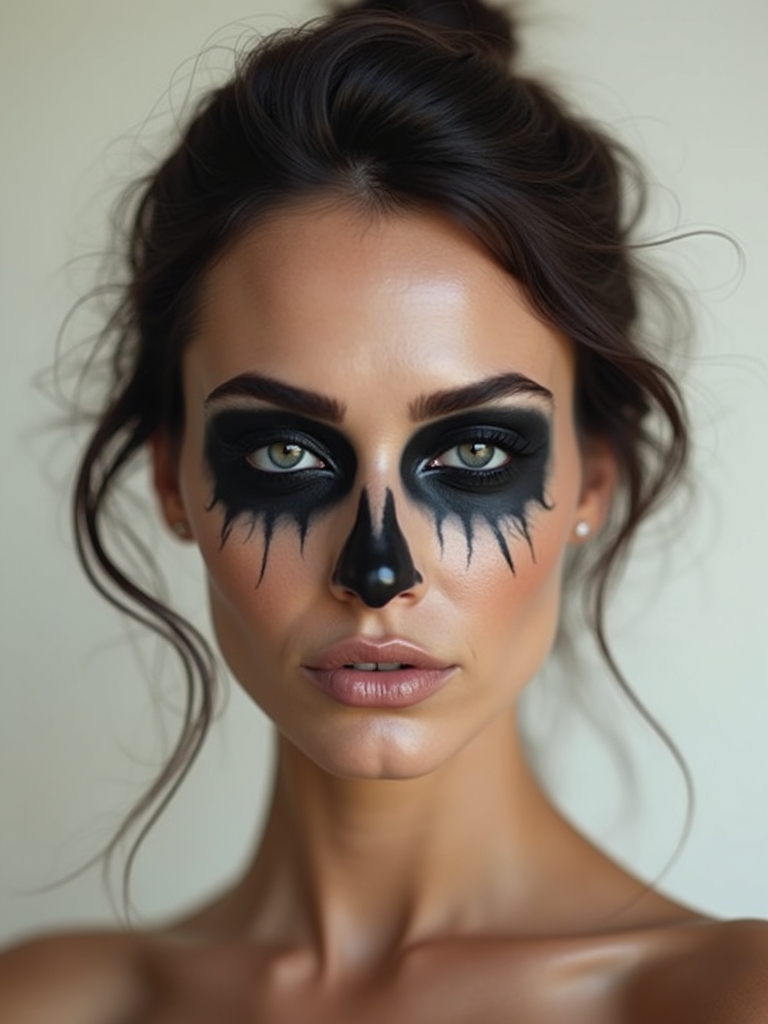
Sometimes the eyes alone tell the whole story. Haunted hollow eyes sink the sockets into deep, smoky shadow so they look empty and bottomless, no full white face required. You ring and fill the sockets with gray and black, blending outward into a haze, until the eyes seem to recede into the skull beneath. It is fast, wearable, and quietly unnerving in low light. Clients ask me for this one when they want eerie without a full painted face.
- Build from the lash line up and out, deepest in the crease and inner socket.
- Carry a little of the shadow under the eye so the hollow wraps all the way around.
- Pair it with a pale, drained complexion to push the haunted effect further.
A Half-Skull Glam Look
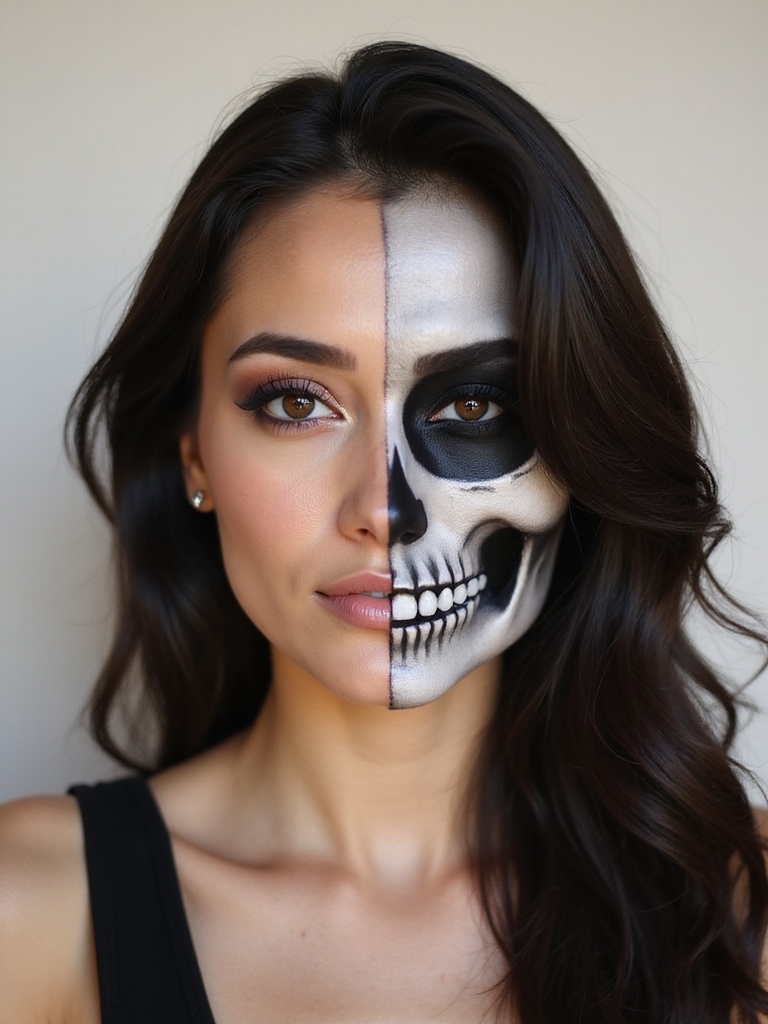
Split the difference and wear a half-skull glam look: bone detail on one side of the face, full glamour makeup on the other. The drama comes from the contrast between a sharp painted skull and a soft smoky eye with a bold lip beside it. Down the center, the two worlds meet, which is where the artistry shows.
- Commit fully to each half; a timid skull next to strong glam looks unfinished.
- Line up the skull’s mouth grid with your real lip on the glam side for flow.
- Photograph both profiles, since each side reads as a totally different face.
A skull does not have to be scary to be powerful. The boldest ones are about contrast and confidence, not gore.
A Sparkling Sculpted Skull
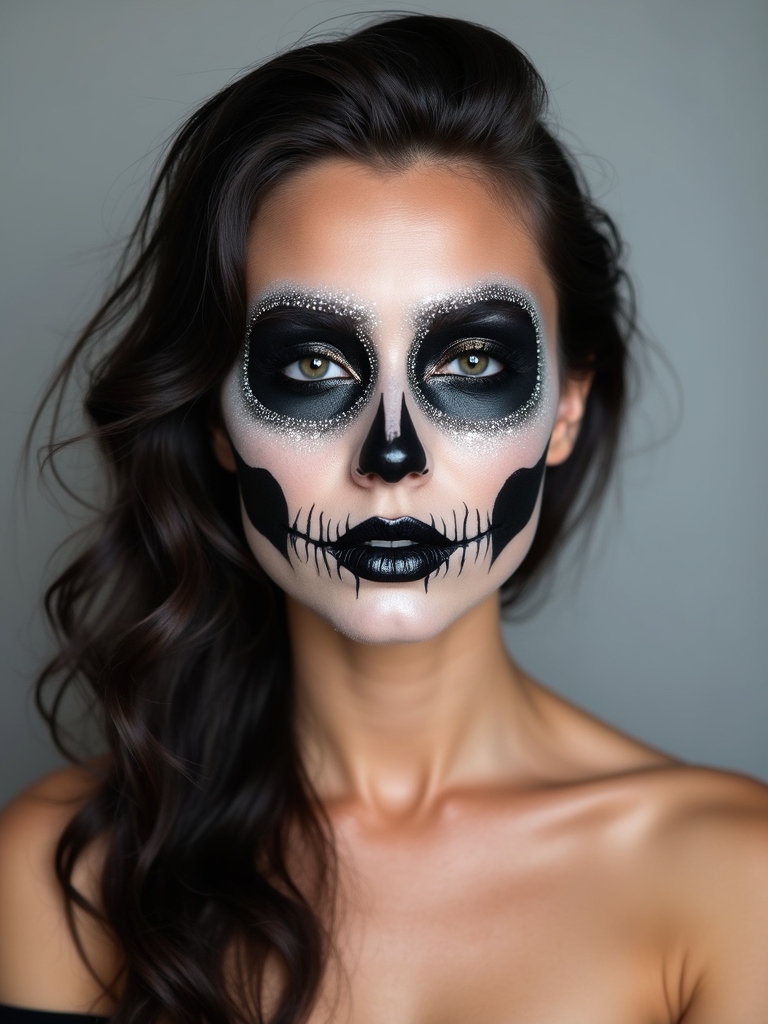
When you want eerie to also be enchanting, dust the sculpted bones with sparkle so they shimmer like frost on a skull. The structure stays clear and graphic, but a sweep of fine silver or white shimmer over the cheekbones and brow makes the bone catch light when you move. It is creepy and a little magical at once.
Sparkle on the High Points Only
The key is layering the sparkle only where bone would naturally shine, the high points, so the skull underneath still reads. Too much sparkle everywhere flattens the structure into a blur.
This is a favorite of mine for parties, where the shimmer photographs beautifully under any light. Set it well, because loose sparkle loves to travel down the face as the night goes on.
Neon UV Contoured Glow
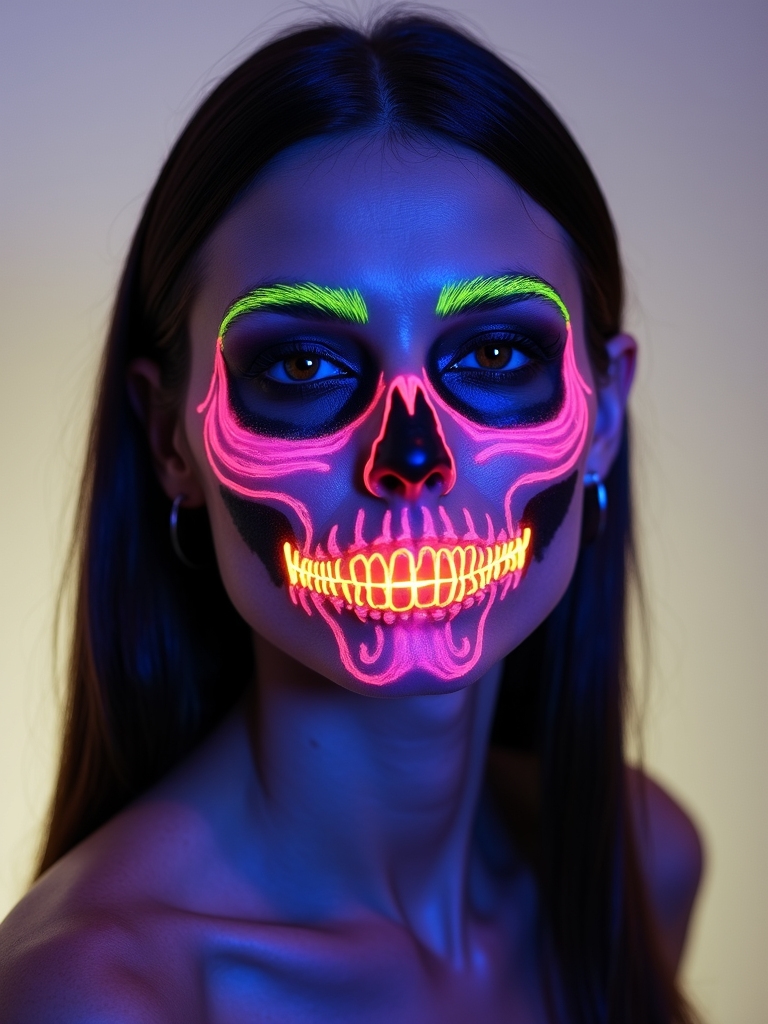
For anywhere with blacklight, a UV-reactive neon skull stays bold by day and erupts into glowing color after dark. You contour the bones in fluorescent paints, which look saturated in normal light and turn luminous under UV, so the skull seems to float off your face on the dance floor. It is the show-off choice for festivals and club nights.
Place the neon exactly where shadow and bone fall, then test it under a UV light before you leave. Use cosmetic-grade fluorescent paint only, and do a patch test the day before if your skin tends to react.
| Energy | Style to try | What sells it |
|---|---|---|
| Cool and graphic | Crisp contouring or minimalist lines | Sharp edges and high contrast |
| Glam and sparkly | Rhinestone, gold leaf, or chrome | Clustered gems and metallic shine |
| Gory and real | Sunken cracks or stitched gray | Layered shadow and tapered cracks |
Mirror Chrome Sculpted Skull
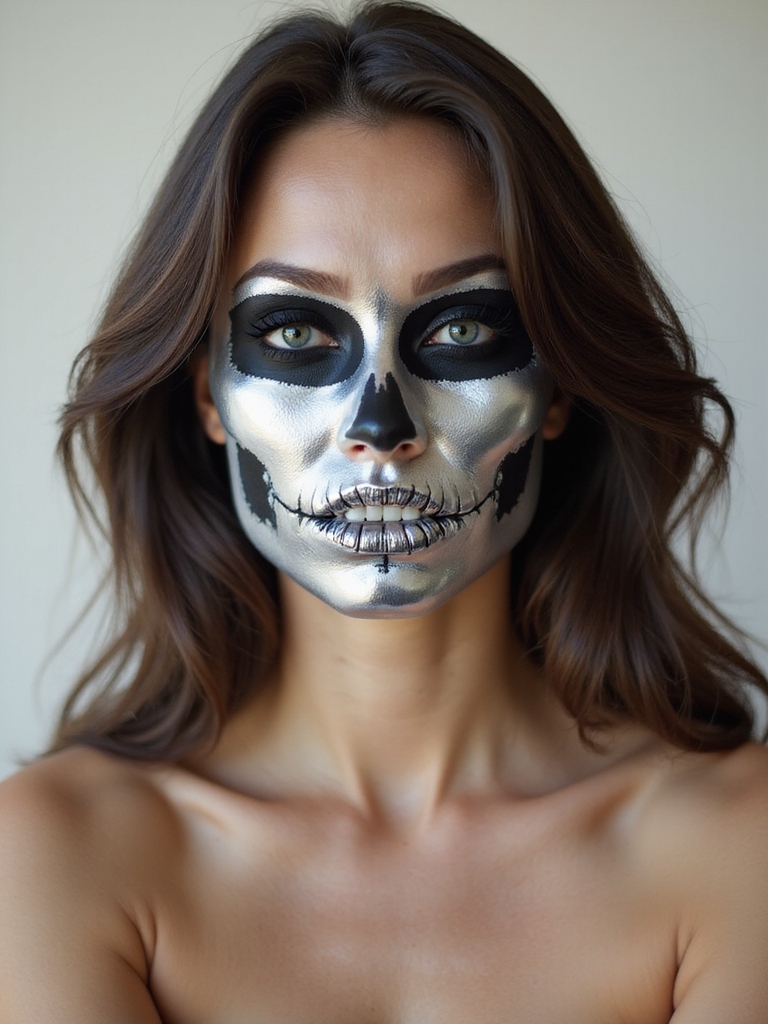
A mirror chrome skull is the most futuristic look on this list, the bones rendered in reflective metallic so the face looks forged rather than painted. You lay a silvered base along the bone map, then buff chrome powder over it until it shines like polished steel, catching every light in the room. The effect is cold, sleek, and unmistakably high-fashion.
Chrome powder needs a smooth, slightly tacky base to grab onto, so work in small sections and seal it fast. Keep the hollows around the chrome inky black so the metal bones leap forward against the dark.
A Pastel Iridescent Dreamy Skull
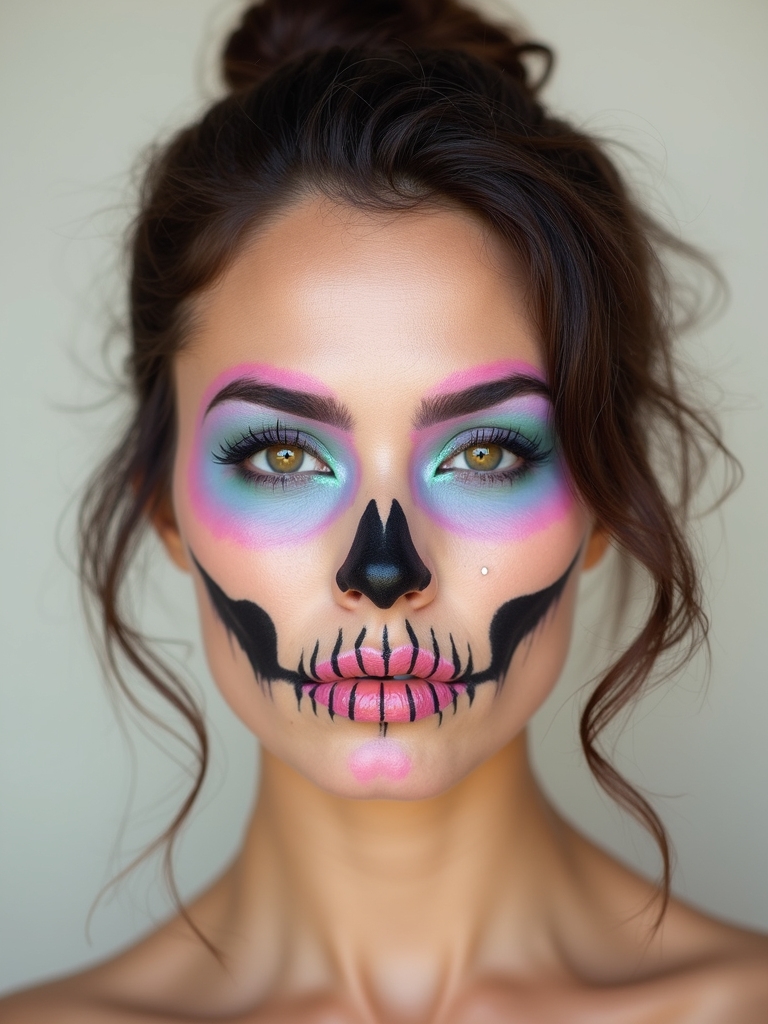
On the soft, dreamy end sits a pastel iridescent skull, where the bones glow in opal-like lilac, blue, and pink that shift gently in the light. It trades menace for a fairy-tale, otherworldly mood, which makes it the pick for anyone who wants the skull shape without anything frightening. The iridescence is what gives it that dreamy, just-not-quite-real quality.
- Map the skull in soft pastel creams, blended so the edges stay hazy.
- Layer an iridescent topper over the bones for the color-shifting glow.
- Add a few pearl gems at the temples to lean into the fairy-tale feel.
A few terms that come up across these looks.
📖Bone map
The placement of sockets, nose shadow, and tooth grid on your real facial structure, the foundation under every skull style.
📖Chrome powder
A fine reflective pigment buffed over a tacky base to create a mirror-metal finish on the bones.
A Stitched Black-and-Gray Skull
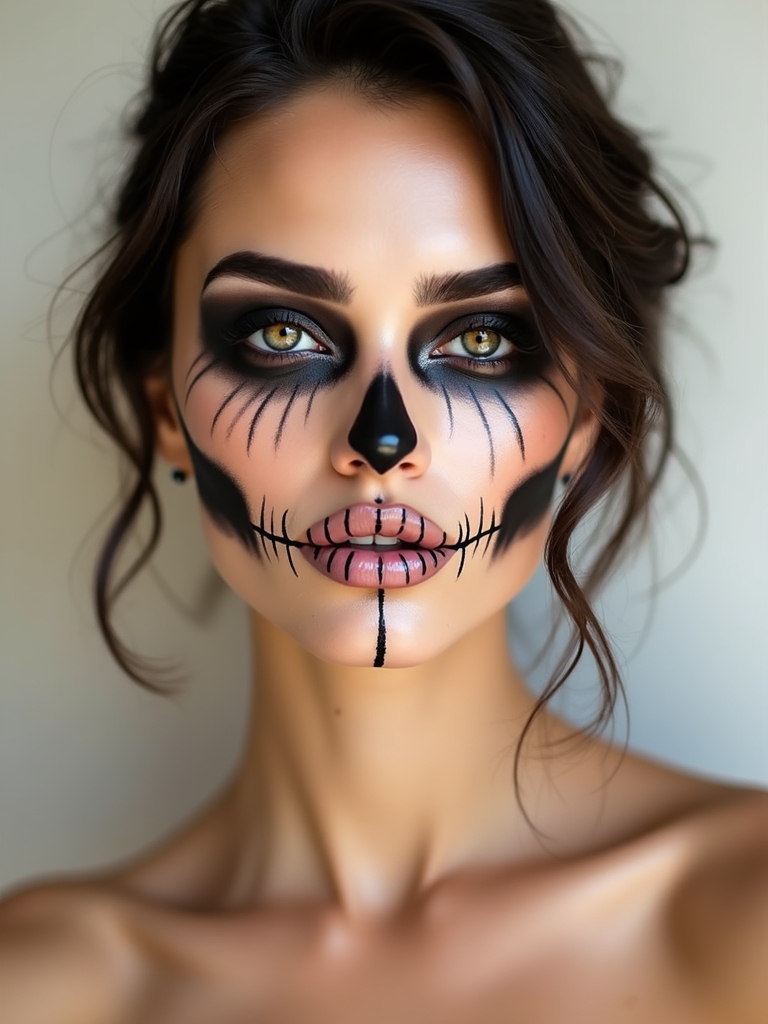
Add stitches to a gray-toned skull and it turns from bone to something pieced-together and uncanny, like a rag-doll version of death. You build the skull in soft grays rather than stark white for a worn, leathery look, then draw stitched seams across the mouth, the forehead, and the cheeks. The stitches are the creepy detail that makes people lean in.
Drawing a stitch is simple once you see it: one long line with short crossing lines over it, spaced evenly. Keep them slightly irregular so they look hand-sewn and a little sinister.
- Use gray instead of pure white for a more decayed, aged base.
- Run the stitched mouth from the corners of the lips out toward the cheeks.
- Vary the stitch spacing a touch so it looks stitched by hand, not printed.
Realistic Sunken Cracks
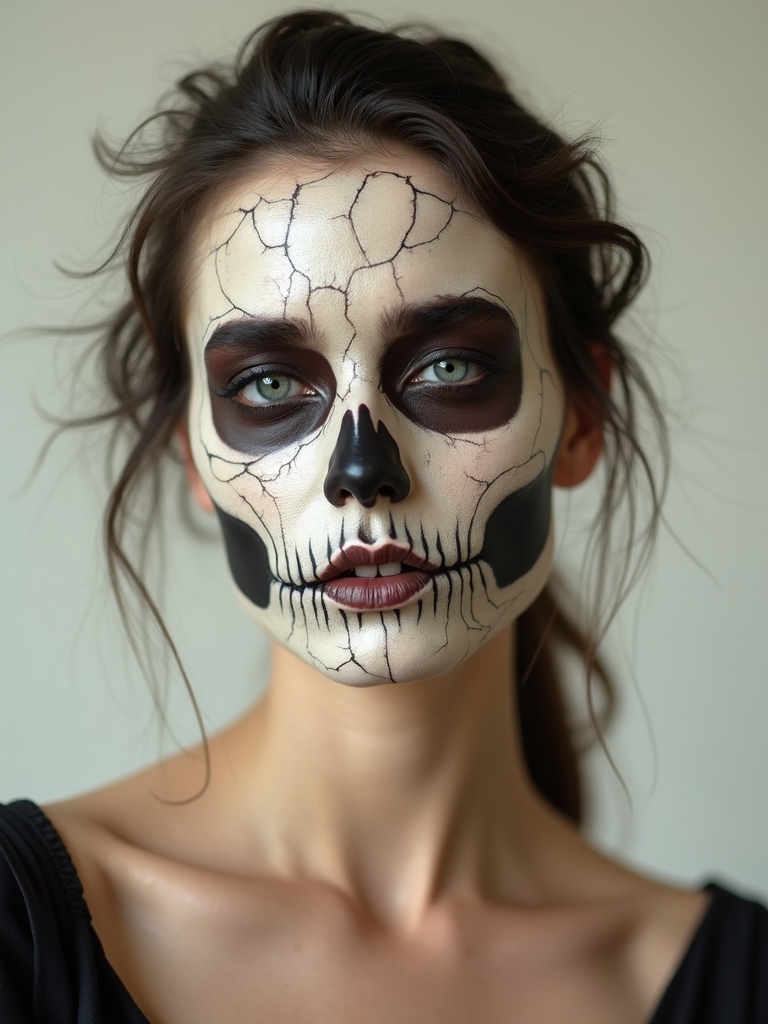
For the most convincing, gruesome skull, you build depth with sunken hollows and tapered cracks so the bone looks convincingly aged and broken. This is the SFX-leaning end, where shading does the heavy lifting and the cracks taper from thick to hair-thin like real fractures in old bone. Done well, it looks dug-up from somewhere, the kind of weathered, brittle skull that makes people do a double take before they realize it is paint.
The realism comes from the shadows, not the lines. Sink the temples, the cheek hollows, and under the brow with layered gray and brown before you add a single crack, so the skull has true dimension.
Then draw the cracks branching and uneven, dark at the center and fading at the edges. A touch of deep red inside a few of them suggests something worse underneath.
A Glam Rhinestone Skull
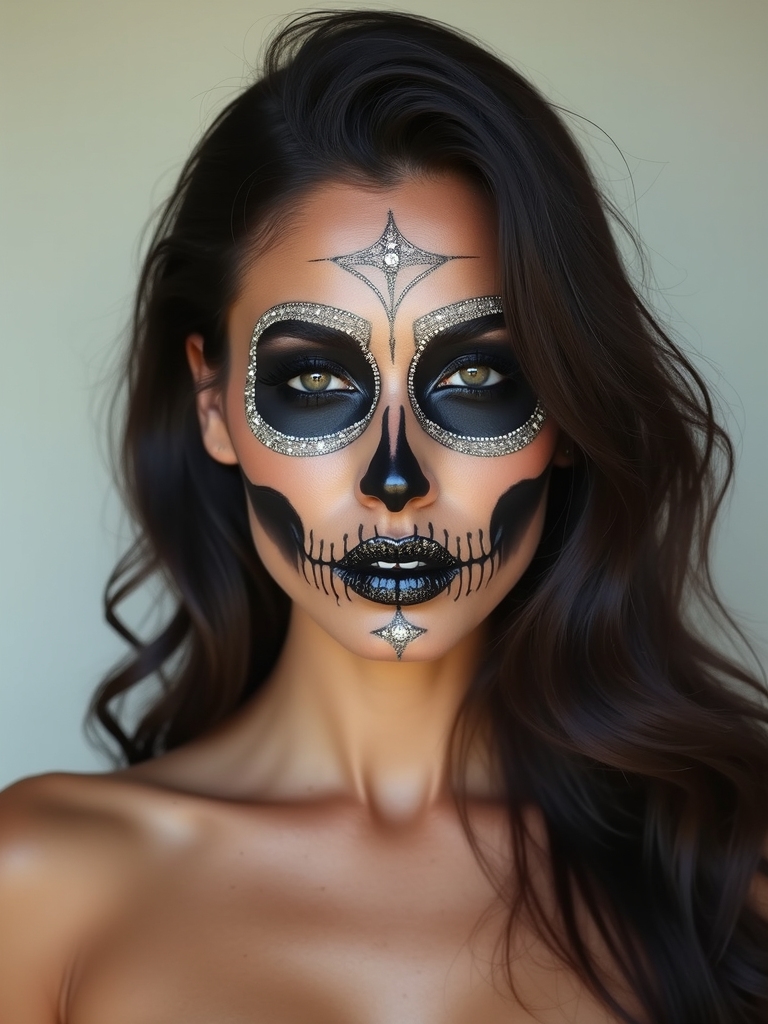
Encrust the bones with rhinestones and the skull goes full glam, every socket and cheekbone catching light like jewelry. This is spooky for people who refuse to give up sparkle, clustering crystals where the bone structure sits so the macabre turns opulent. It photographs like a couture mask.
Cluster, Do Not Grid
Apply the gems over a finished skull base with lash glue for a hold that lasts the night. Cluster them densest around the eyes and scatter them thinning out along the cheekbones.
Mixing crystal sizes is the trick that keeps it looking rich and intentional. An evenly spaced grid of identical stones looks flat; varied clusters look expensive.
A Smudged Charcoal Skull
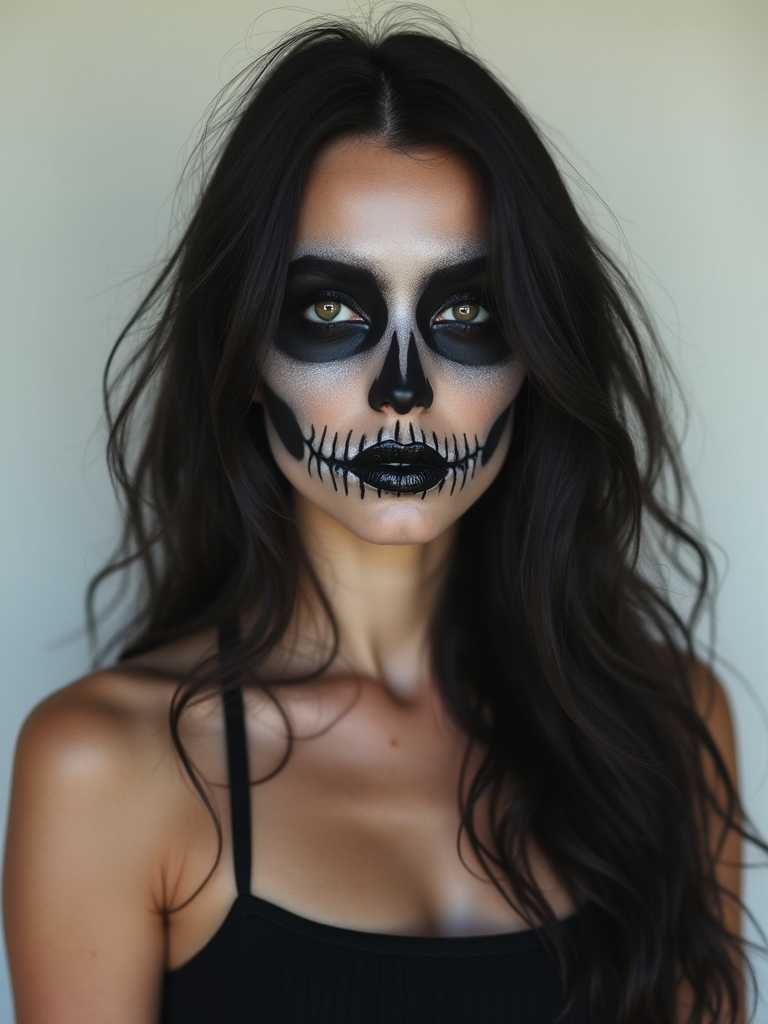
When hard edges feel like too much pressure, a smudged charcoal skull gives you a softer, moodier version with none of the precision. You sculpt the bones in blendable charcoal gray, smoking the edges out so the skull looks shadowy and atmospheric rather than graphic. It is the most forgiving look here for an unsteady hand.
Because smudged is the entire goal, there are no crisp lines that can go wrong, which makes this my go-to for anyone painting their first skull. Build the depth slowly and let the soft edges do the work.
- Use a fluffy brush and build the charcoal in light, smoky layers.
- Keep the sockets deepest and let the bones fade softly at the edges.
- A matte gray, not a shimmery one, keeps the smoke looking like shadow.
Gold-Leaf Glam
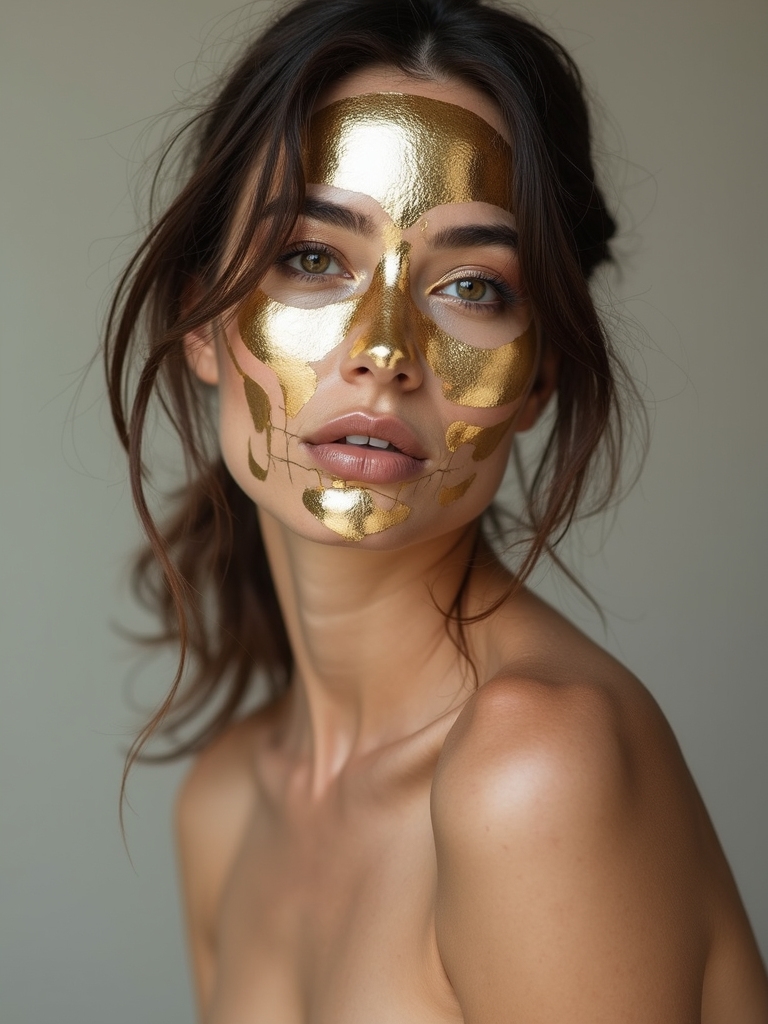
Press flecks of gold leaf onto a skull and it becomes regal, like a relic gilded over time. The warm metal against the cool bone gives a rich, ceremonial feeling, somewhere between memento mori and treasure. It is the most luxurious skull here and looks beautifully warm against deep skin tones especially.
Less Gold, More Impact
Apply the gold leaf over a finished skull with a dab of adhesive, pressing it onto the cheekbones, brow, and around the sockets. Crackle and tear the leaf a little so it looks ancient and worn.
Keep the rest of the skull restrained so the gold stays the focal point. A few well-placed flecks read richer than a face covered in them.
An Iridescent Holographic Skull
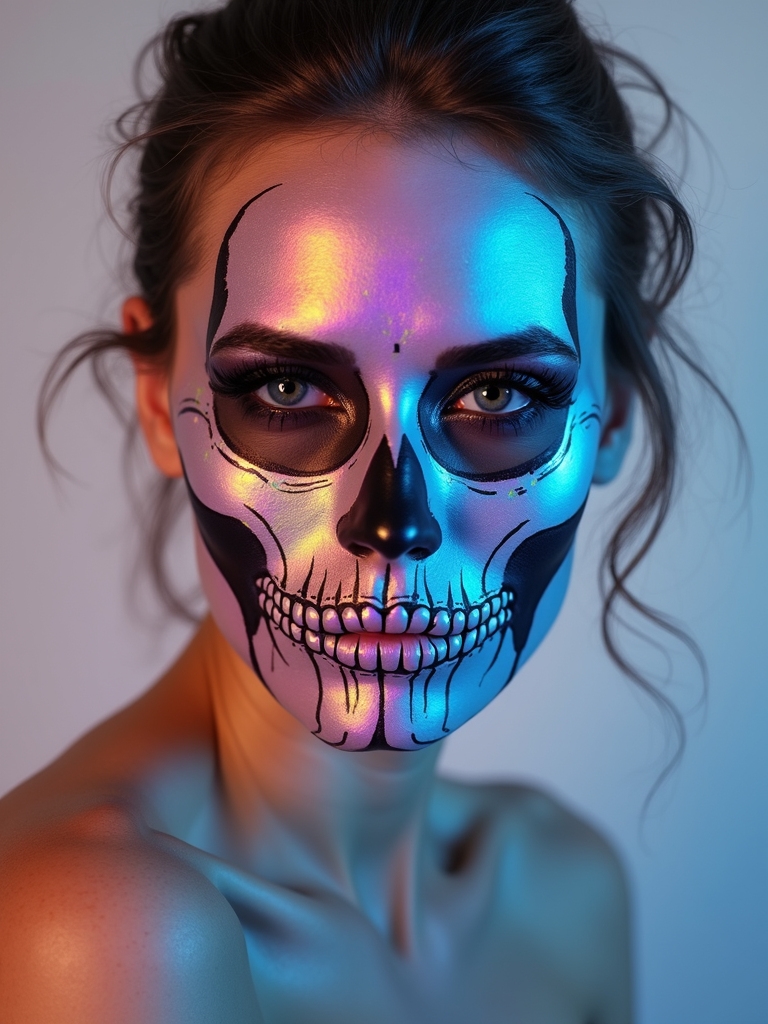
The wildest finish is a holographic skull whose bones shimmer through shifting rainbow color as the light moves. Holographic flakes and neon pigments layered over the bone map create a skull that looks different from every angle, electric and alive. It is maximalist, rave-ready, and impossible to ignore.
Lay the bones in a base shade first, then pack holographic pigment over the top so the color shifts as you turn. The more the surface moves through color, the more striking the whole face becomes.
Carry the holographic accents onto the lips and inner corners for a fully cohesive look. Layered pigments migrate, so set everything firmly and refresh once through the night.
Deliberate Minimalist Skull Lines
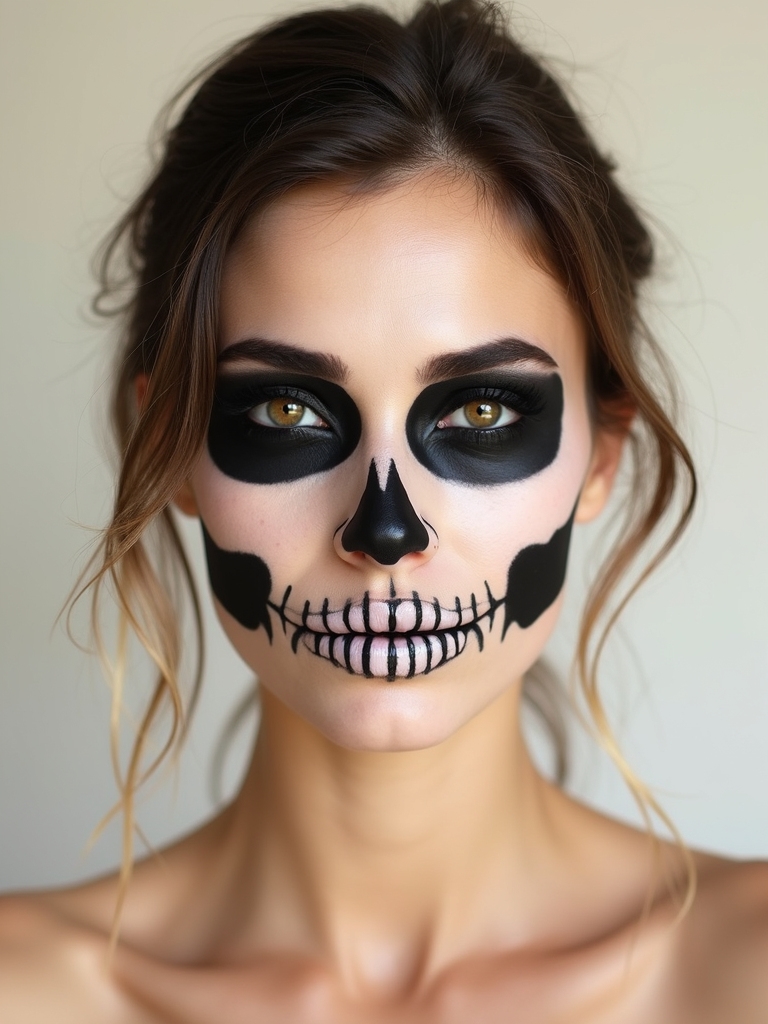
At the opposite extreme from full paint, a minimalist line skull suggests the whole thing with just a few deliberate strokes. A blackened pair of sockets, a small nose shadow, and a single clean row of teeth on the lips look like a skull instantly while leaving most of your face bare. It is modern, graphic, and quick to wear.
The restraint is the style. Because there is so little on the face, every line has to be confident and well-placed, so take your time on the few marks you do make. This is the look I steer anyone toward who wants impact without an hour in front of the mirror.
Making a Skull Read From Across the Room
A skull look succeeds or fails on whether it reads from a distance, not on tiny details no one sees in dim party light. Contrast is the whole game: the more separation between your white and your black, the more the bones jump out across a room, so go opaque on both and keep your grays clean unless decay is the whole point.
Place the big shapes, the sockets, the nose, the tooth grid, boldly and symmetrically, because those are what the eye catches first from ten feet away.
Beyond contrast, a couple of habits keep the look sharp all night. Set every cream layer with powder and a mist of setting spray so the bones do not smear when you talk, laugh, and hug.
And take it off kindly: melt heavy paint and any gems off gently with an oil cleanser rather than scrubbing, since the eye area is delicate and a good skull is worth protecting your skin for. Patch test new paints a day ahead, and your bold, creepy, cool skull will look as fierce in photos at midnight as it did at dusk.
Questions About Skull Makeup
?What is the easiest skull makeup for beginners?
Haunted smoky hollow eyes or a minimalist line skull. Both skip the full white base, rely on a few well-placed dark shapes, and look like a skull instantly with very little skill or time.
?How do I keep skull makeup from smudging all night?
Powder every cream layer as you finish it, then mist a setting spray over the whole face. Waterproof liner for the black lines and a long-wear base help the bones survive talking, eating, and dancing.
?What products do I need for a basic skull?
An opaque white cream, a black gel liner or face paint, a gray for shading, and a setting spray. A small face-paint palette covers most of it for around eight to fifteen dollars and lasts for years.
?Which skull styles flatter deep skin tones?
Gold leaf, warm-toned chrome, jewel and rhinestone looks, and rich holographic shades all glow beautifully on deep, melanin-rich skin. For metallics and shimmer, warm gold and bronze read richer than stark silver.
?Is skull makeup safe for sensitive skin?
It can be, with care. Use only cosmetic-grade face paint, patch test a day ahead, keep paint out of the eyes themselves, and remove everything gently with an oil cleanser. Stop if any product stings or irritates.
Choose Your Energy
Every skull on this list starts from the same handful of shapes and then becomes whatever you want, cool and graphic, dripping in crystals, glowing under blacklight, or cracked like something unearthed. The look is never really about the bones; it is about the attitude you paint over them. Decide the energy you want to project, and the style picks itself.
If you are new to it, save the crisp graphic skull or the minimalist lines to learn placement, then push into glam or gore once the bone map feels natural. For more, browse a few halloween makeup looks or compare it with a full skeleton makeup when you want to take the bones past your face.
Don’t Miss These