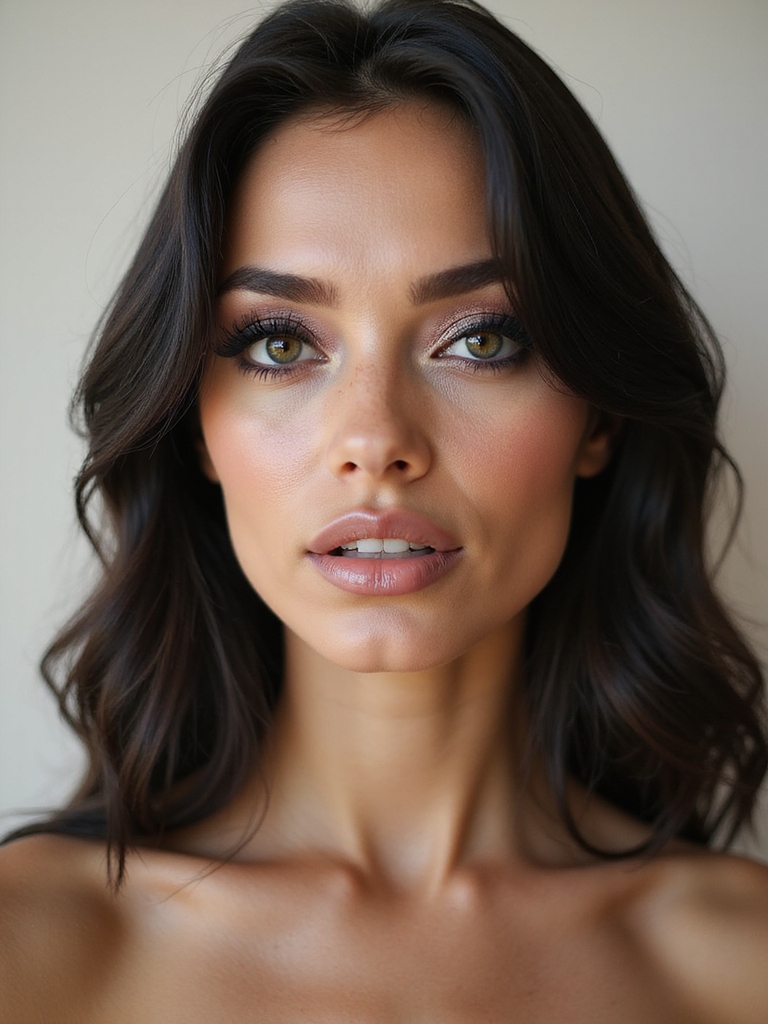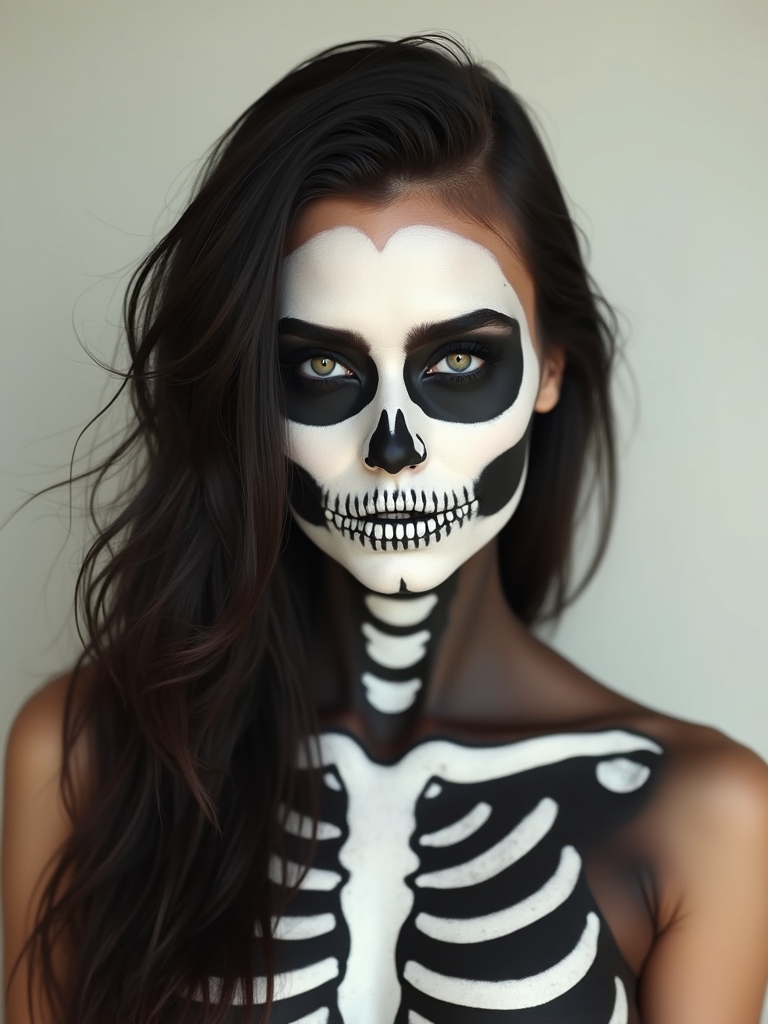
Most people picture skeleton makeup as the same drugstore-kit look everyone wore in middle school: a chalky white face, black-circled eyes, a few wobbly teeth. It can be so much more. A skeleton is the most versatile costume there is, because the bones underneath are the same whether you go classic, glam, neon, or pastel; only the styling changes.
These fifteen ideas run from a crisp black-and-white skull to glittered, jeweled, and glowing takes, each built on the same basic bone map. I have painted skeletons every October for years, and the trick is always placement first, decoration second. Below you will find the technique, rough cost, and the one detail that makes each version work, so you can pick how much drama you want.
Skeleton Makeup, Quick Answers
What do I actually need for skeleton makeup? A white base, a black cream or liner, and a setting spray cover the classic look. A face-paint palette runs about $8 to $15 and lasts years of Halloweens.
Where do the bones go? Hollow the eye sockets, shade down the sides of the nose, and draw stitched teeth across the lips and out onto the cheeks. That bone map is the foundation for every version here.
How do I keep it from cracking? Powder over cream face paint, then mist setting spray. Cream that is not set will crease and transfer onto everything you touch all night.
Black-and-White Skull Glam
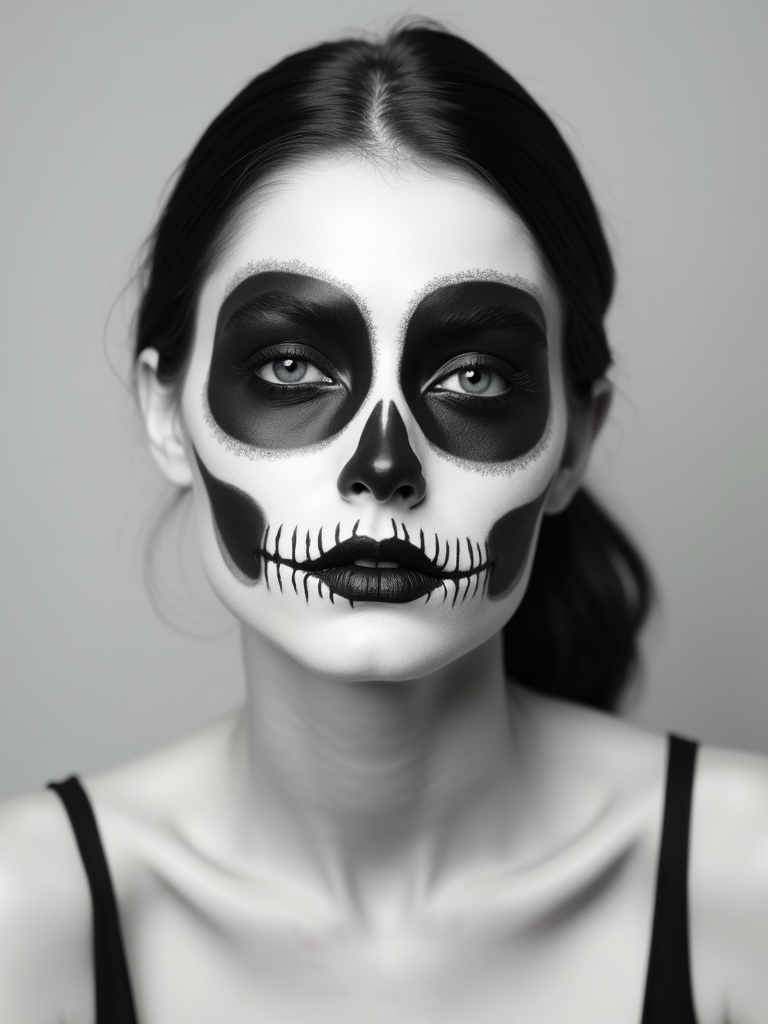
The classic black-and-white skull is the one everyone knows, and done well it is striking, never childish. Cover the face in a smooth white base, then map the sockets, nose, and stitched mouth in solid black, keeping the edges crisp. The contrast is the whole effect, so clean lines matter more than fancy shading here.
Why the Classic Is Worth Mastering First
Where the glam version differs is the eyes and lashes. Add false lashes, a sharp black wing past the socket, and the skull suddenly looks editorial, not costume-shop. The white has to be opaque and the black truly black, or it muddies.
Set every layer with powder and spray so the high contrast stays put. This is the look I start every beginner on, because the bone map you learn here carries into all the others.

Glittered, Sculpted Bone Glam
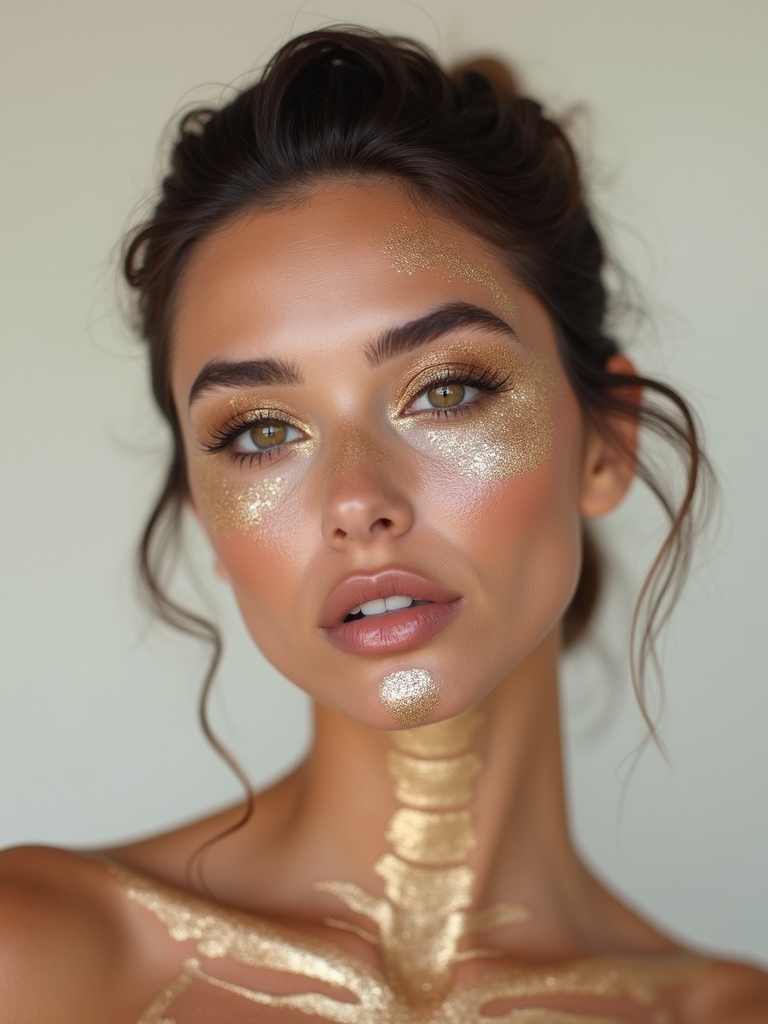
Take the bone structure and trade flat black for glitter along the sculpted lines, and the skeleton turns party-ready. You shade the hollows and bones as usual, then press chunky silver or iridescent glitter along the cheekbone, brow bone, and jaw where the bone catches light. The glitter looks like light hitting bone, which is eerie and pretty at once. Clients ask me for this one for parties more than the plain black skull.
Keep the glitter to the high points so the skull structure stays readable underneath. Press, do not sweep, so the flecks land where you place them.
- Use cosmetic glitter and a dab of glitter glue so it sticks where you want it.
- Silver and iridescent read most skeletal; save colored glitter for the cheeks.
- Lay the glitter last, after all the black-and-white work is set.
“Map your bone structure before you paint a single line. Suck in your cheeks to find the real hollows, feel for your brow bone and jaw, and place the sockets and shading there. A skull drawn on your actual bones lands instantly; one drawn on guesswork always looks slightly off, no matter how neat the lines.”
Neon UV-Reactive Skeleton
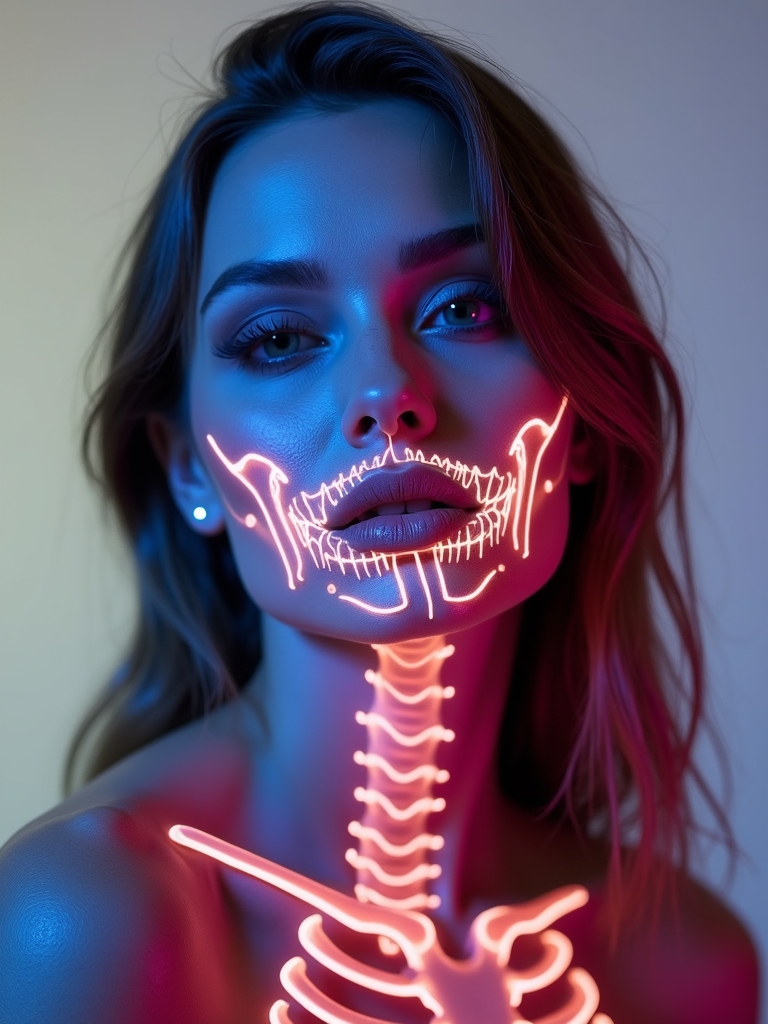
For a club or a blacklight party, a neon UV-reactive skeleton lights up the whole bone map once the lights drop. You paint the bones in UV-reactive neon greens, pinks, and yellows where the black would normally go, so the skeleton looks bold in daylight and glows electric under UV. It is two costumes in one.
The placement is identical to the classic; only the color changes. Make sure the paint is cosmetic-grade and skin-safe, and patch test the day before if your skin is sensitive.
- Map the bones in neon exactly where you would place the black.
- Layer the neon over white for the brightest glow under blacklight.
- Charge nothing; UV paint reacts on its own once the blacklights are on.
A Feathered Half-Skull Blend
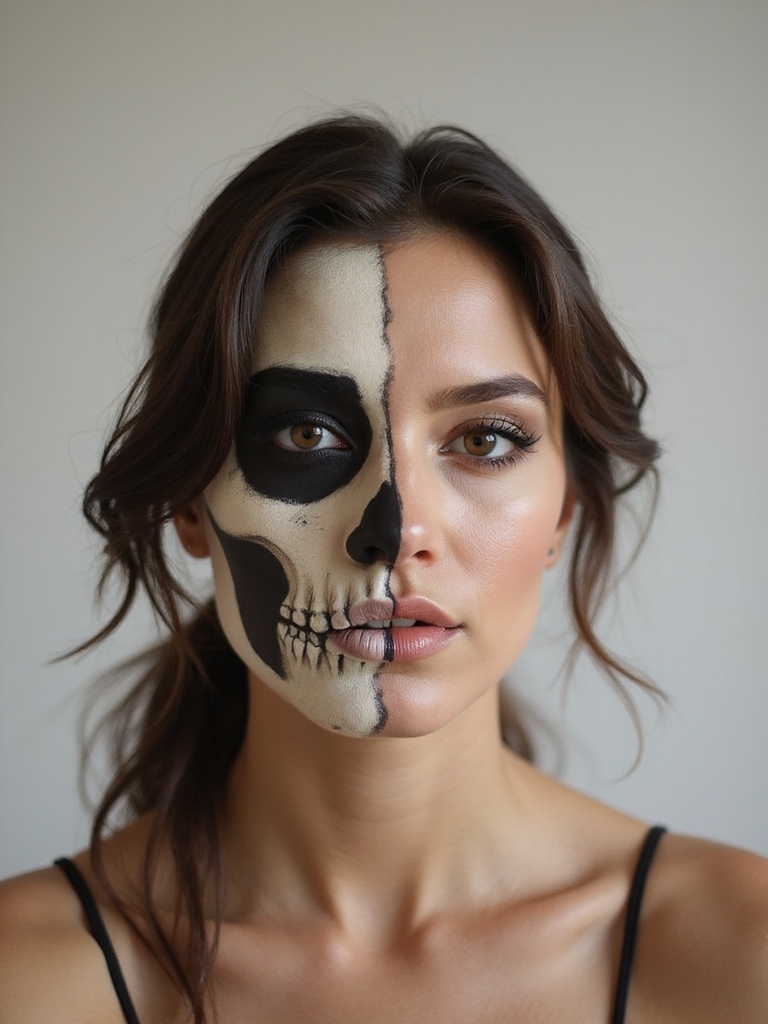
The half-skull paints bones on one side of the face and leaves the other bare, with the two melting softly into each other down the center. The feathered transition, where the skull dissolves into your real skin, is what makes it feel artful rather than literal. It is striking in photos and lets you keep half your normal makeup.
The skill is in the blend down the middle. Feather the edge of the white with a soft brush so it fades into bare skin and softens away to nothing.
- Paint full bone detail on one side, fading the white toward the center.
- Keep your everyday eye and brow on the bare side for contrast.
- Blend the seam with a clean, dry brush so the two halves melt together.
Two things people believe that keep them stuck on the basic kit look.
❌ Myth: Skeleton makeup needs special-effects skill.
✅ Reality: The classic skull is just a white base, black hollows, and stitched teeth. Placement matters far more than artistry, and the bone map is the same for every version.
❌ Myth: You need full white face paint every time.
✅ Reality: A minimalist skull with just blackened sockets and a few teeth reads as a skeleton instantly, with none of the heavy, crack-prone base.
Smoky Diffused Skeleton Cheekbones
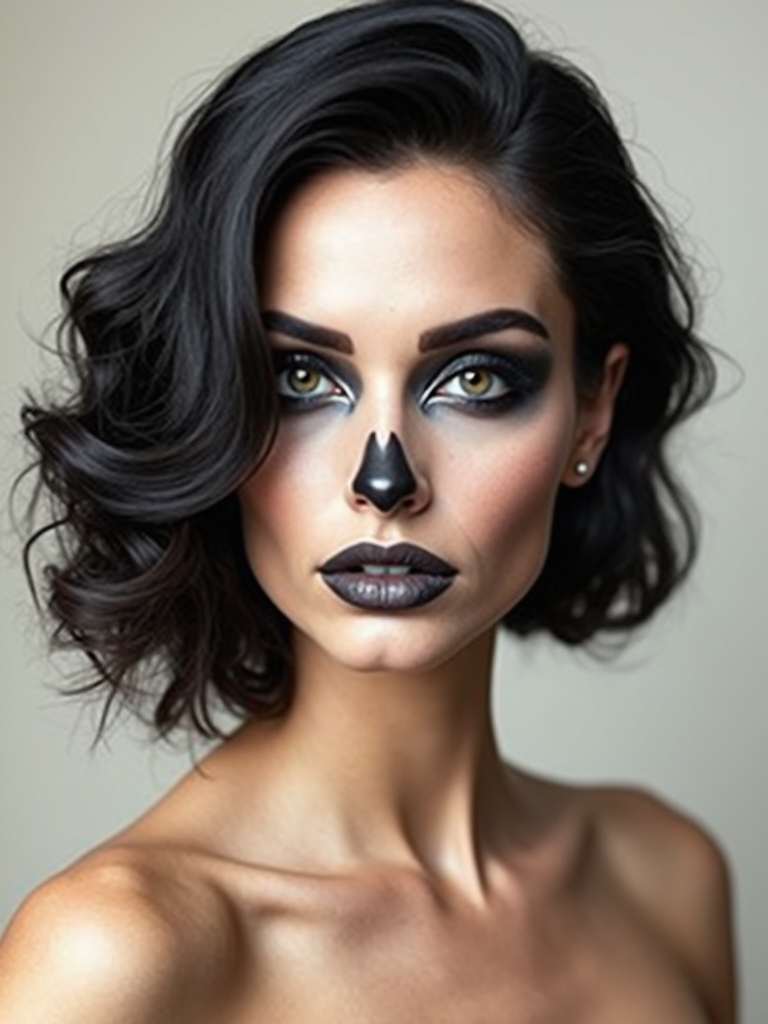
Not every skeleton needs hard lines. A smoky, diffused skull swaps crisp black edges for soft, smoked-out shading, so the bones look hazy and haunted rather than graphic. You blend gray and black into the hollows and along the bones with a fluffy brush, building depth without a single sharp border.
This version is the most forgiving for shaky hands, since smudged is the goal and there are no perfect lines to ruin. It looks more like a decaying, ghostly skull than a cartoon one, which suits a subtler, eerier costume.
A Smoky Sugar Skull With Florals
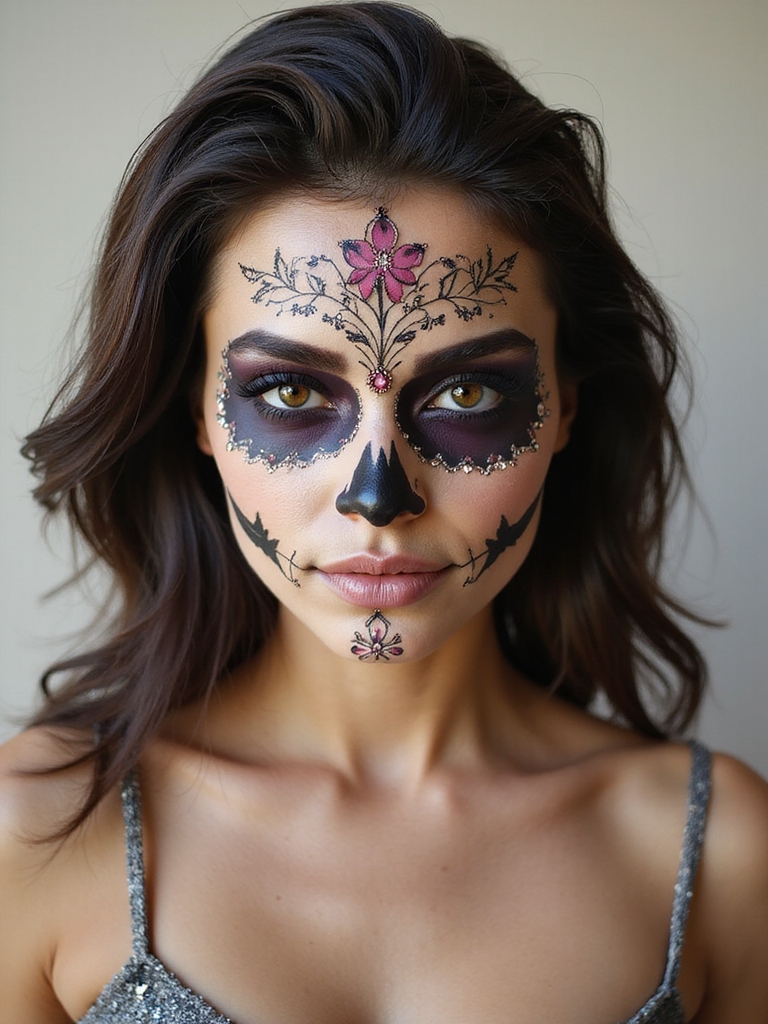
The sugar skull, rooted in Dia de los Muertos, is the most decorative skeleton, with bright florals, dots, and swirls around the bone base. Painted respectfully, it is a beautiful, ornate look: a white base, black-rimmed eye sockets turned into petals, and colorful flowers and beadwork across the forehead and cheeks. A smoky shading under the decoration adds depth.
Because the tradition carries real cultural meaning, it is worth wearing it as celebration rather than caricature. Keep the artistry detailed and the spirit reverent, and the look honors where it comes from while letting you go all-out with color and pattern.
Heads-Up
Cream and UV face paints can irritate sensitive skin, and the eye area especially. Always patch test a new product a day before, keep paint out of the eyes themselves, and use only cosmetic-grade pigment, never craft glitter or industrial UV paint. Remove everything gently with an oil cleanser at the end of the night.
Liquid Chrome Sculpted Bones
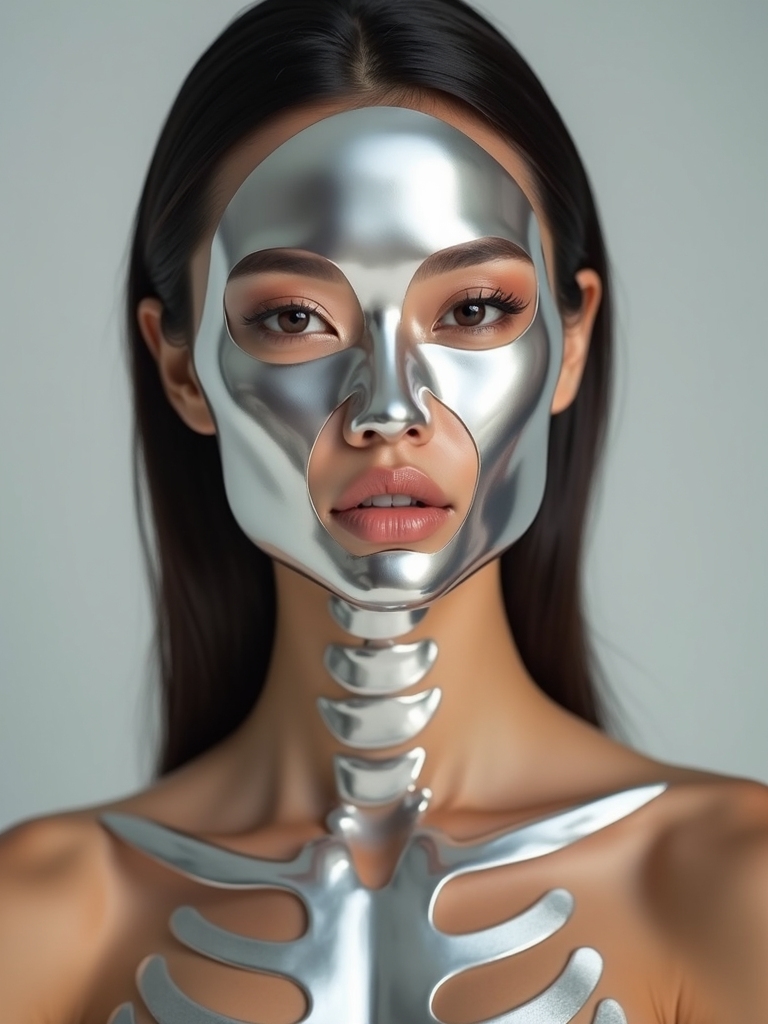
For a futuristic skeleton, liquid chrome turns the bones into a mirrored, metallic silver that looks part robot, part ghost. The chrome catches light along the cheekbones and brow like polished metal, giving the skull a cold, sci-fi edge. It is one of the more advanced looks here but worth it for the impact.
- Lay a silver or gray base where the bones go, then press chrome powder over it.
- Seal the chrome with a setting spray so it does not rub off through the night.
- Keep the hollows deep and dark so the metallic bones pop against the shadow.
A Minimalist Skull
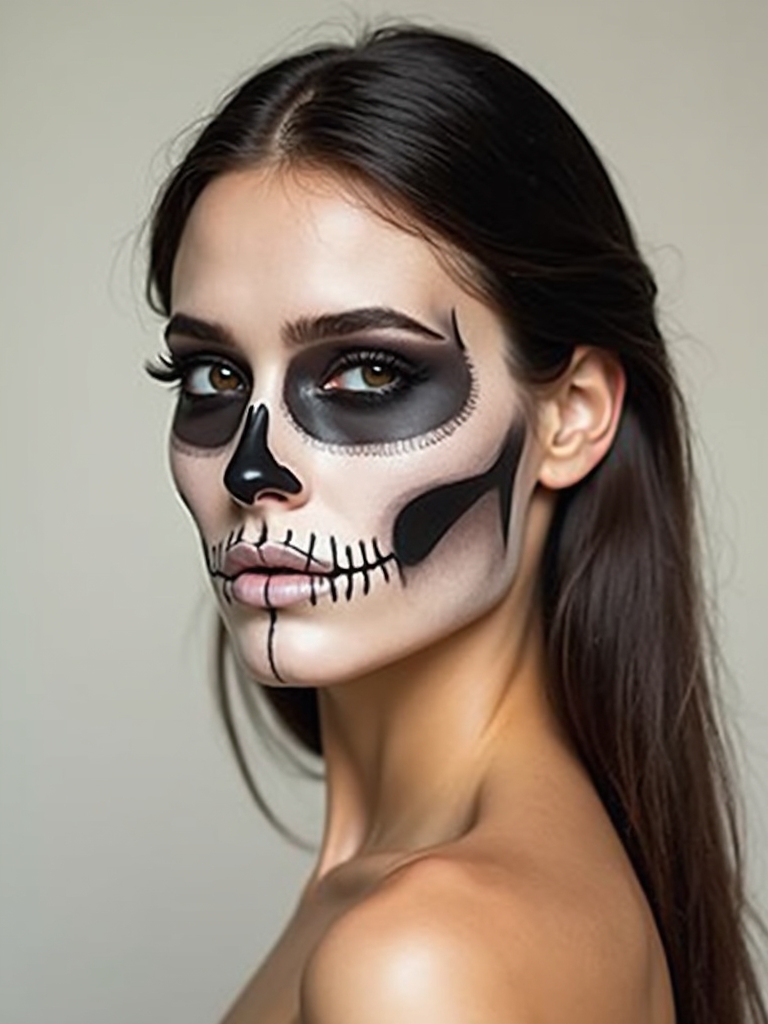
If a full painted face feels like too much, a minimalist skull gives you the idea with a fraction of the effort. You hollow just the eye sockets and add a small stitched mouth, leaving the rest of the face as your normal makeup. It looks like a skeleton instantly while staying quick, comfortable, and easy to wear all night.
This is the one I recommend for a last-minute costume or anyone who hates heavy face paint. A blackened socket and a few teeth across the lips do most of the storytelling, and you can eat and talk without your whole face cracking.
Artist Tip
Do the black bone work before your white base fully dries down too hard, and powder each section as you finish it rather than all at once at the end. Setting in stages keeps the earlier work from smudging while you paint the rest, which is the difference between crisp bones and a muddy blur by midnight.
Bold Dripping Skeletal Contrast
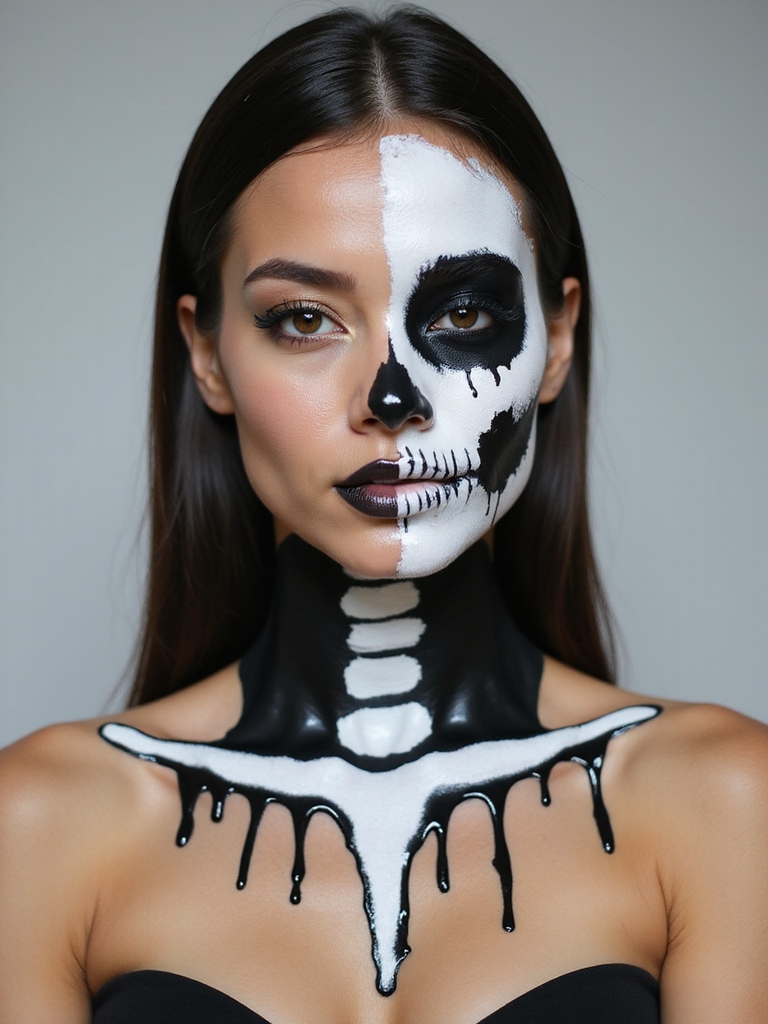
For a grungier, modern skull, bold dripping contrast lets the black bleed and run down from the sockets and mouth like the skull is melting. The high-contrast black-on-white with deliberate drips feels edgy and a little horror-movie, perfect for anyone who wants gore without fake blood. The drips are the signature here.
Paint the classic skull first, then pull thin black trickles downward from the eyes and the corners of the mouth with a fine brush. Keep them uneven and gravity-led so they look like they are actually running.
- Drag drips straight down with a thin brush so they follow gravity.
- Vary the drip lengths so they look natural rather than placed.
- A glossy top layer on the drips makes them look wet and fresh.
Jewel-Encrusted Skull
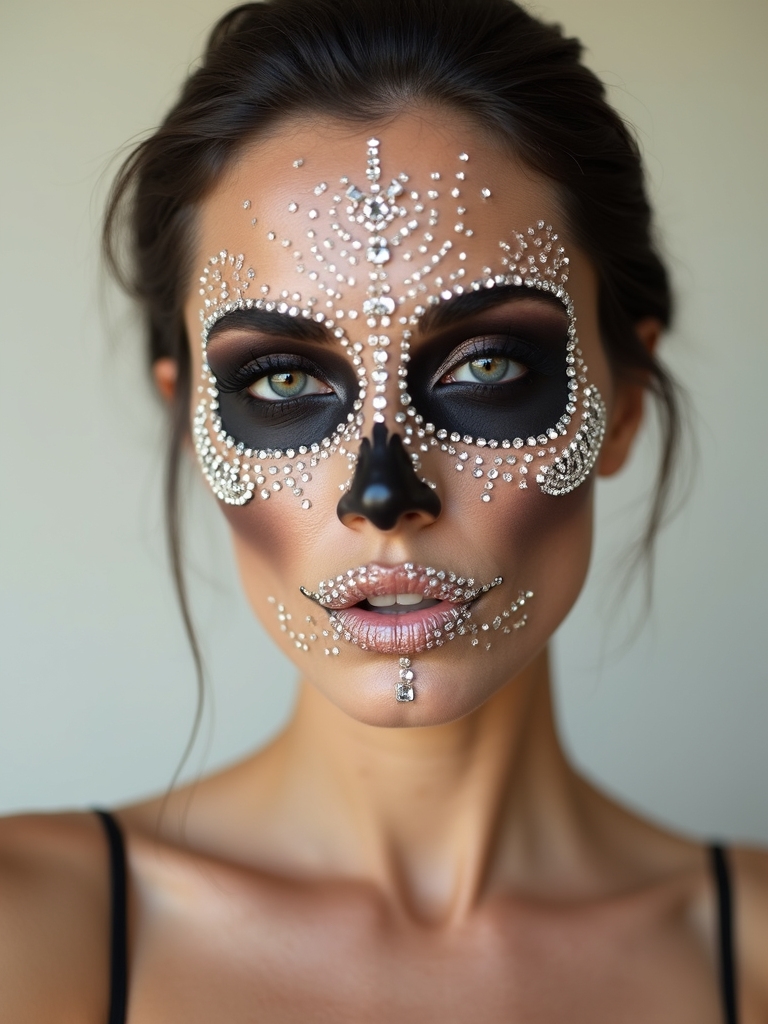
The most glamorous skeleton of all studs the bone structure with rhinestones and jewels, turning a skull into something opulent and red-carpet ready. Gems clustered around the sockets and along the cheekbones catch the light and soften the macabre into pure glam. It is the look for someone who wants spooky to still be beautiful.
- Paint the skull base first, then apply gems with lash glue for a strong hold.
- Cluster jewels around the sockets and scatter them out along the bones.
- Mix gem sizes so the encrusting looks rich rather than evenly spaced.
Crimson Sculpted Undead Bone
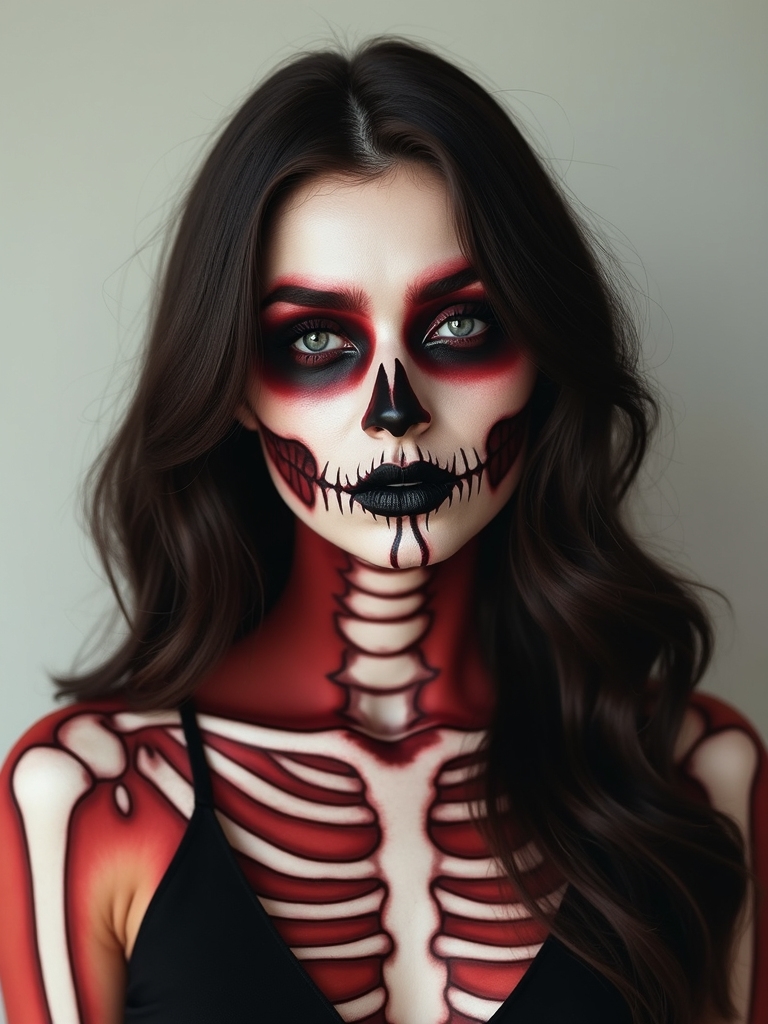
Swap black for deep crimson in the hollows and the look turns from skeleton to undead, like bone seen through a haze of blood. The red shading in the sockets and along the bones gives a warmer, gorier, more visceral skull that suits a vampire-adjacent or demon costume. It is unsettling in the best way.
Blend the crimson the way you would the black, keeping it deepest in the hollows and fading out along the bones. A touch of black layered into the red adds the depth that keeps it from looking flat or merely pink.
- Build crimson in the sockets and temples where shadow naturally falls.
- Layer a little black into the deepest points for a bruised, decayed look.
- Keep the lips dark and cracked to match the undead mood.
A Pastel Cotton-Candy Skull
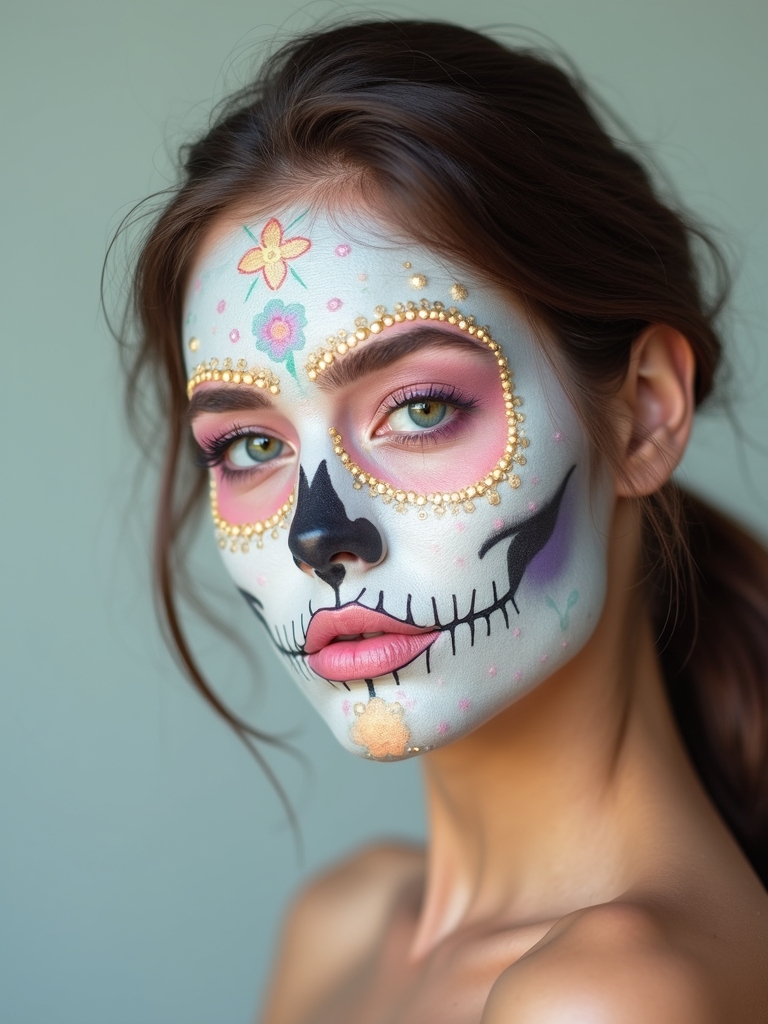
On the sweet end of the spectrum, a pastel cotton-candy skull paints the bones in soft lilac, mint, and baby pink where stark black would normally go. The result is cute and dreamy, the gentle end of the spectrum, perfect for anyone who wants to nod to Halloween and skip the gore. It is a hit for soft-glam lovers and photographs beautifully.
The bone placement stays the same; only the palette softens. Use pastel cream colors blended gently, and add a little pearl shimmer over the bones for that candy-floss glow.
- Map the skull in pastels exactly where the black would go.
- Blend the pastels softly so the skull looks dreamy, not graphic.
- Finish with glitter makeup on the high points for extra sparkle.
Glowing Neon Skeletal Neck Art
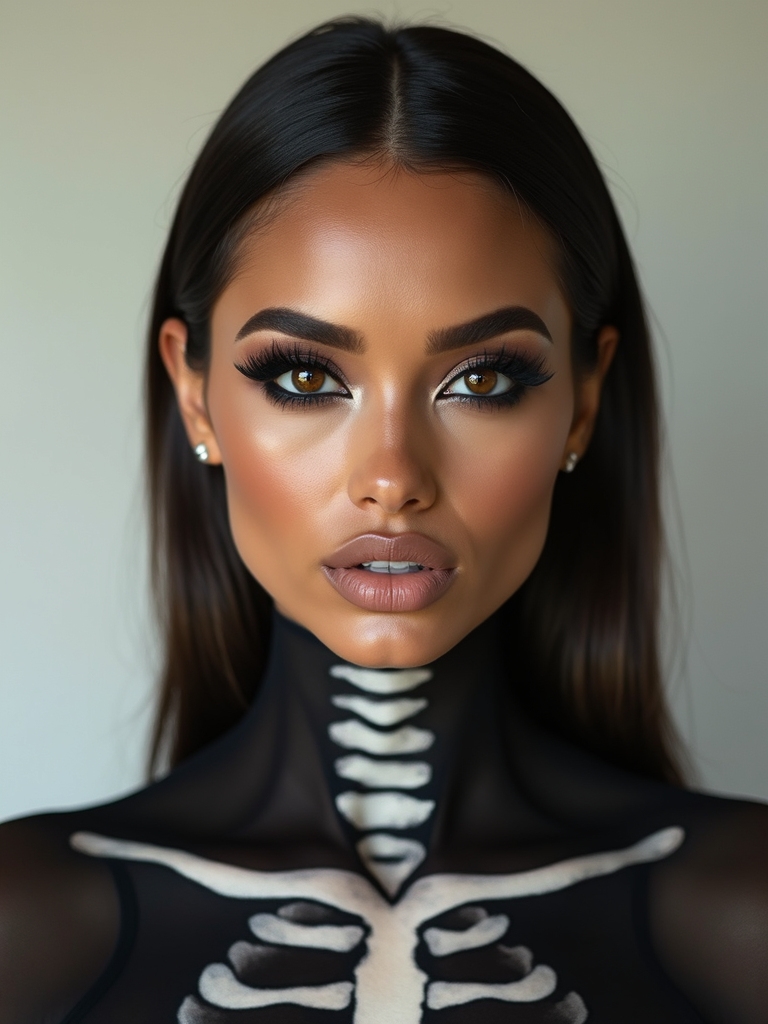
Extending the skeleton down the neck and collarbones takes the costume from face paint to full art, and neon makes it glow. Painting the cervical vertebrae and collarbone in glowing neon turns a simple top into a full skeletal reveal, especially under blacklight. It is the detail that makes people look twice.
Taking the Bones Past the Jaw
Keep the neck bones anatomically loose but recognizable: a line of small vertebrae down the center, the collarbones branching out. You do not need precision, just the suggestion of a spine and shoulders.
Pair it with a neon face skull for a cohesive glowing look, or keep the face classic and let the neck be the surprise. Either way, set it well so it survives a sweaty dance floor.
A Gritty Fractured Skull
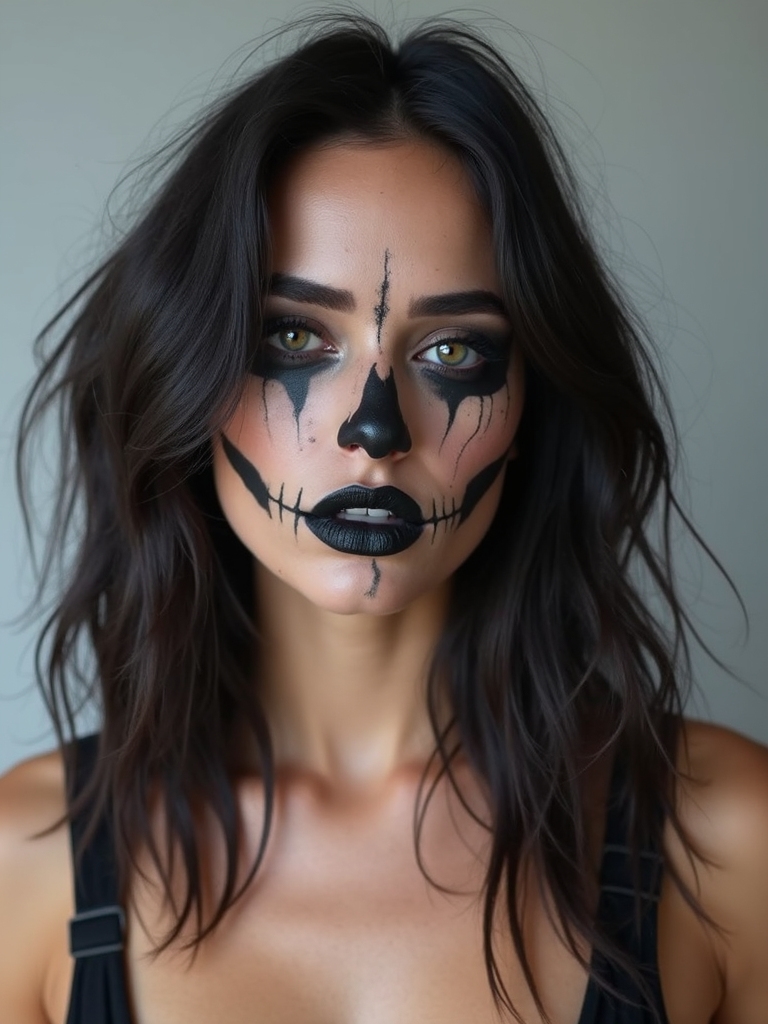
For a horror-leaning look, a gritty fractured skull adds cracks, chips, and texture so the bone looks old, broken, and weathered. Instead of a smooth painted skull, you add fine cracking lines and gray shading so it reads like a real, damaged skull dug up from somewhere. It is the most realistic and unsettling option here.
- Draw thin, branching cracks in gray and black across the white bone.
- Stipple gray unevenly so the bone looks aged and dirty, not clean.
- Add a few darker chips at the temples and jaw for fractured depth.
Neon Holographic Skeleton Glam
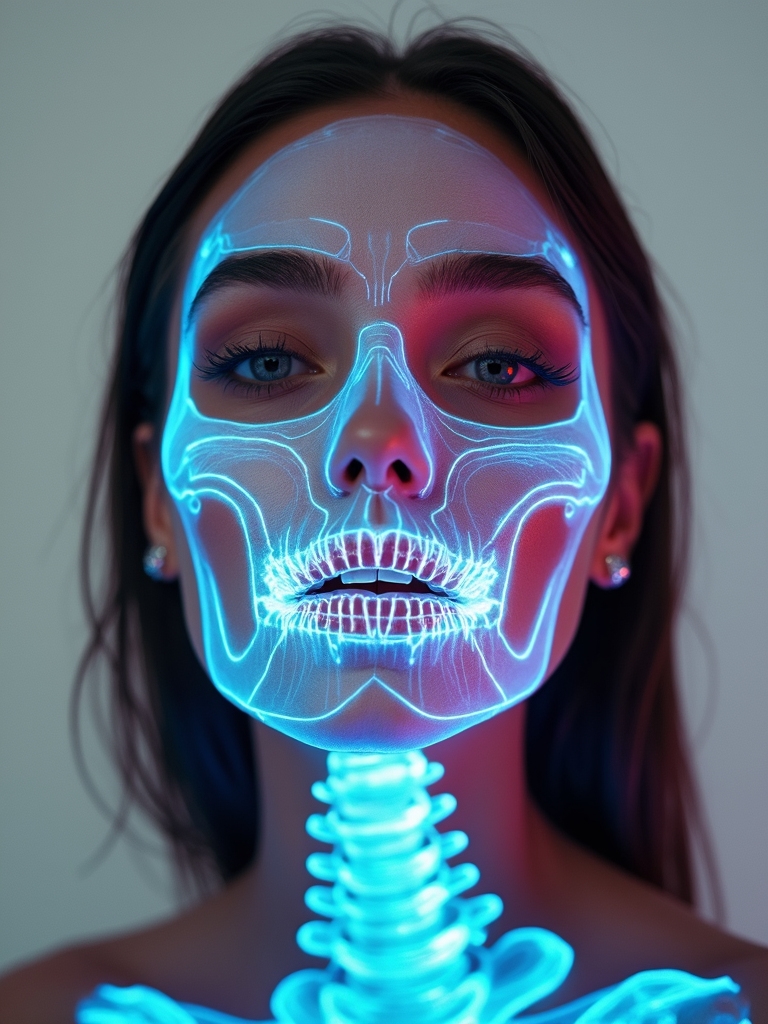
The boldest finish of all is a holographic neon skeleton, where the bones shimmer in shifting, iridescent color that changes as you move. Holographic pigments and neon shades layered over the bone map give a rave-ready, otherworldly skull that looks different from every angle. It is pure spectacle.
Layering the Holographic Shift
Build the bones in a base color first, then layer holographic powder or flakes over the top so the shift catches the light. The more the color moves, the more alive and electric the skull looks.
This one rewards going all-in, so add holographic accents to the lips and inner corners too. Set everything firmly, because layered pigments love to migrate as the night goes on.
Common Mistakes to Avoid
The biggest skeleton mistake is skipping the structure step. People rush to draw bones where they think they should go, but a skull looks convincing only when you place the sockets, nose, and teeth on your actual bone structure, so suck in your cheeks to find the real hollows and work from there.
The second common slip is forgetting to set the paint. Cream face paint that is not powdered and sprayed will crease, smear, and end up on every glass and collar you meet.
The other mistakes are about restraint and care. Going too thick with white makes the base crack as you talk and smile, so build it in thin, even layers that move with your face.
And whatever the style, patch test new face paint a day ahead and melt it off gently at night with an oil cleanser, since face paint and heavy pigment are hard on the delicate skin around the eyes and reward a soft touch over a scrub. Treat the prep and the takeoff as seriously as the art, and your skeleton will look sharp all night and leave your skin happy.
Pick Your Bones
Every look here is built on the same simple foundation: hollow the sockets, shade the nose, stitch the teeth, and place it all on your real bone structure. Once you have that map, the style is just decoration, whether you reach for classic black-and-white, glittered glam, glowing neon, or soft pastel. The bones stay the same; the mood is yours to choose.
If you are new to it, start with the classic skull or the minimalist version to learn the placement, then play with color and texture from there. For more inspiration, browse a few halloween makeup looks or keep it quick with simple halloween makeup when time is short.
Next Up