People think unique acrylic nails mean long claws and rhinestones on every finger. At the nail desk, the sets that actually stop a scroll are the opposite: quiet, precise, one clever detail done cleanly. Standout is a technique thing, not a volume thing.
Below are twelve designs that read editorial without screaming for it, from mirror-bright chrome tips to ink-in-water marble. I will tell you what each one takes to wear, roughly what the art adds to a set, and which ones survive a real week so you book the look that photographs well and still types fine on Monday.
Before You Book a Statement Set
Do unique acrylic designs damage your nails? Not the acrylic itself. The damage comes from rough removal, so soak the set off in acetone instead of prying. Book a soak-off at $15-20 and your natural nail stays fine underneath.
How much does a statement acrylic set cost? A plain full set runs about $40-70. Hand-painted art, 3D petals, or foil work adds $15-50 depending on detail, and a fill every two to three weeks keeps the edges sharp.
Which unique design lasts the longest? Encapsulated and chrome designs wear best because the art sits sealed under acrylic. Raised 3D petals and foil shards snag first, so save those for events rather than everyday wear.
Mirror-Bright Chrome Tips
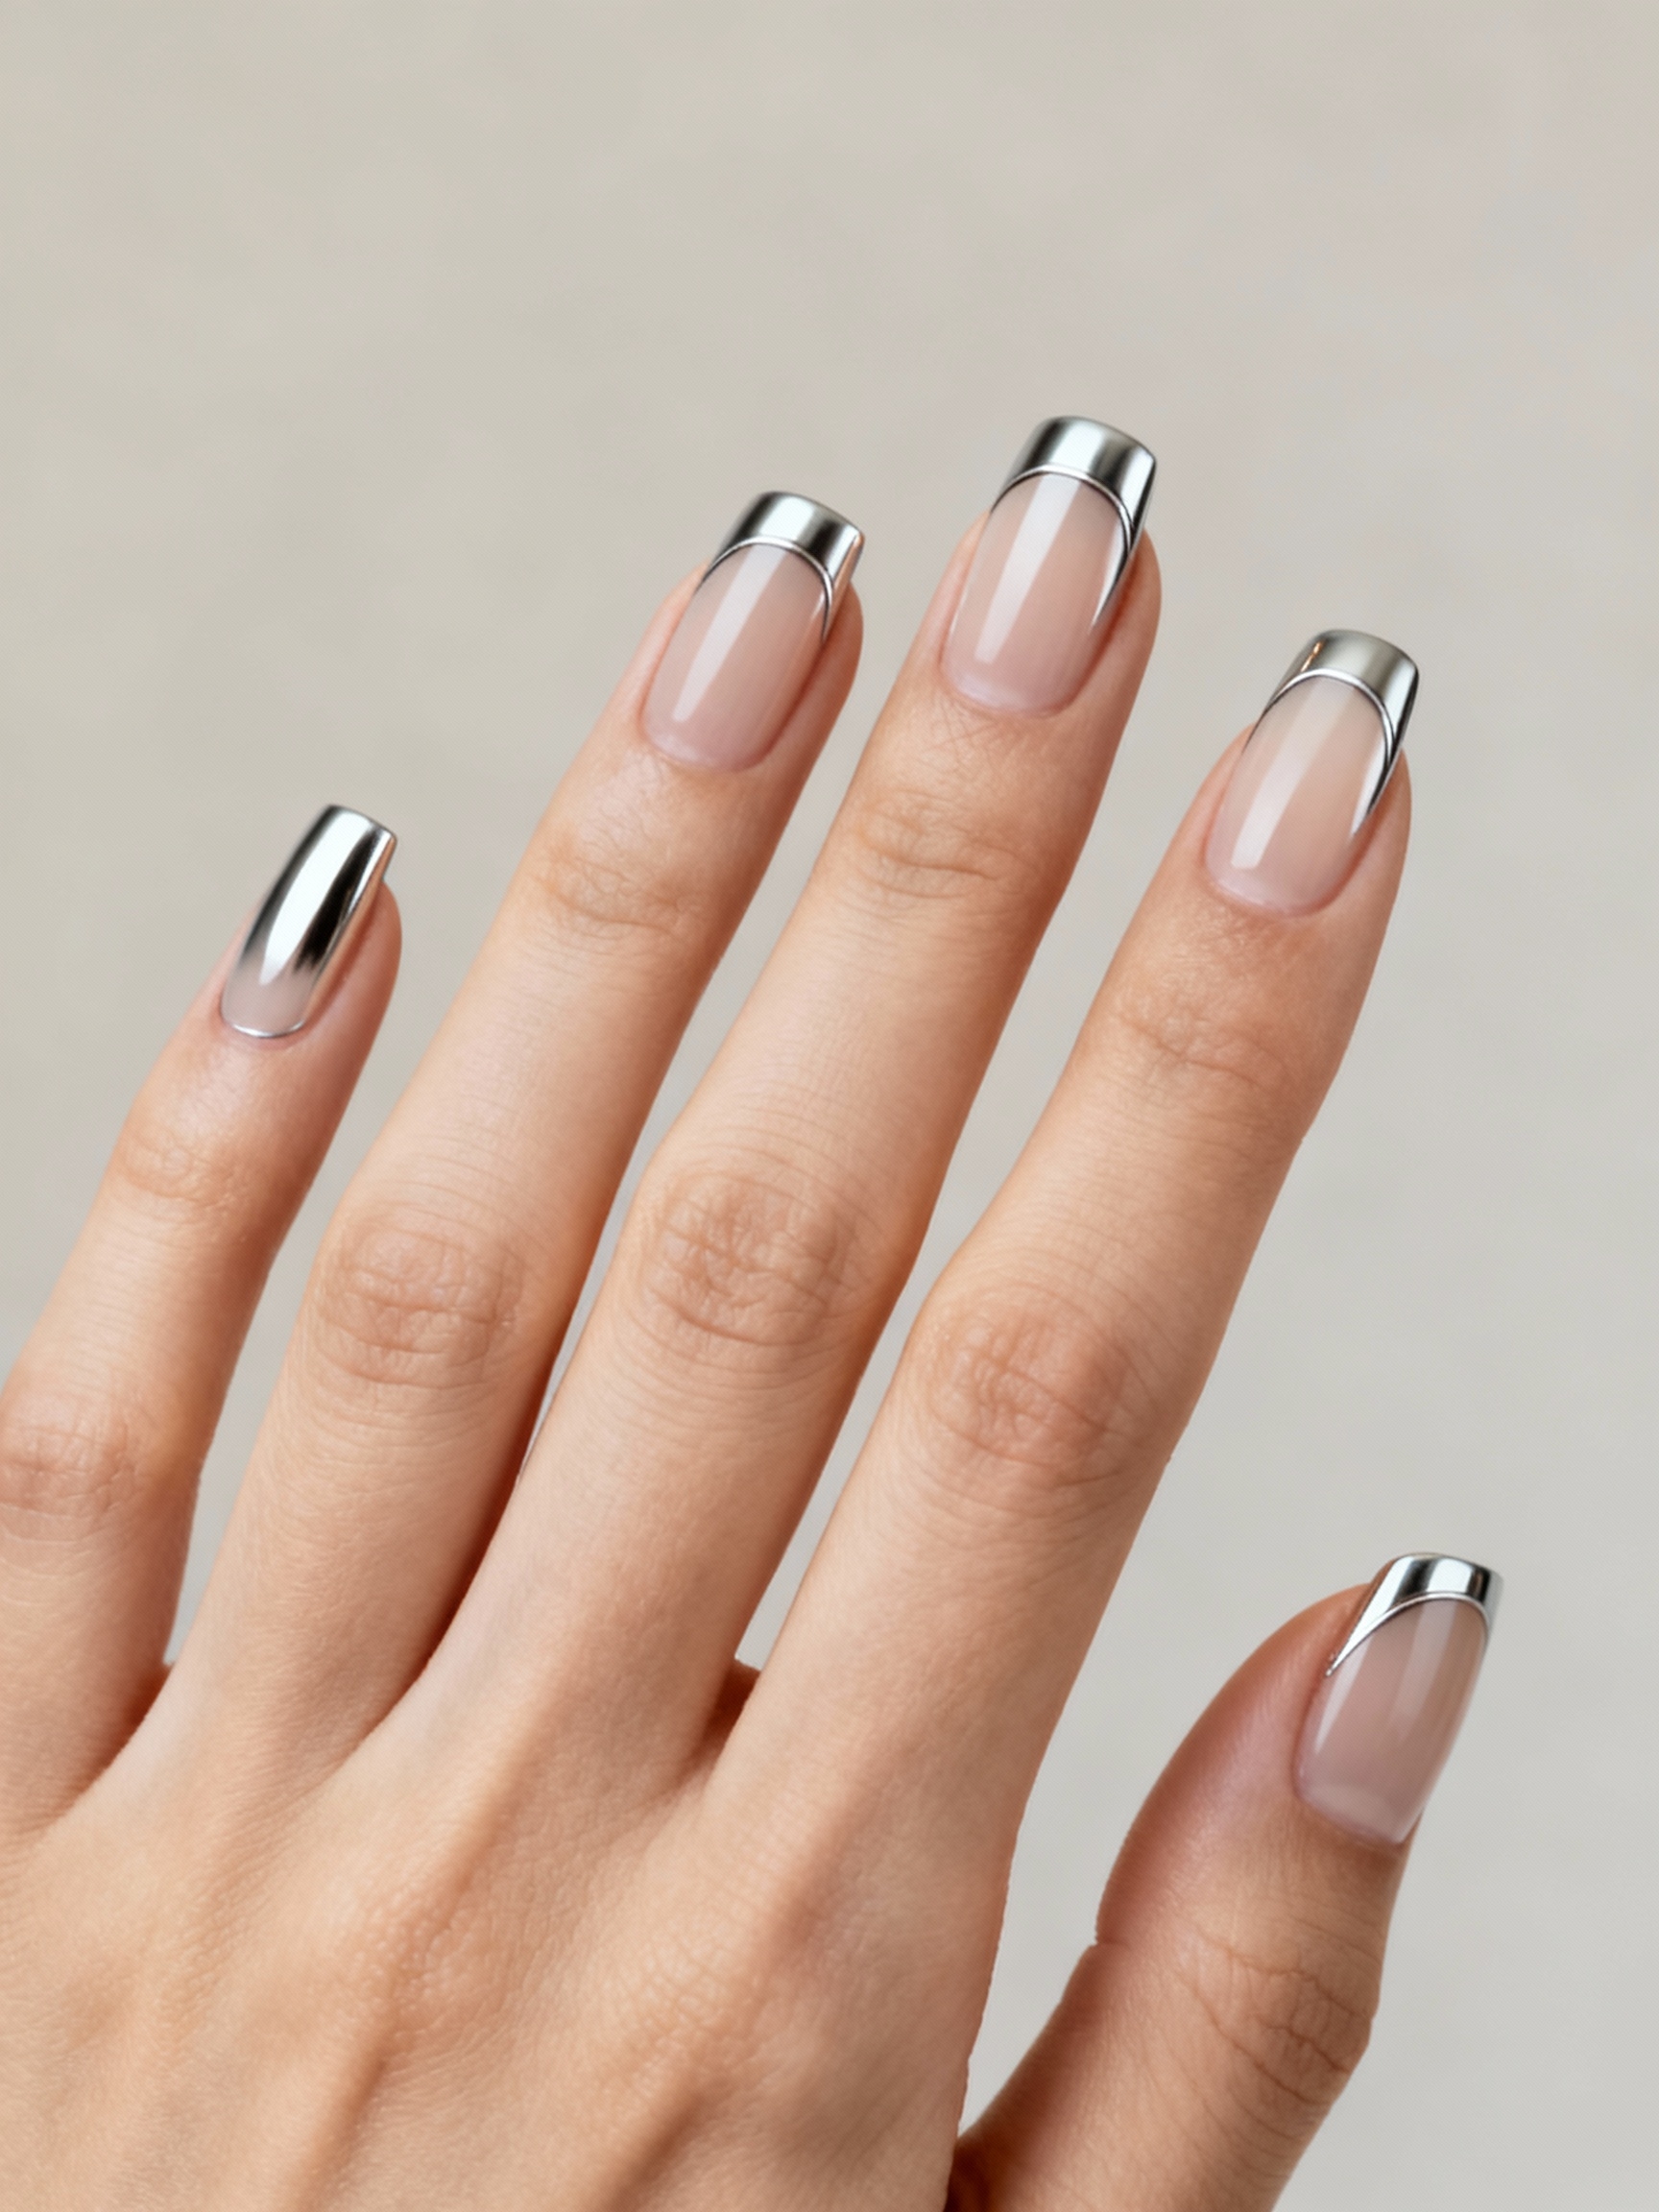
Soft sheen, sharp line. Chrome-glazed tips put a mirror-bright edge on a nude or milky base, and the quiet contrast is what makes them look expensive. The tips stay ultra-thin, tapered, and lined up across the hand.
Keep the Tips Thin
Color is where you personalize it. Cool silver, soft champagne, and rose chrome each pull toward different jewelry, so I match the chrome to whatever a client wears daily. The powder buffs over a cured base, then locks under a glossy top.
They wear well, photograph cleanly, and move from desk to dinner without a restyle. For an all-over version of that finish, a full set of white chrome nails takes the same shine edge to edge.

Ultra-Thin Neon French Lines
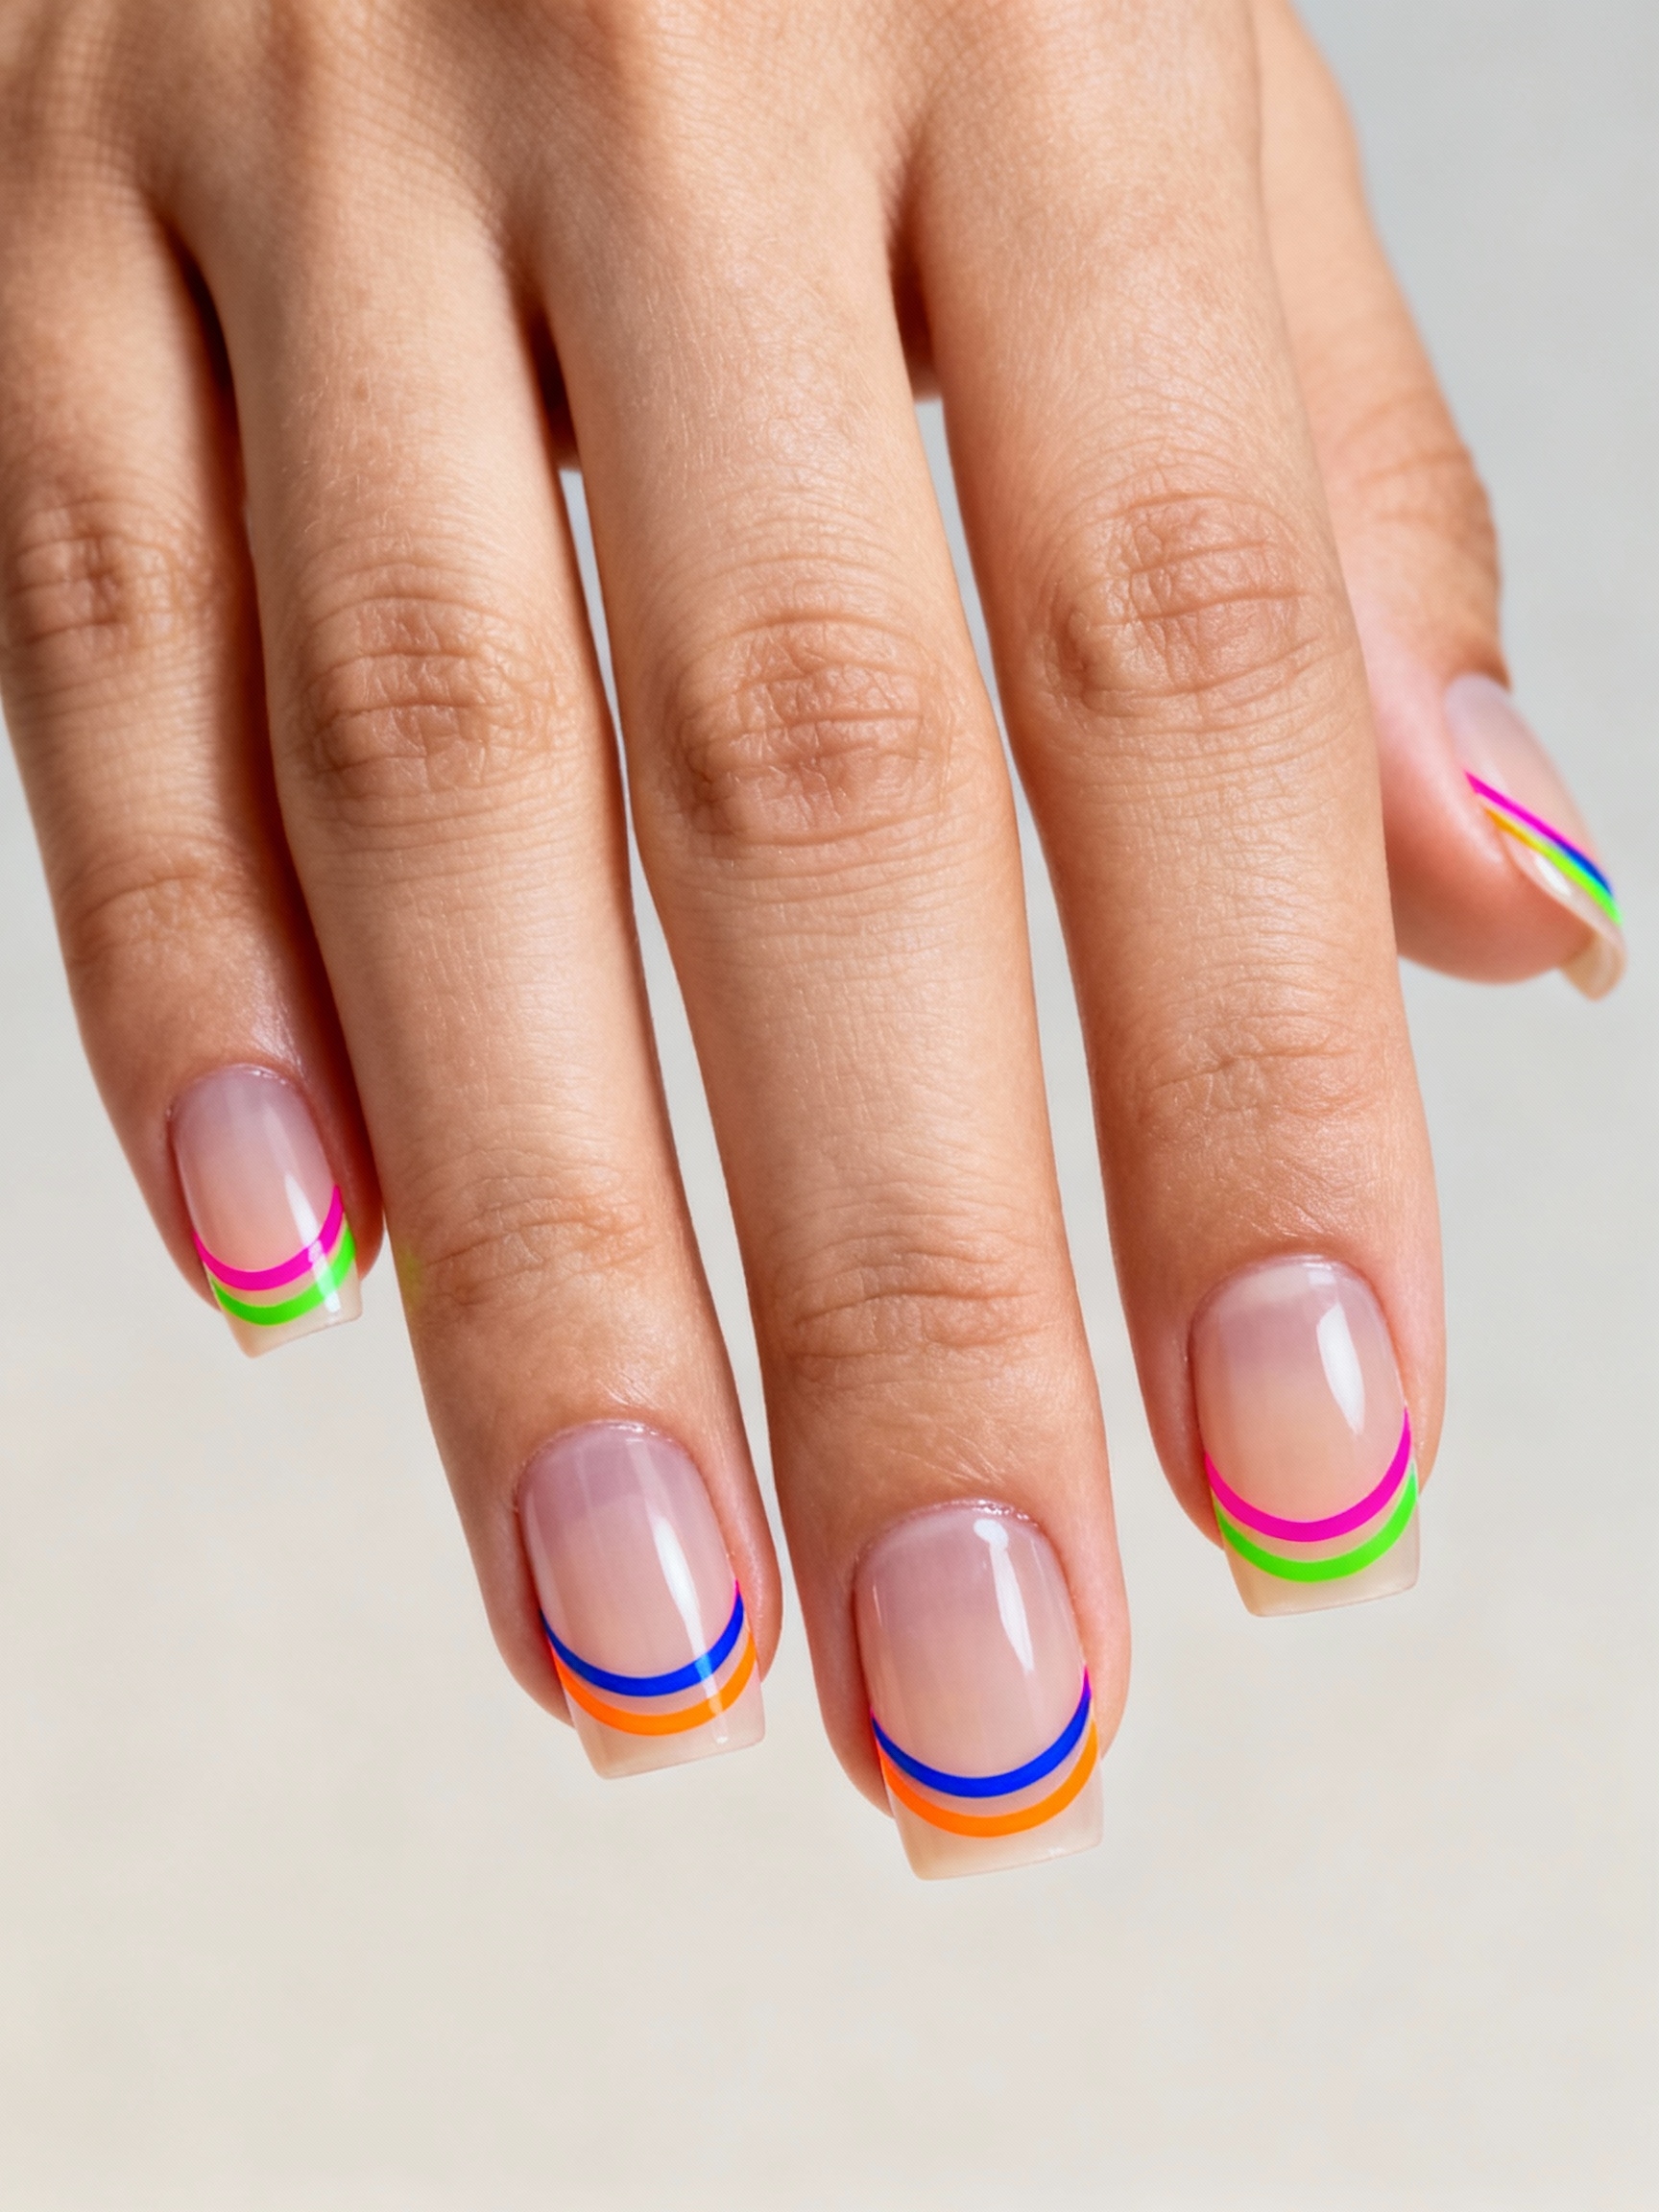
Neon French is the move that makes a loud color look chic. You keep the line razor-thin with a precision micro-tip brush, so the color pops without taking over the nail. The thinner the line, the more editorial it looks.
Placement matters as much as the pigment. Run the neon just off the smile line, or stack two fine lines near the sidewalls, for a finish that feels designed rather than dipped. Neon needs a white base under it to glow.
This is a set that rewards a steady tech, so it is worth booking rather than freehanding at home unless your line work is solid. A precise neon French adds about $15-25 to a standard set.
The most unique set in the room is rarely the busiest one. It is the single detail done so cleanly that everyone assumes it cost more than it did.
Sculptural 3D Petal Accents

Sculptural petals push acrylics into couture territory. They are built up by hand in acrylic, gel, or soft resin, then placed so they catch light like a real bloom. One petal nail against a bare hand says more than ten busy ones.
The material choice drives the wear. Acrylic petals hold hardest, gel looks softer, and resin sits lightest. I steer clients toward acrylic for anything they want to keep past an event, because raised art is the first thing to pop off.
Keep placement to an accent nail or two so the texture feels intentional. Seal the base of each petal well, and treat the hand gently, since these snag on sweaters and hair faster than any flat design.
Negative-Space Geometric Art
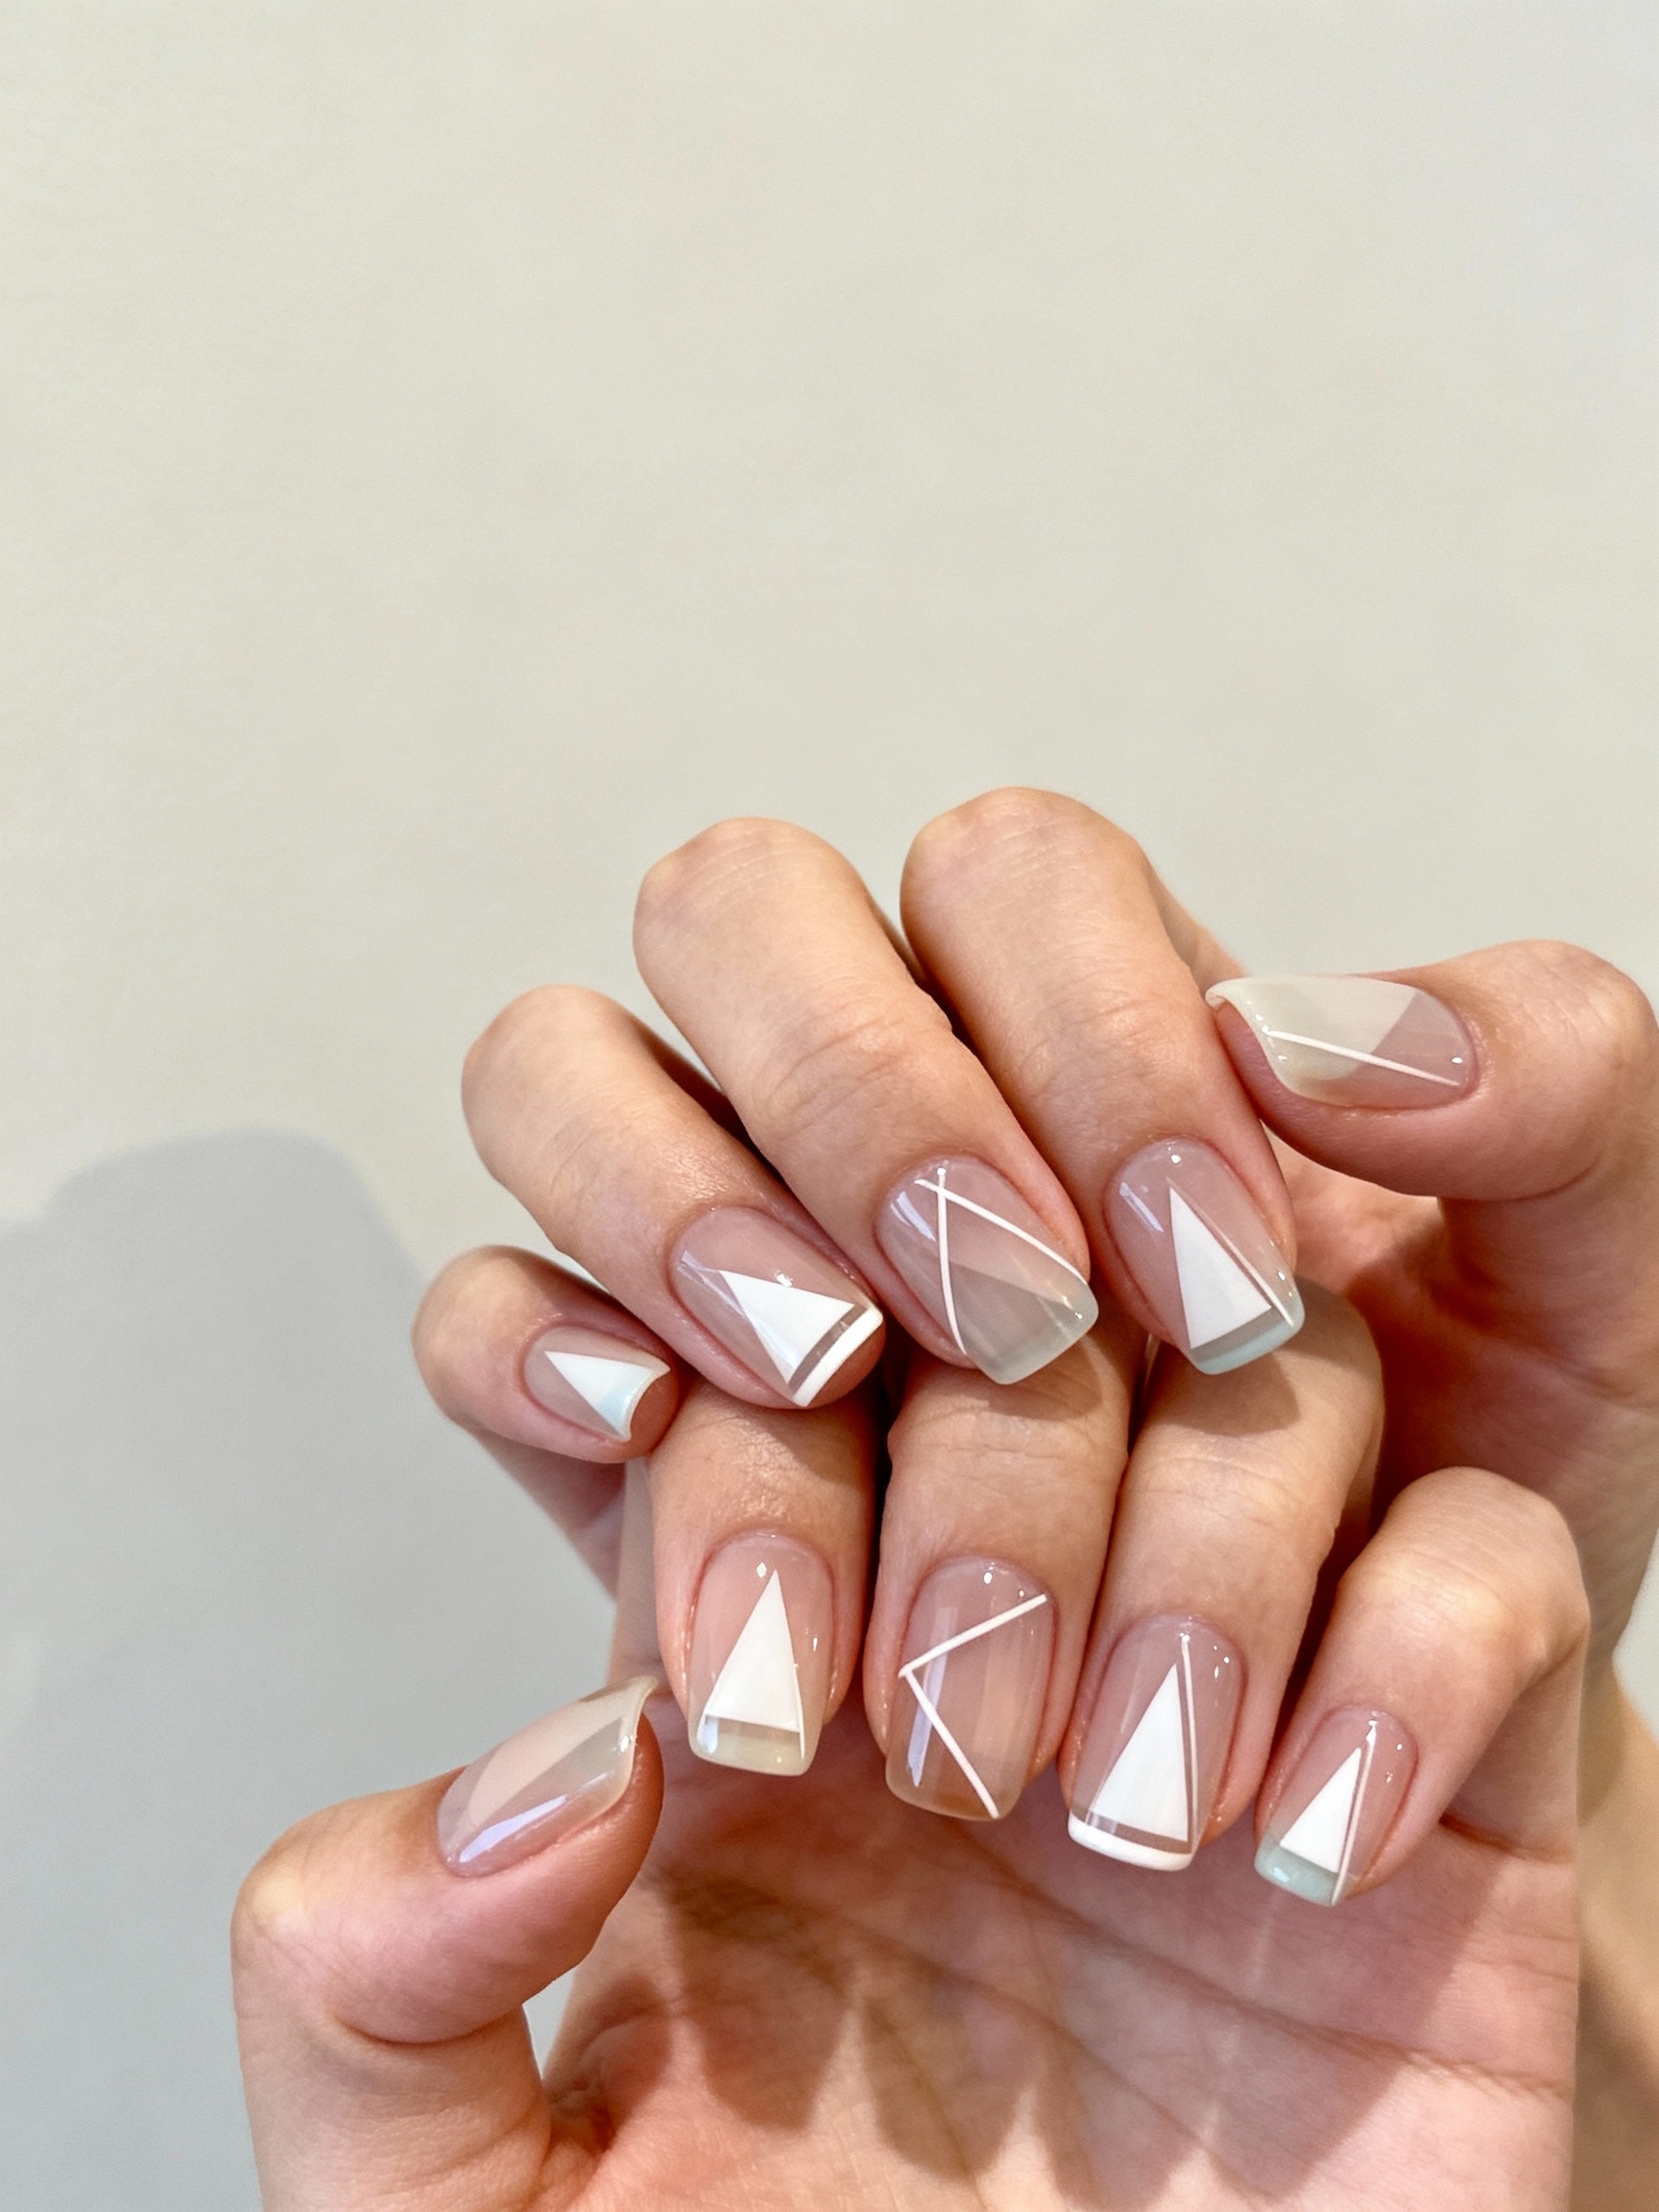
The chicest acrylics often hold back. Negative-space geometry lets bare, skin-toned gaps breathe between crisp lines, so the design stays light and modern. It is the look clients ask me for when they want art that does not read as try-hard. A few that wear beautifully:
- Angular French tips with a bare diagonal cutting through the color
- A micro-lattice of fine lines floating over a nude base
- Off-center cutouts framed in a thin ring of chrome
- Matte triangles laid over a glossy base for quiet dimension
👍Why 3D petals wow
- +Real couture-level texture you can actually feel
- +Photograph beautifully in close-up shots
- +Fully customizable in color, size, and placement
👎What to weigh first
- –Raised petals catch on clothes and hair
- –Add noticeable cost and chair time
- –Wear shorter than flat art before one pops off
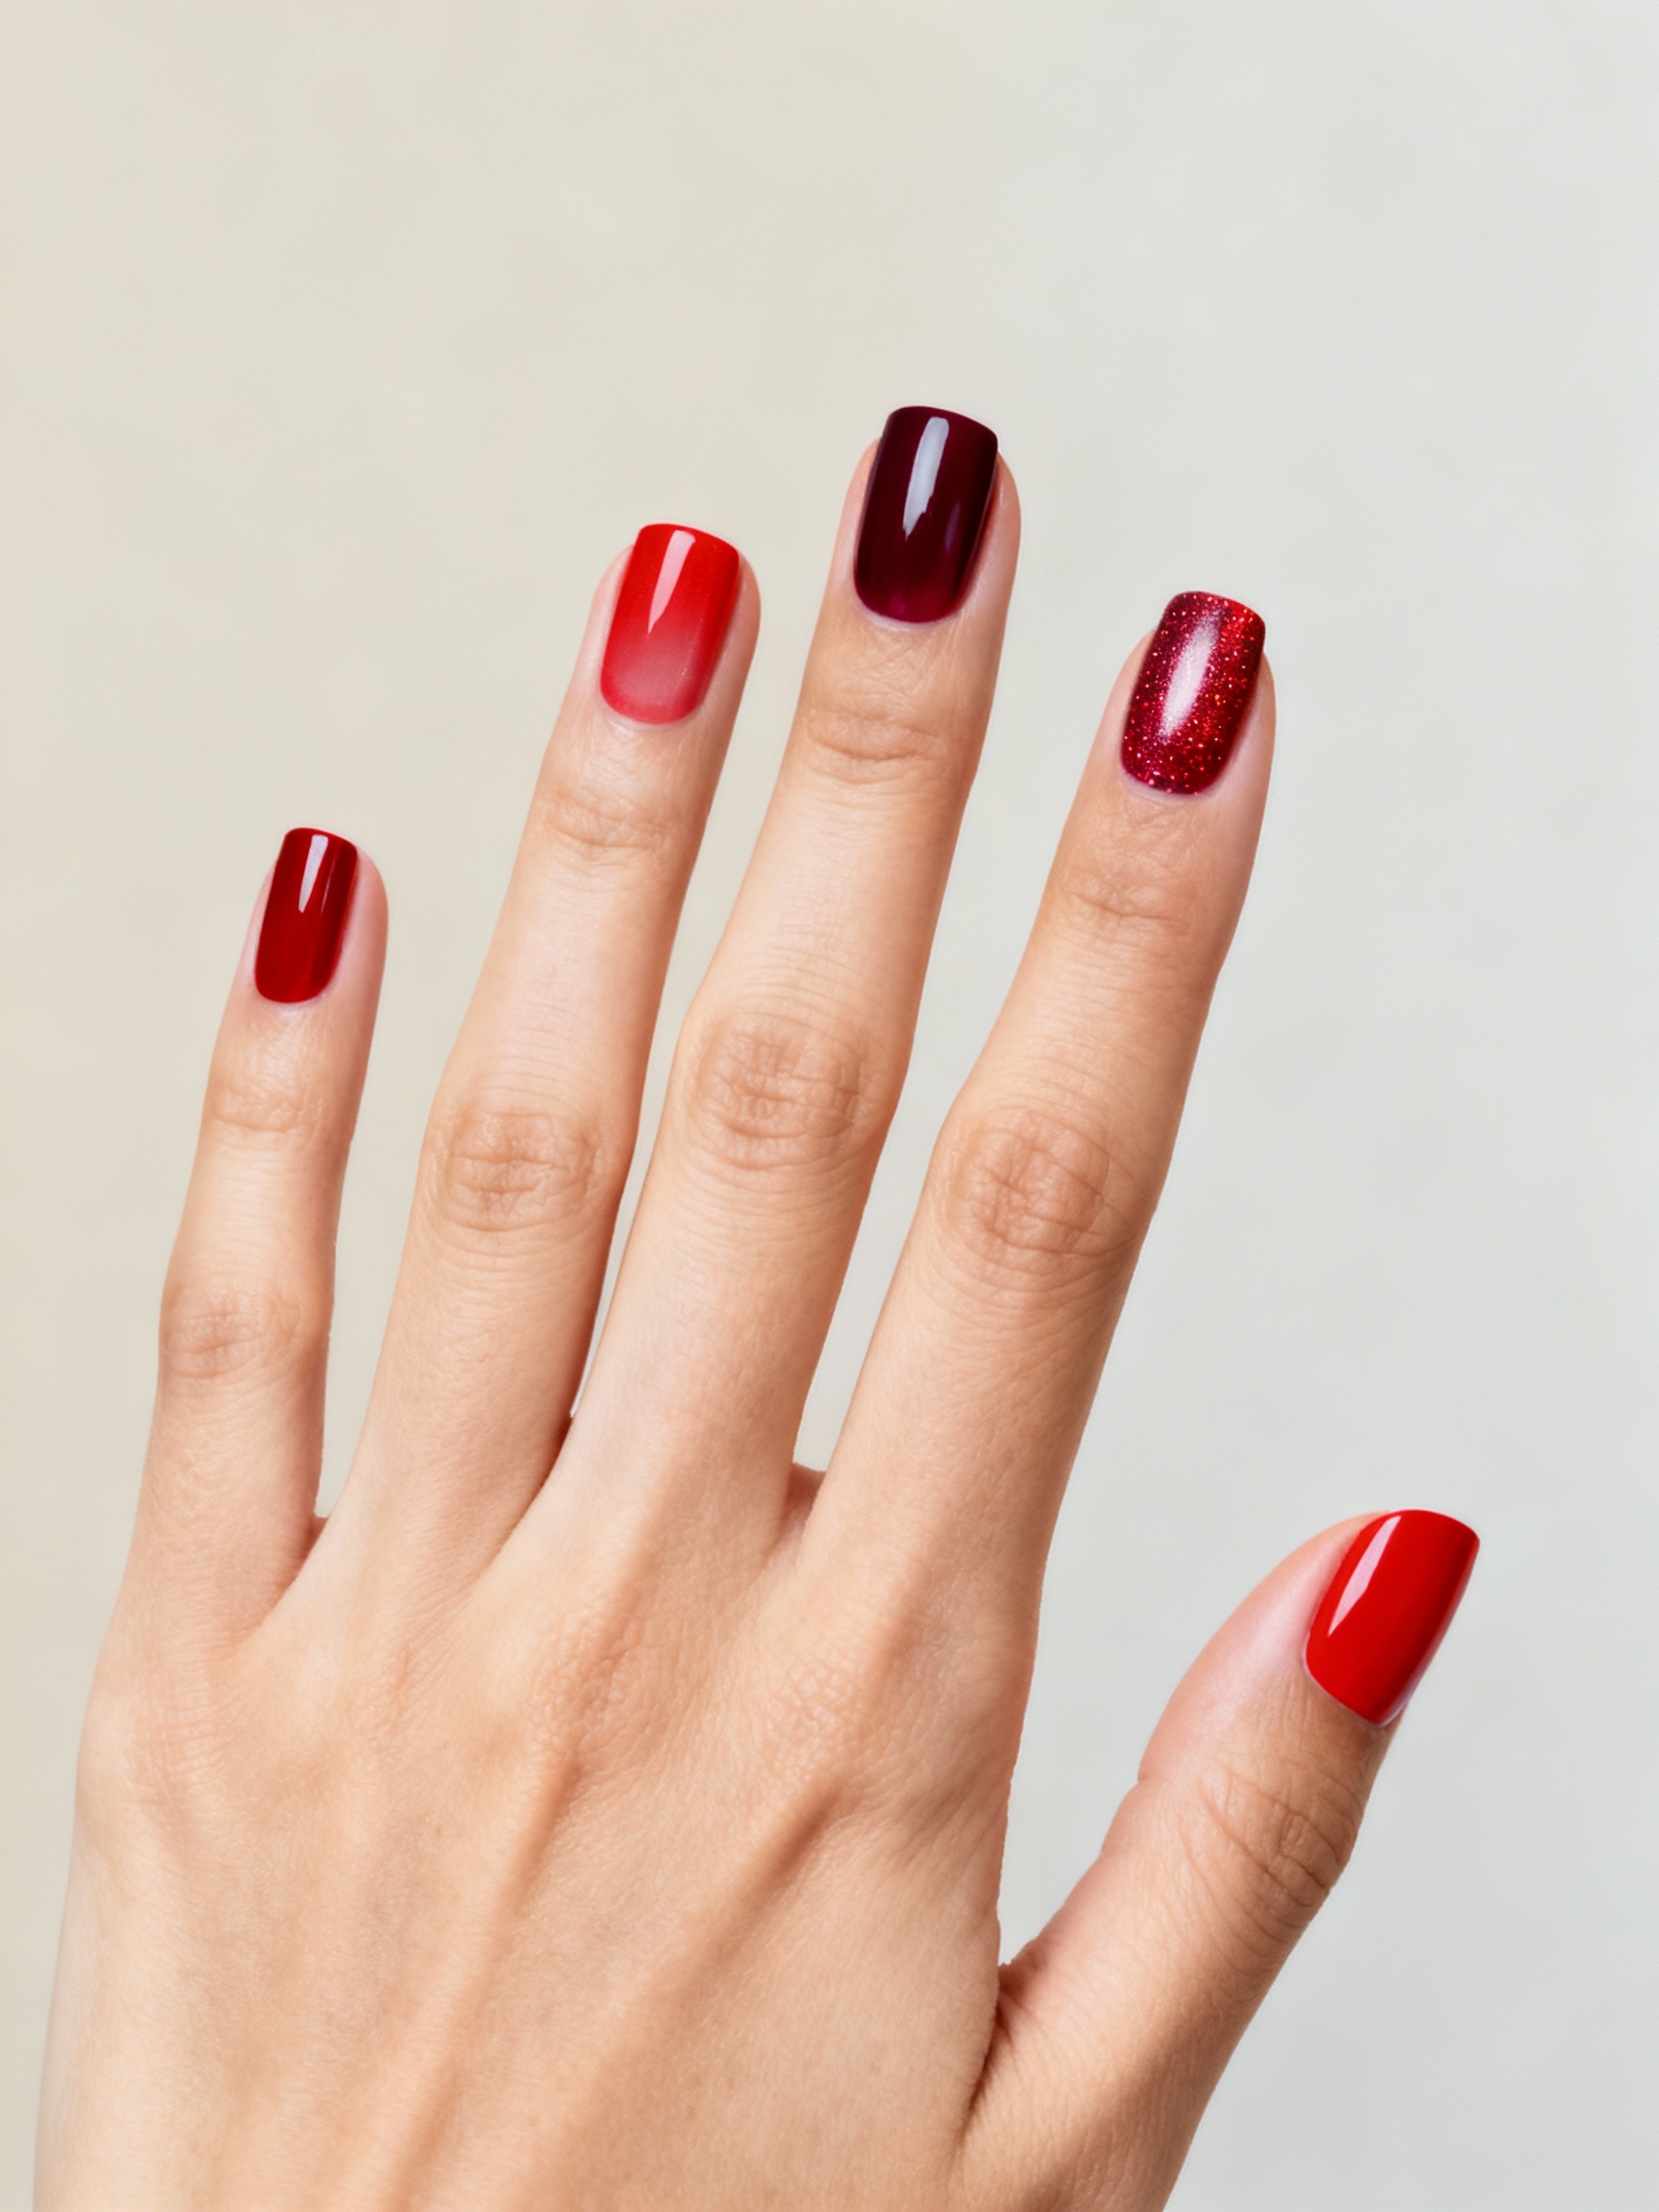
Plush Magnetic Cat-Eye Shimmer

Velvet cat-eye looks like liquid light on the nail. It uses an ultra-fine magnetic powder, and the secret is particle size: the finer and more uniform the powder, the plusher the velvet beam, with none of the gritty streak cheap versions leave.
Application has a rhythm. You lay the magnetic gel, then hold a magnet to the wet surface so the particles stand up into a glowing band. Tilt the magnet differently and the beam shifts from a soft glow to a bold streak. Pull it too early and the light scatters.
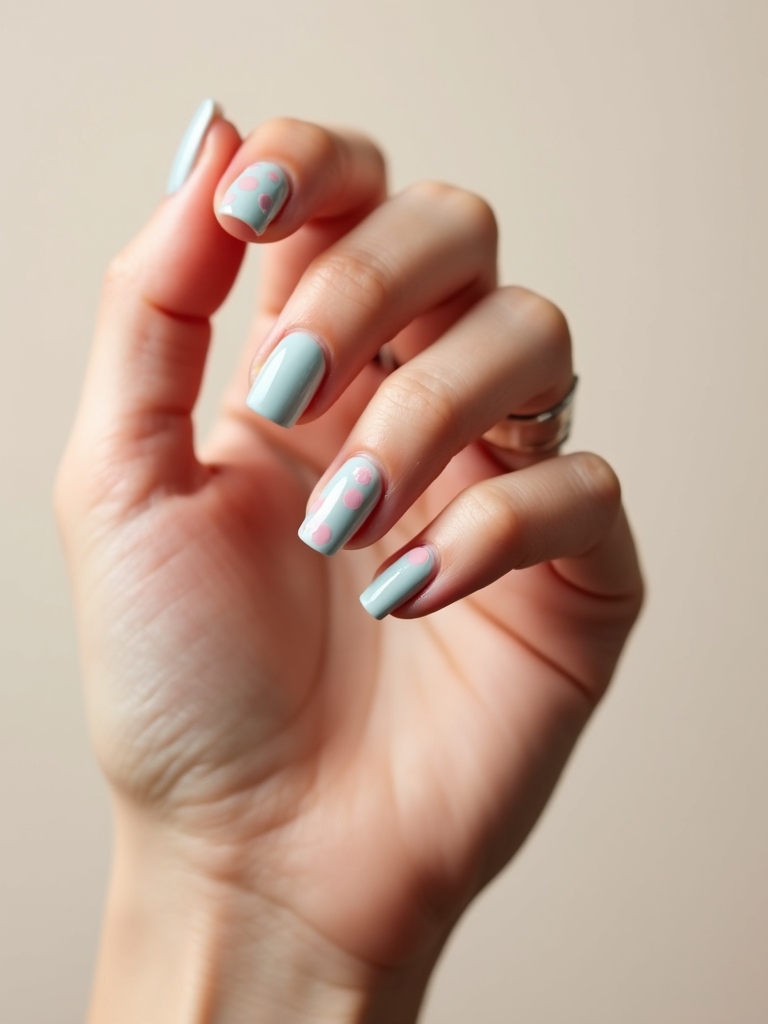
Dreamy Aura Halo Ombré

Aura nails bottle that glow-from-within effect, a soft halo melting from sheer to saturated across the nail. On acrylic the surface stays glassy and smooth, which is hard to match with polish alone. It photographs beautifully and wears quietly. Here is the build:
- Pick two or three analogous colors that sit next to each other on the wheel
- Airbrush translucent layers, building the glow from the center out
- Diffuse the edges with a small sponge so there are no hard borders
- Seal with a milky, glossy topcoat to set the halo, much like aura nails in gel
Two acrylic myths worth busting:
❌ Myth: Acrylics ruin your natural nails.
✅ Reality: The harm is almost always from removal, not the acrylic. Soaked off properly in acetone, a set leaves the nail underneath intact and healthy.
❌ Myth: Magnetic cat-eye powder is just glitter.
✅ Reality: It is iron-infused pigment that a magnet pulls into a 3D beam of light. The glow shifts as your hand moves, which flat glitter can never do.
A Mismatched Checkerboard Mix
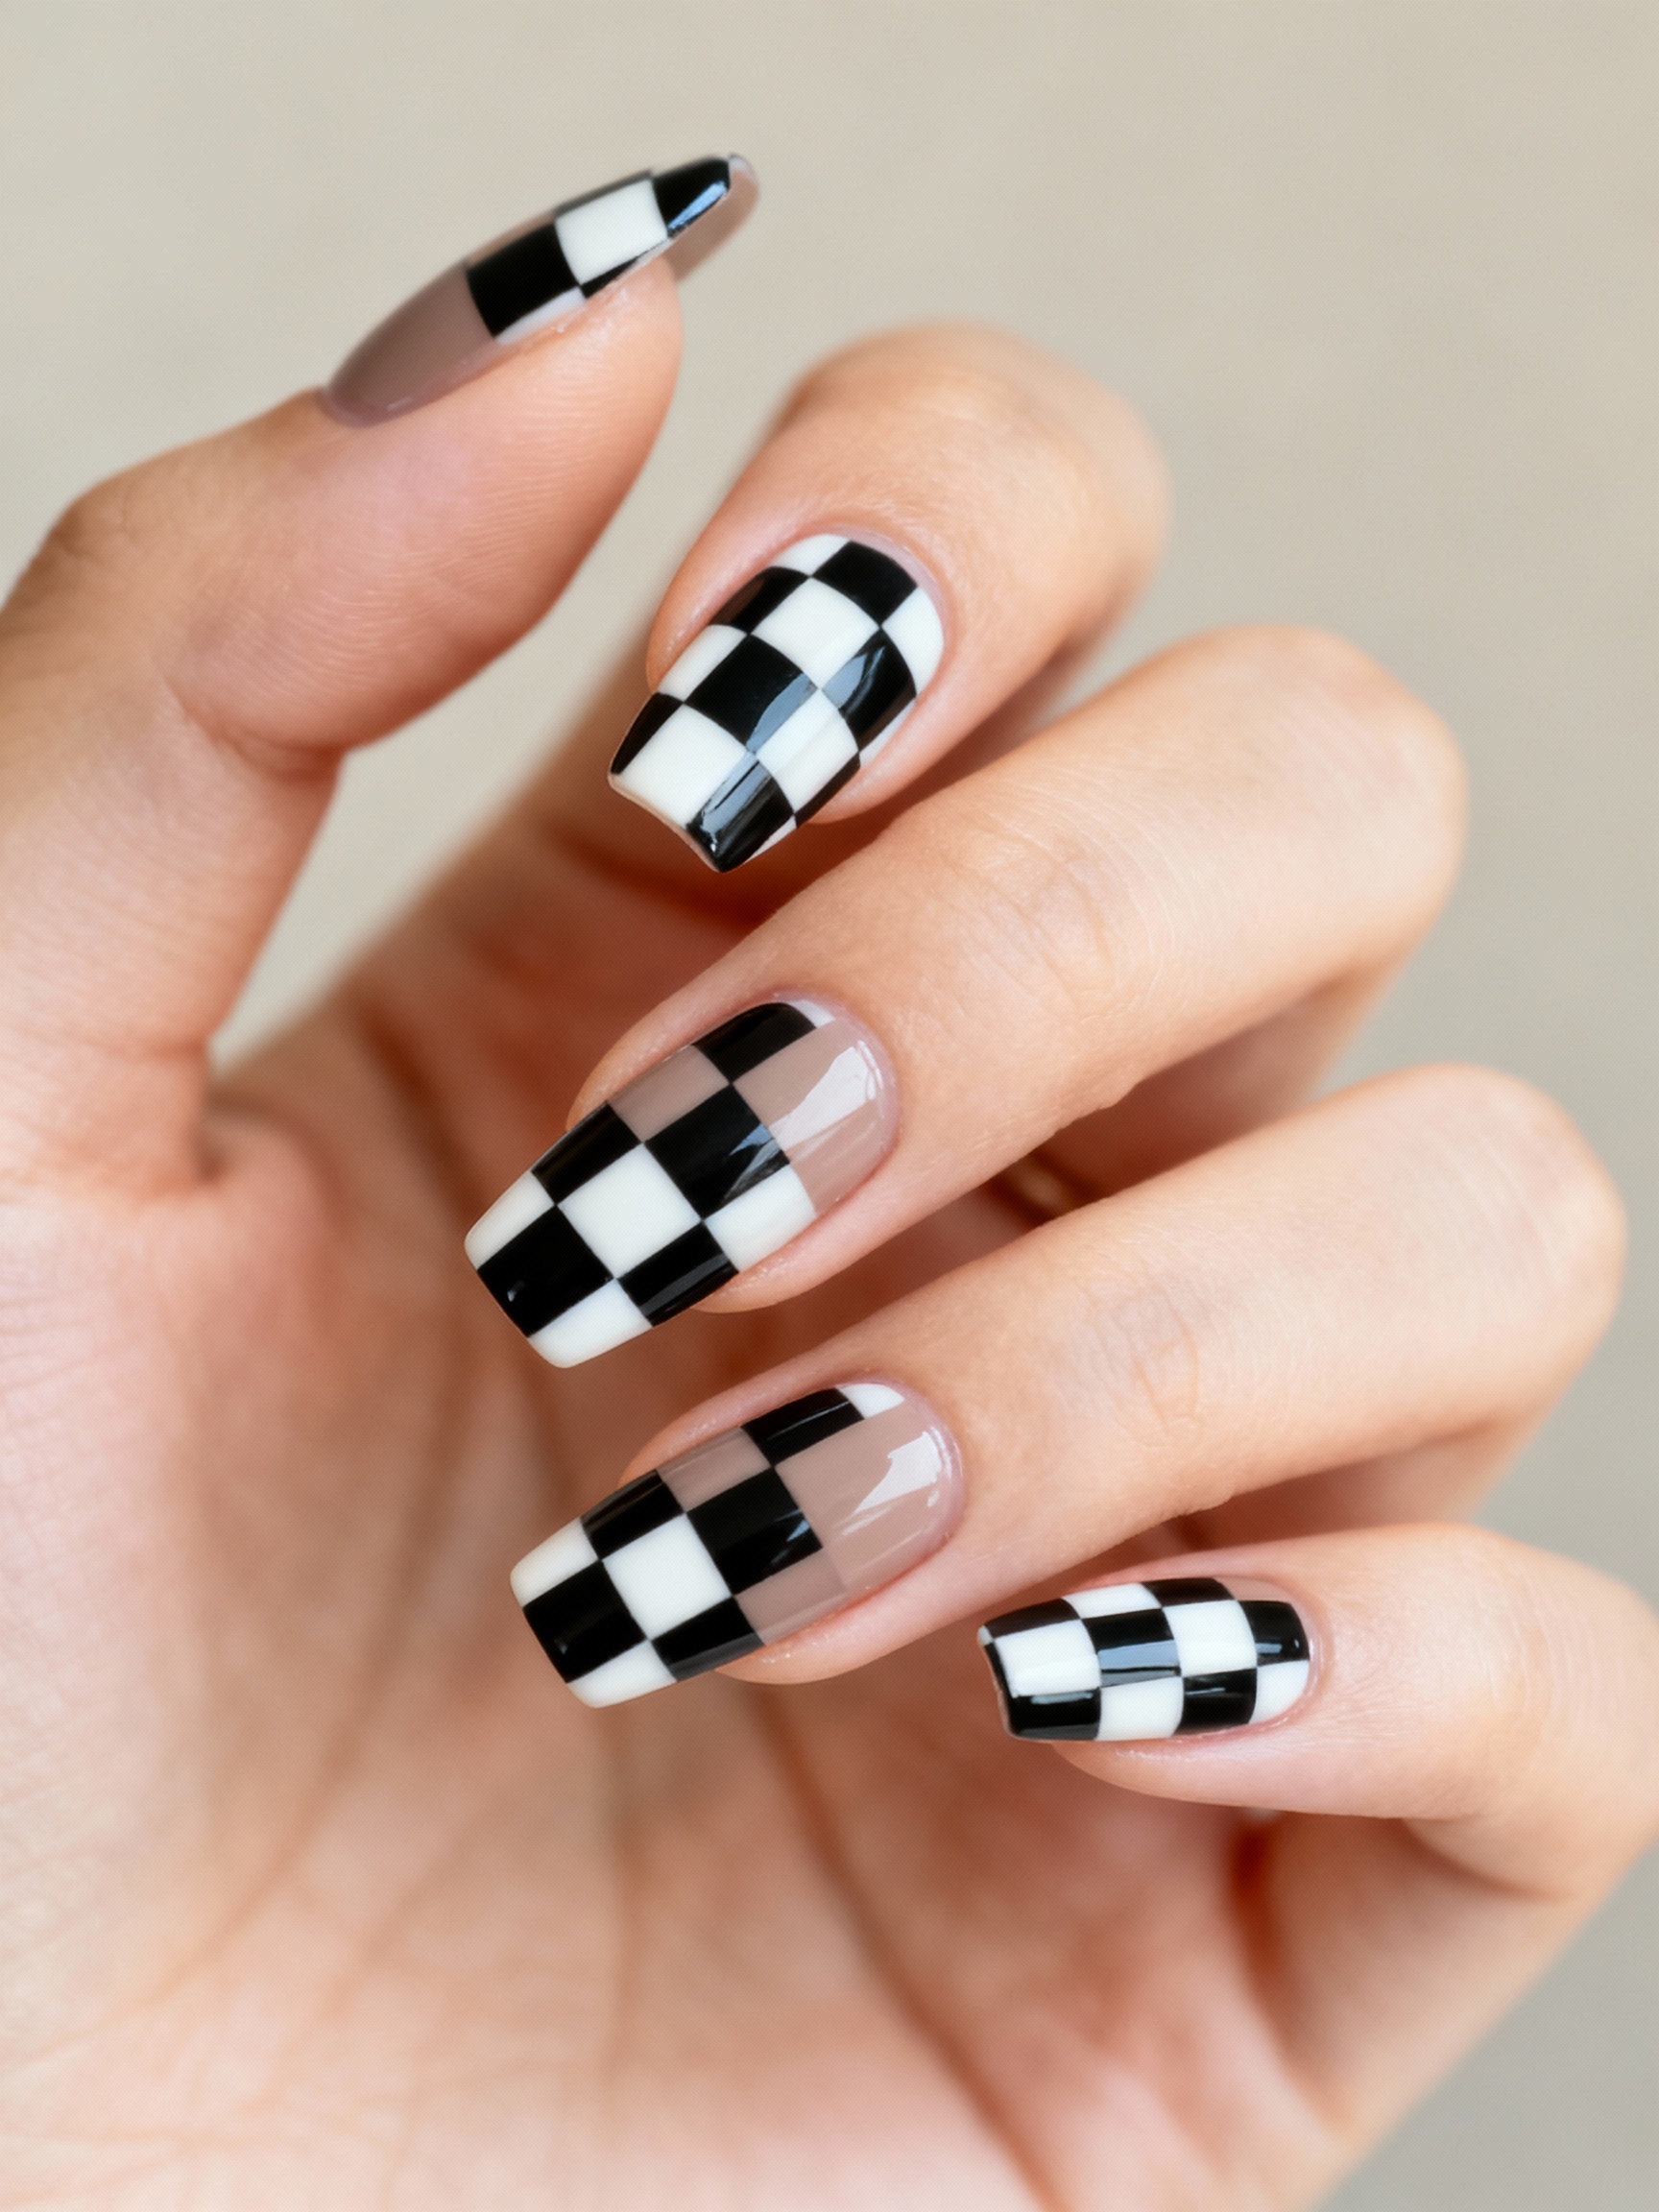
Checkerboard goes from costume to curated when you mismatch it on purpose. You pair classic black-and-white squares with soft pastels and glossy neutrals, then change the scale nail to nail so the hand looks collected, not copy-pasted. A few moves that keep it chic:
- Alternate square sizes across the hand so no two nails match exactly
- Slip in one negative-space accent nail to give the eye a rest
- Seal everything under a glassy top so the grid stays crisp and flat
Whisper-Thin Chrome Flame Tips
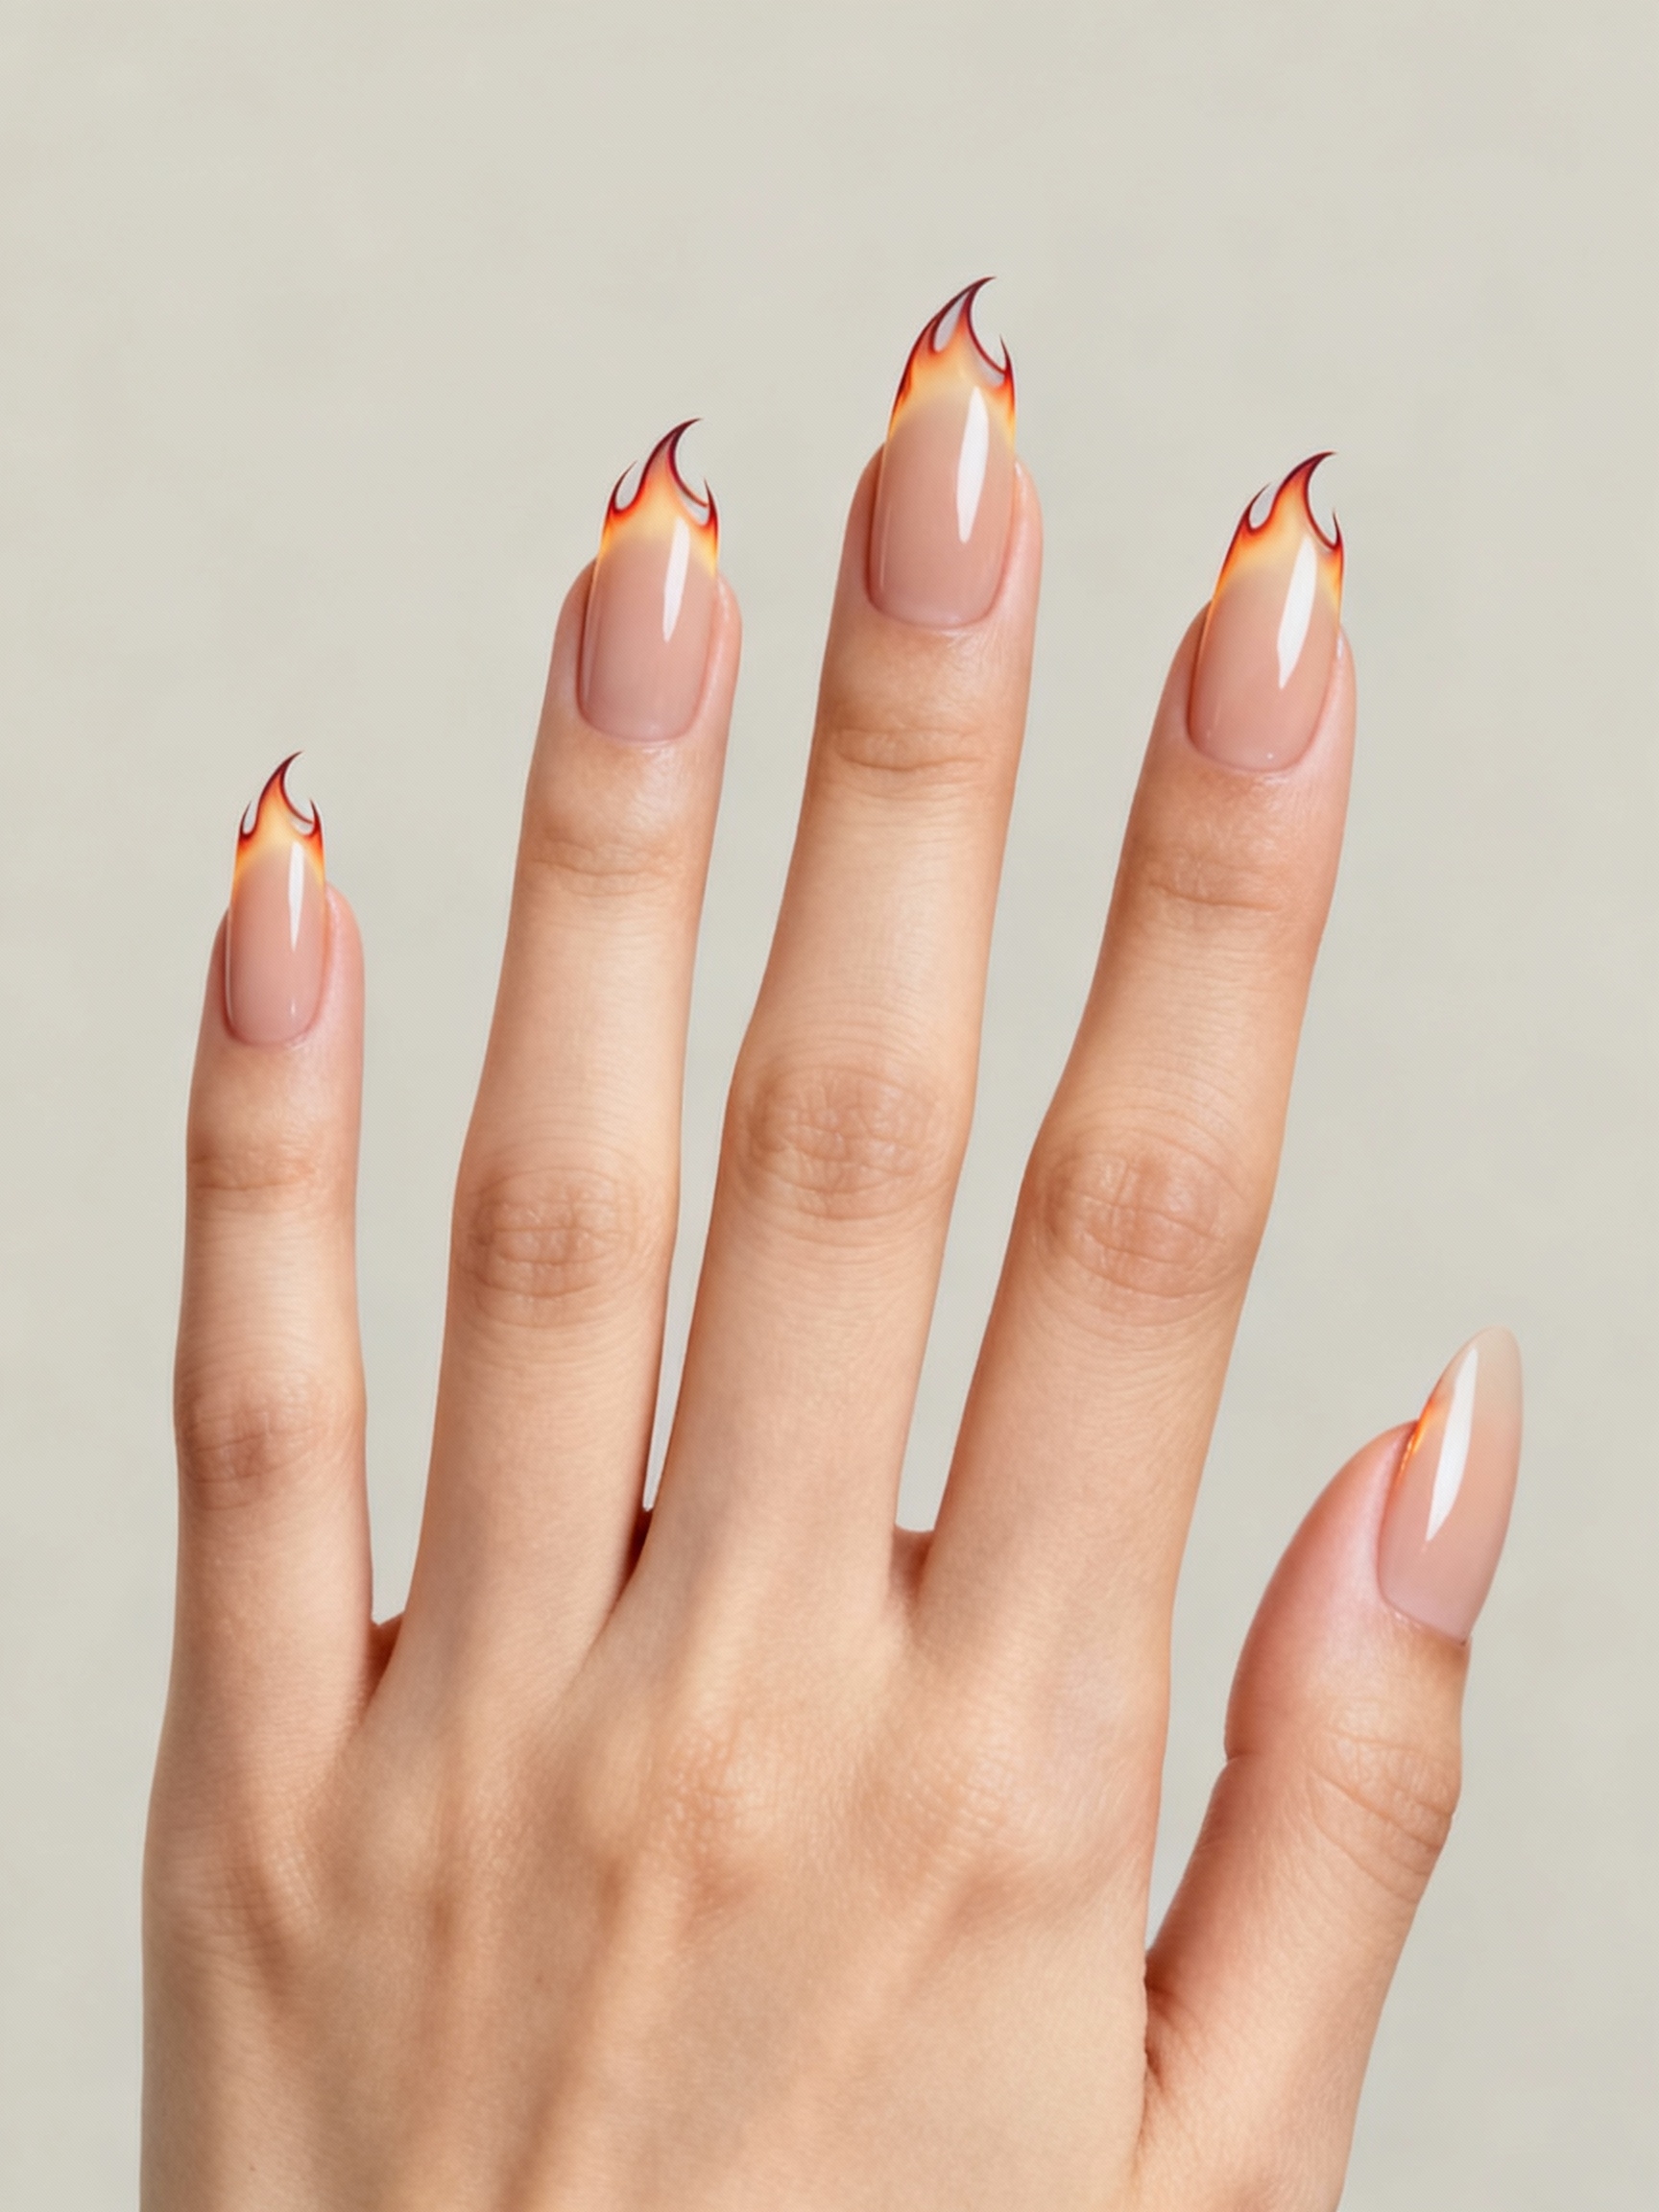
A flame edge sounds loud and lands subtle when it is done thin. You swipe the slimmest flicks of chrome or neon along the free edge, letting bare nail breathe beneath while the tips glow. The whole look is spicy without being heavy.
Thin Tails Read Editorial
Symmetry is the make-or-break. Keep the lines whisper-thin and taper the tails to a point, then mirror them across the hand so the flames echo each other. Thick flames age the look fast.
Seal it under a glassy topcoat so the contrast between matte base and shiny flame stays crisp. This kind of fine detailing adds about $20-30 to a set, since it is slow, careful work.
Smoky Marble Swirls
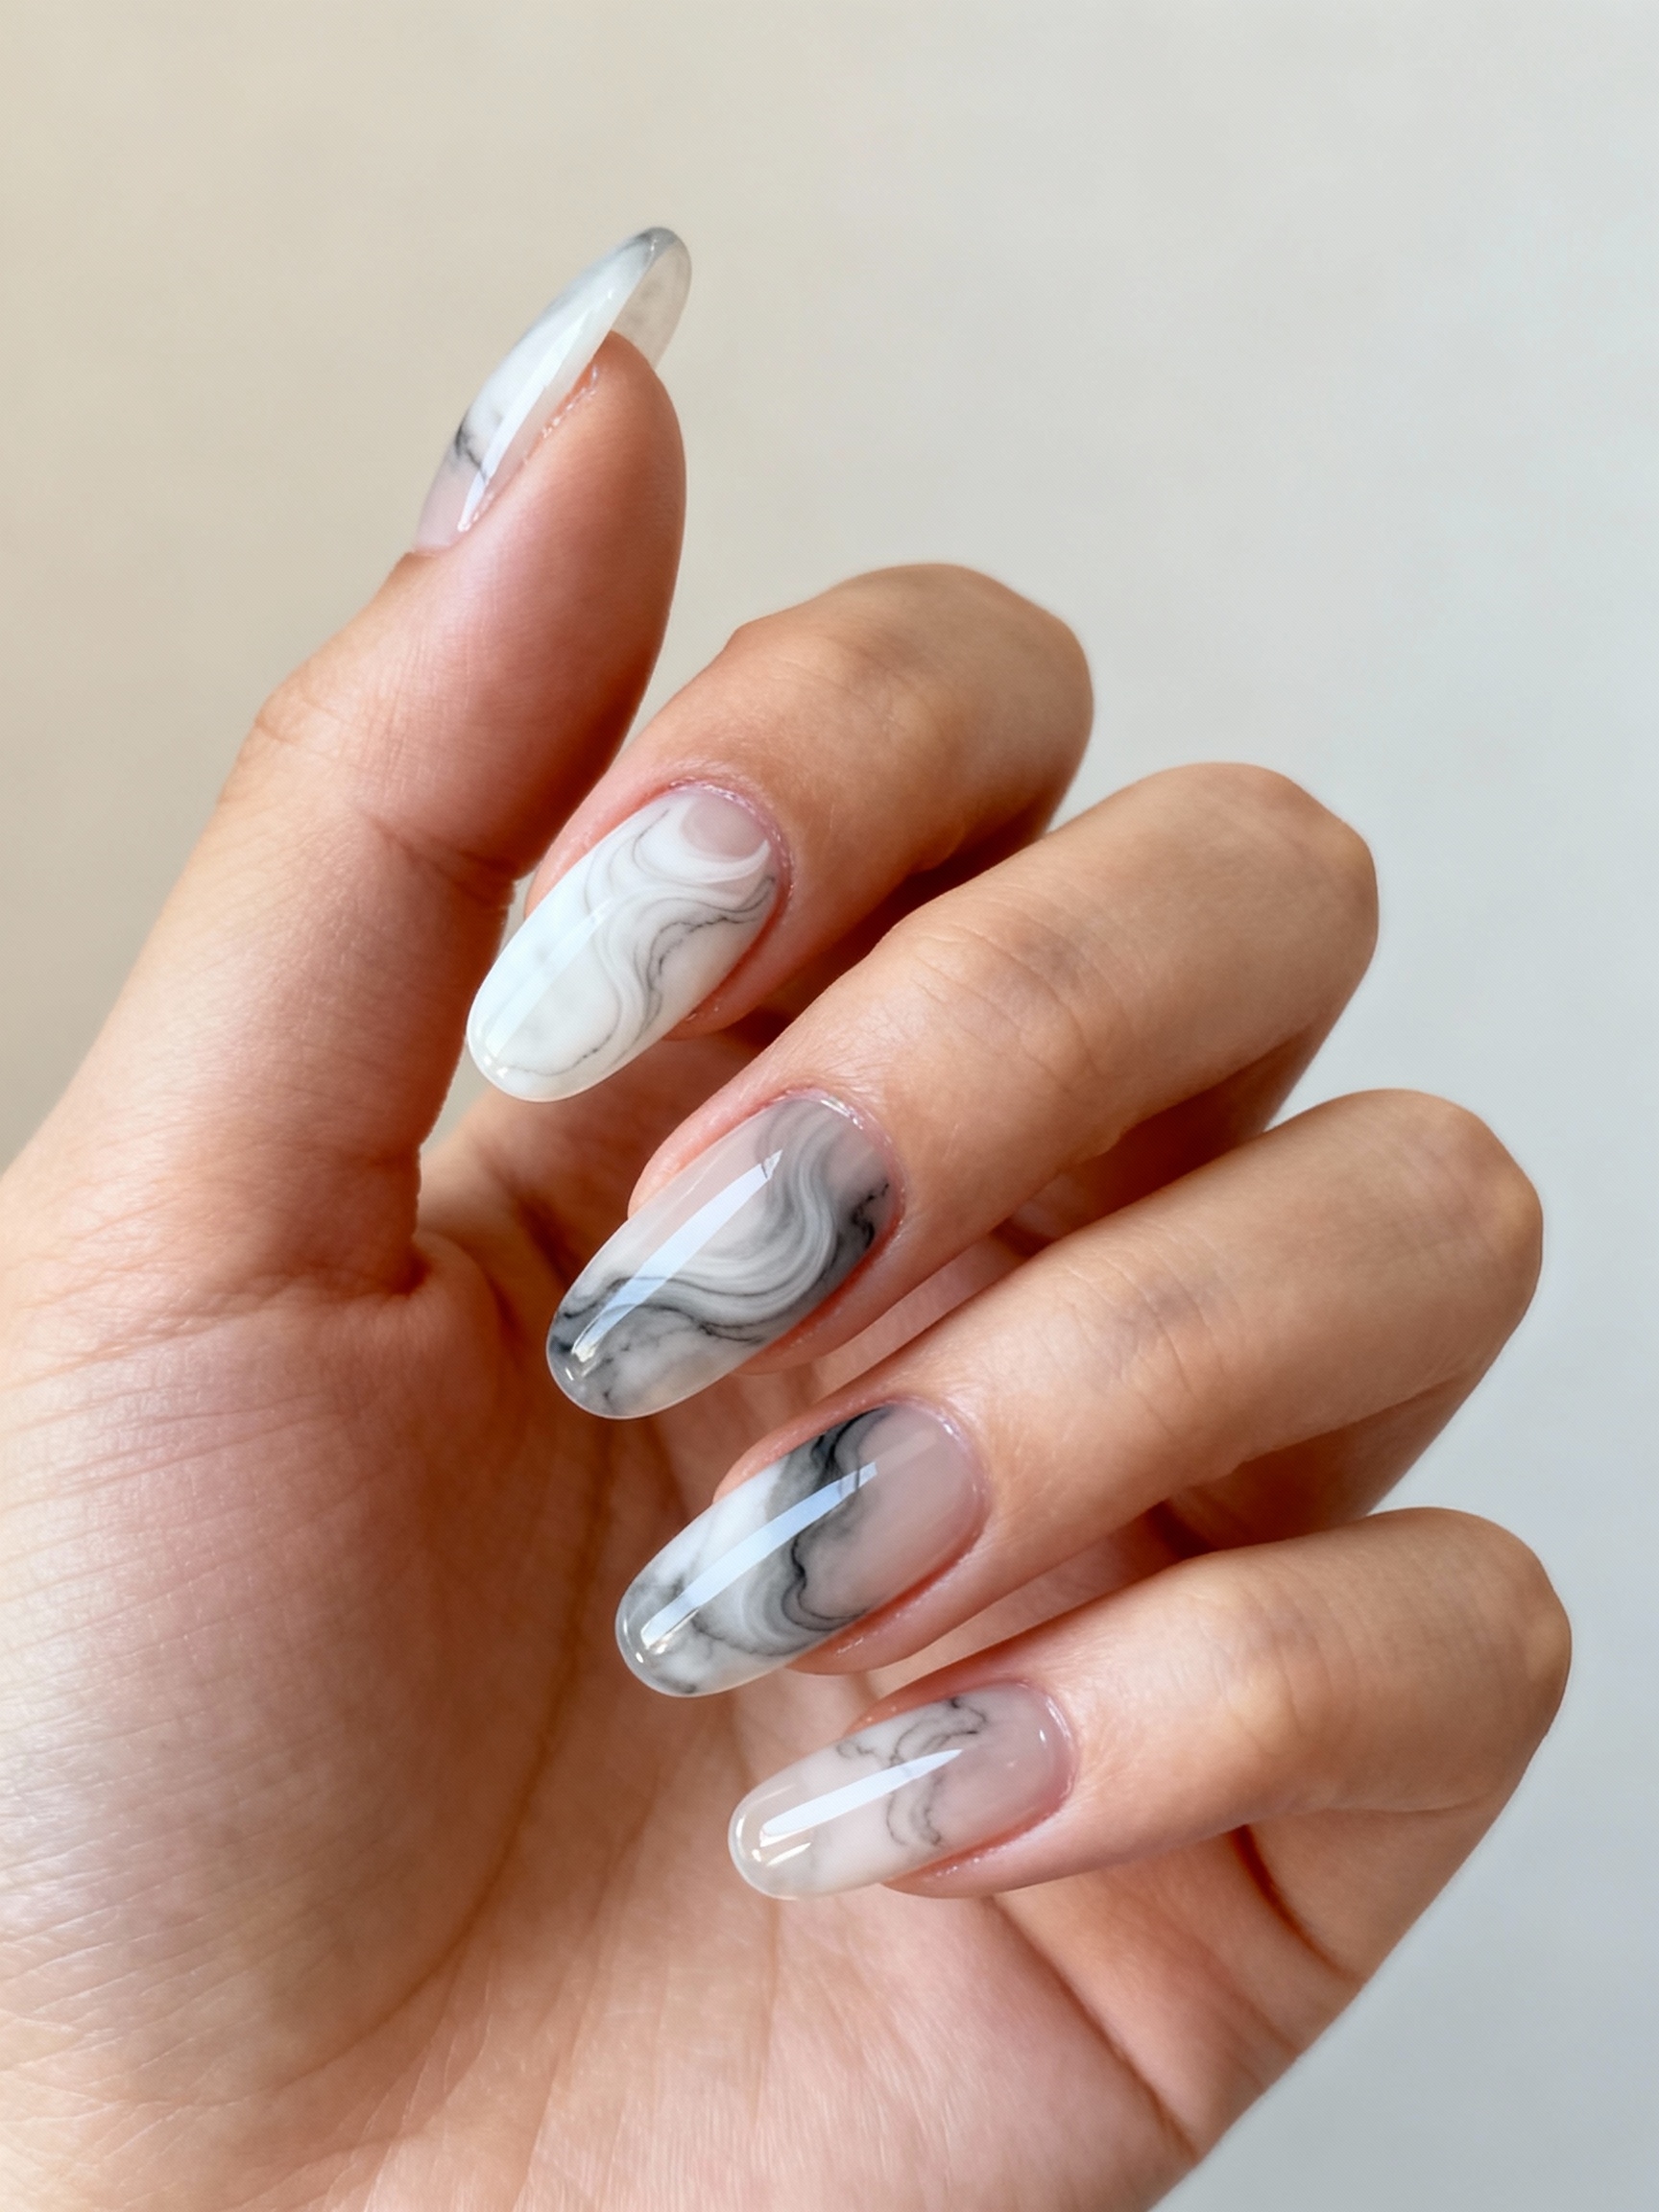
Smoky marble drifts across the nail like ink dropped in water, soft and moody. You layer translucent grays, pearl whites, and wisps of charcoal, then shear them with a touch of alcohol so the colors feather into smoke. No two nails ever come out the same.
A whisper of shimmer near the cuticle adds depth, and keeping the tips airy lets the swirl elongate the nail. The translucency is the whole point, so a heavy hand kills it.
It suits anyone drawn to a cooler, minimalist wardrobe, and it pairs with silver jewelry for instant edge. The effect looks complex, yet it is forgiving to wear because there is no crisp line to chip.
Velvet Matte Meets Chrome
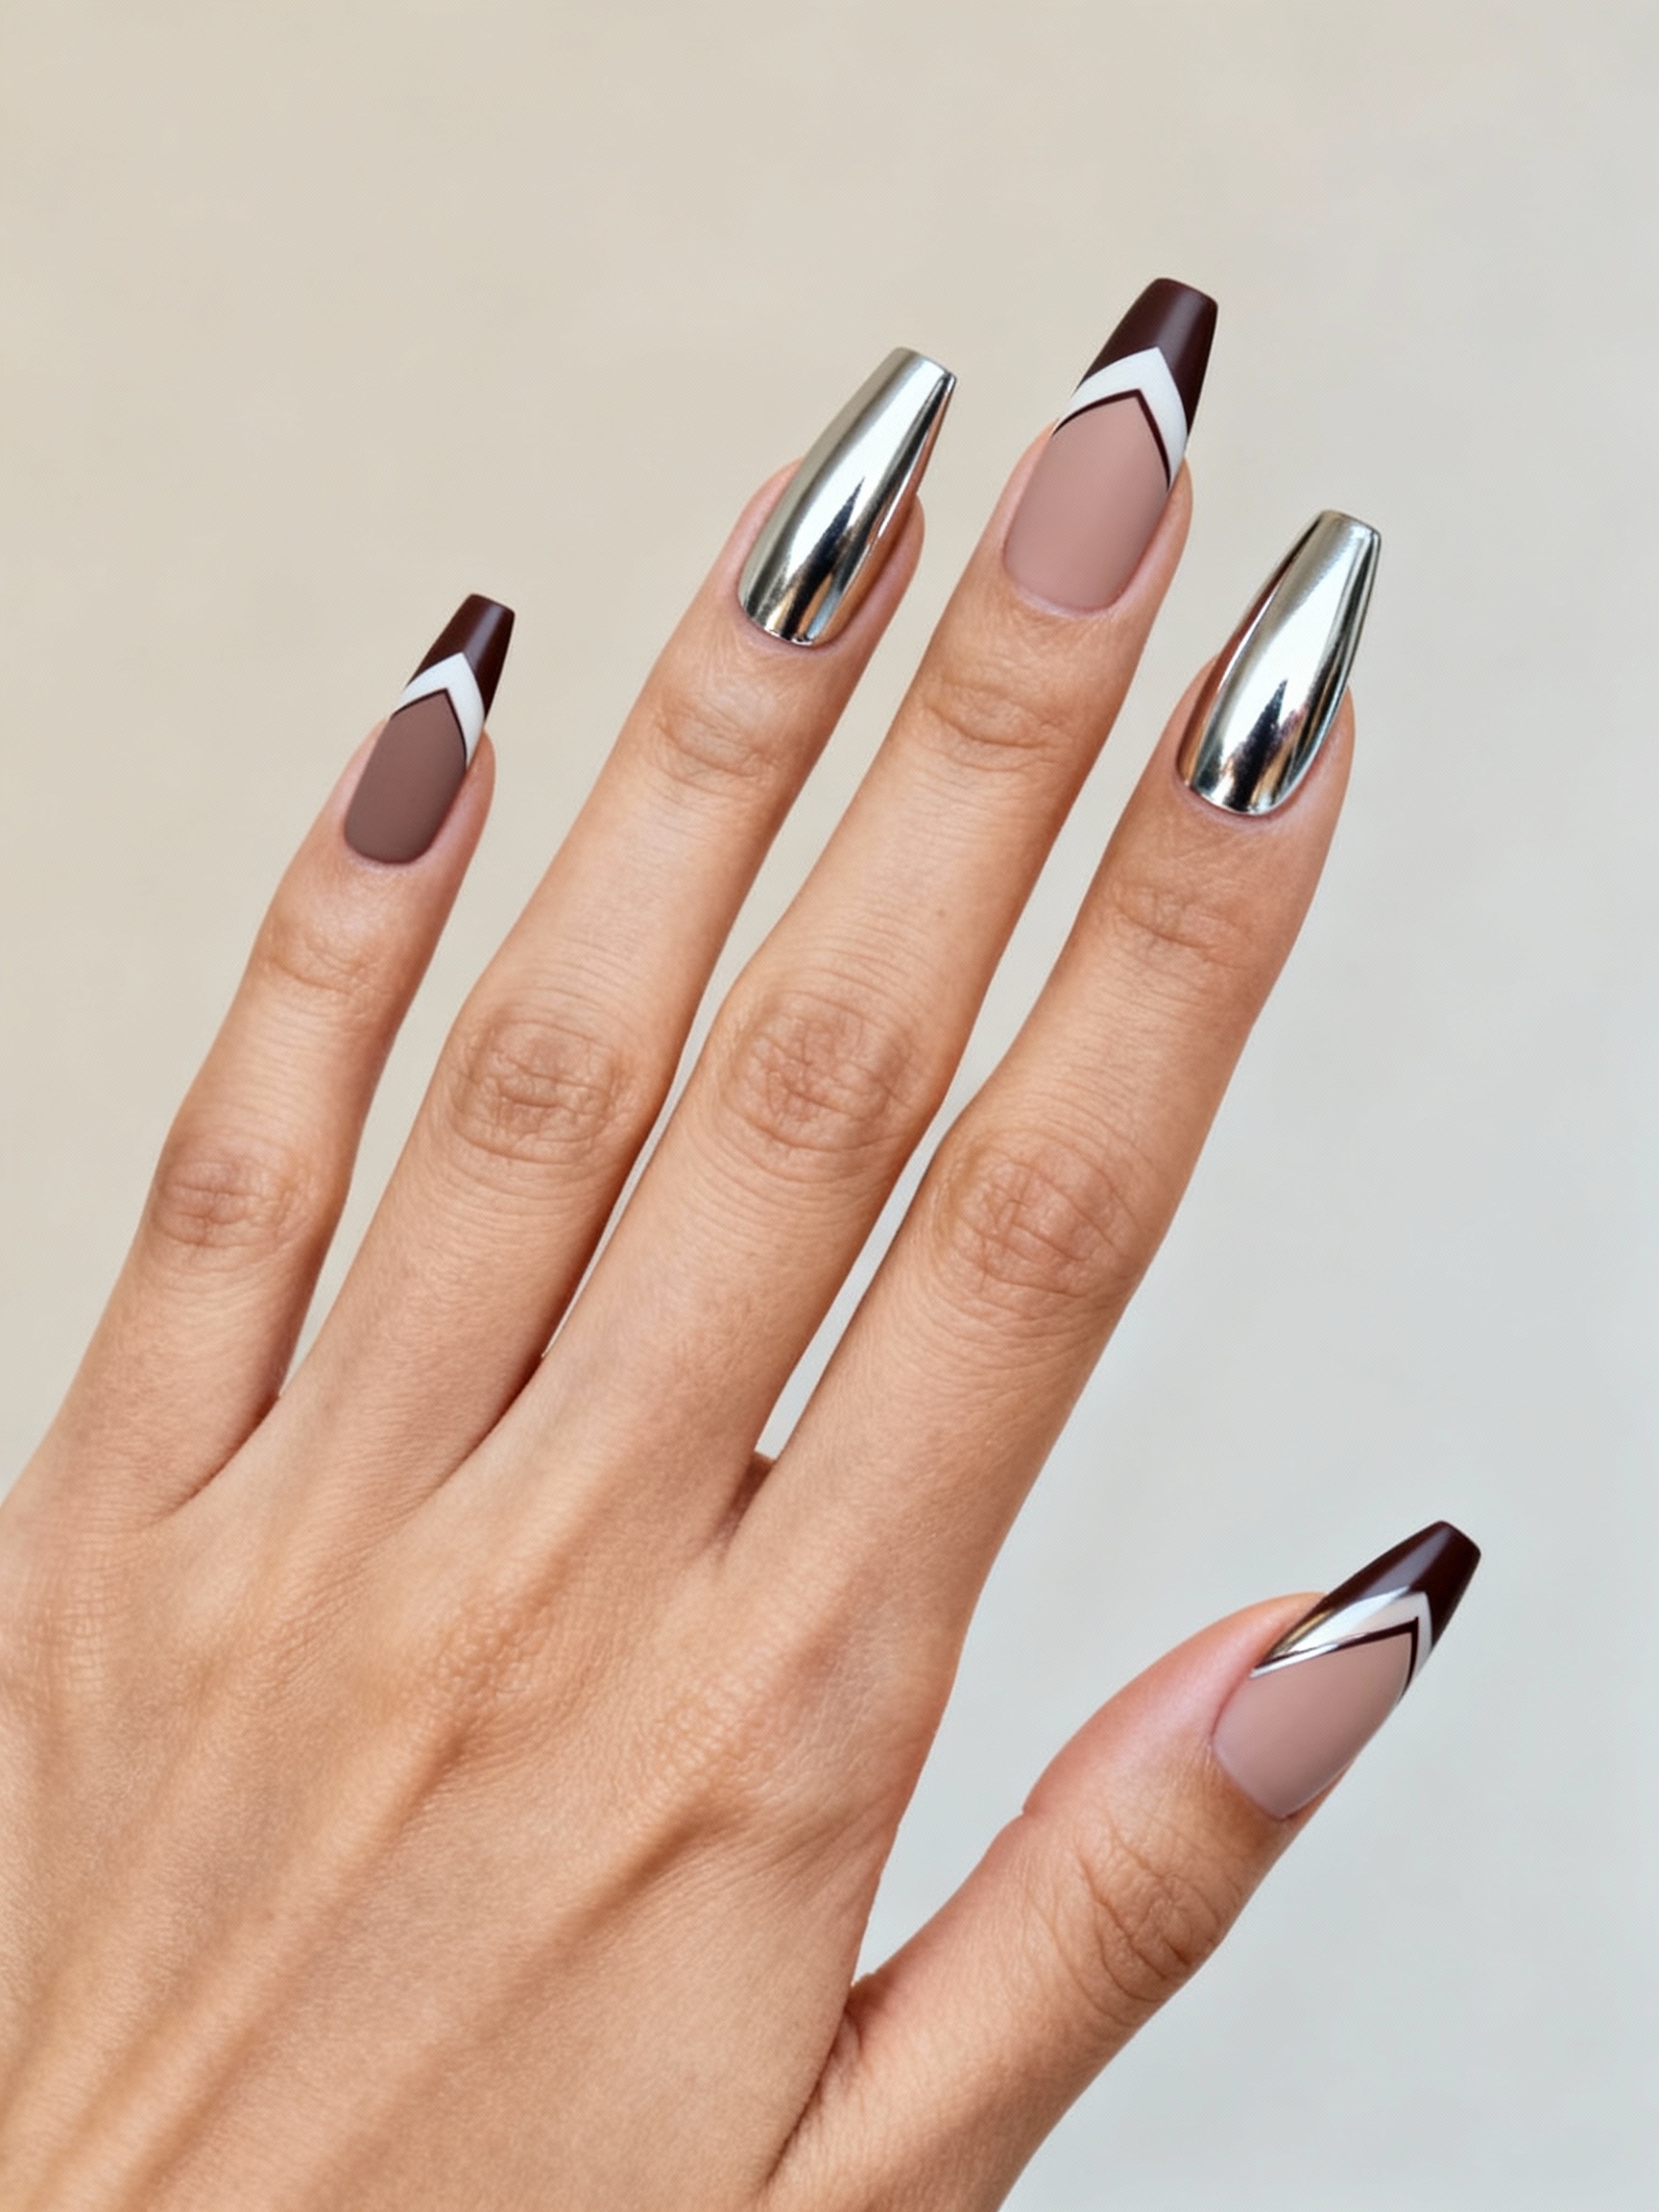
The chicest statement here is a contrast of finishes. You pair a velvet-matte base with razor-sharp chrome accents, and the muted backdrop lets the mirror details gleam without overwhelming the hand. It looks sleek, editorial, and surprisingly wearable.
The key is restraint with the shiny part. A little chrome against a lot of matte is what sells it, so keep the metallic to a half-moon, a thin line, or a single accent. Done right, it photographs like a luxury ad and still survives a workday.
- Matte black with silver chrome tips for high drama
- Nude matte with chrome half-moons for something office-safe
- Dusty rose matte with thin micro-chrome lines for a soft finish
Translucent Sorbet Color Blocks
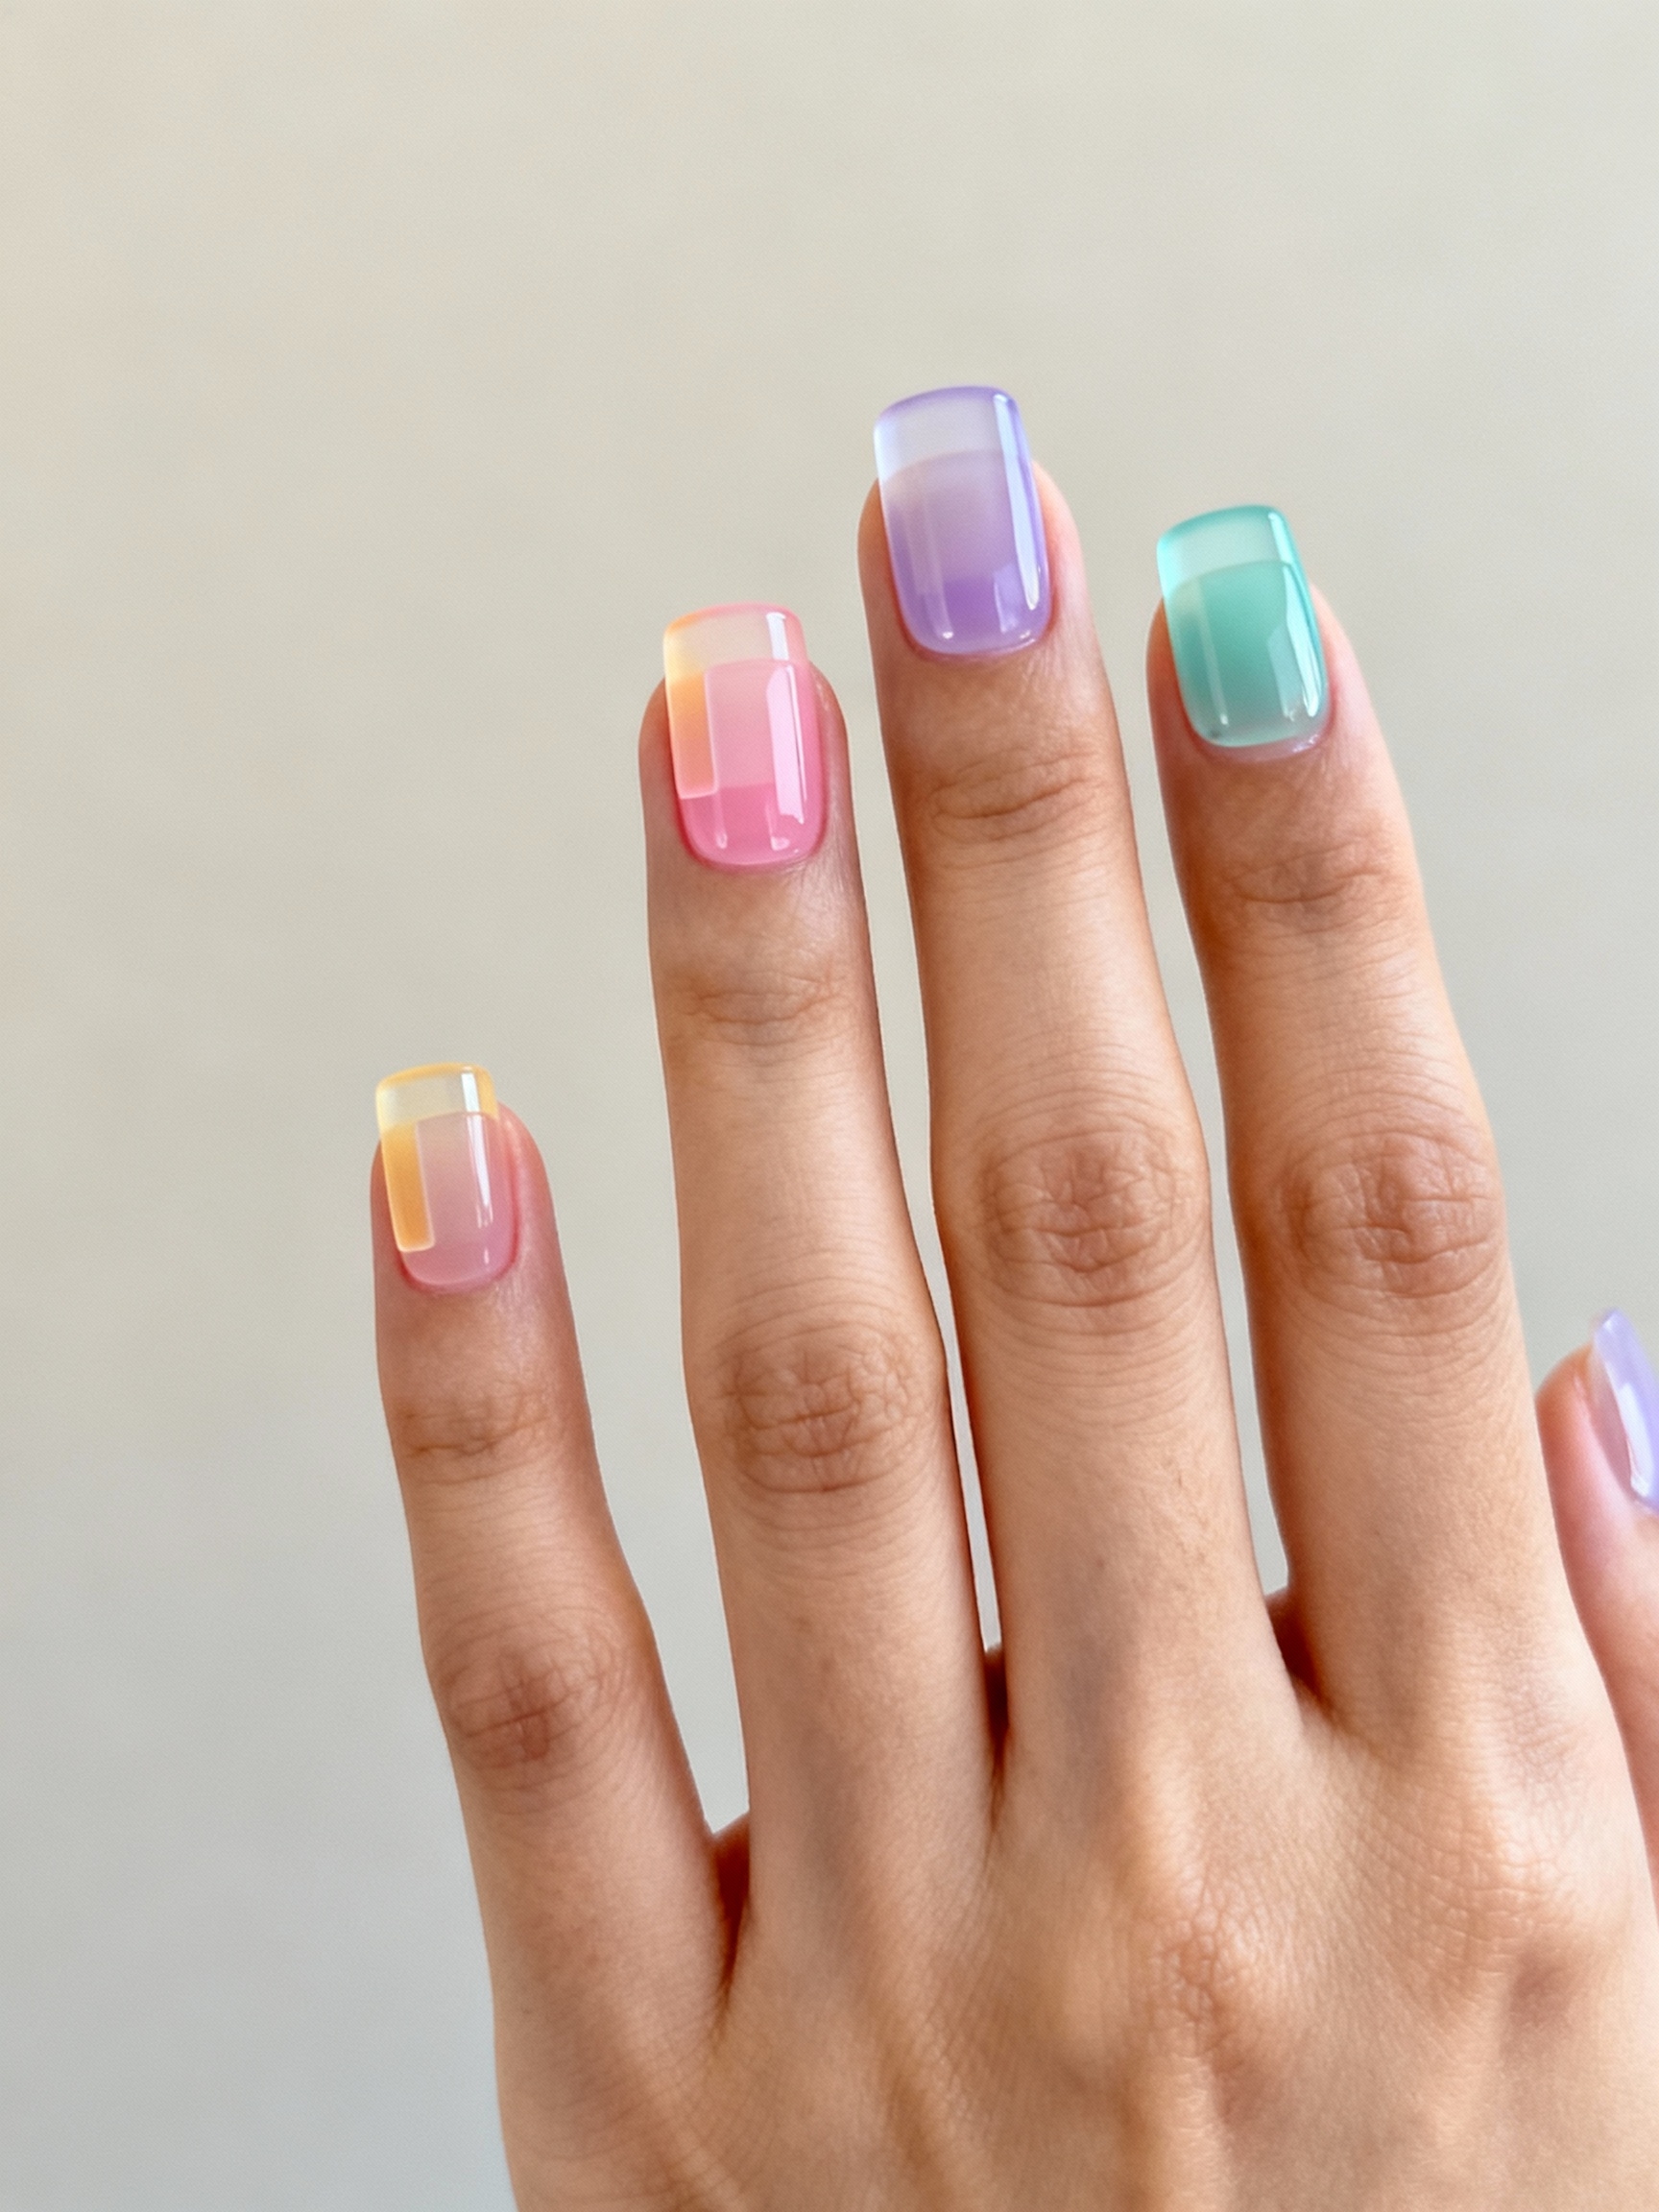
Jelly color blocks are the playful, polished pick. You map translucent squares and stripes in sorbet shades, peach, lilac, lime, so natural light glows straight through them. The sheerness is what keeps a bright look from going heavy.
Let the Light Through
Negative space and crisp borders give it gallery energy, while rounded edges and a little asymmetry keep it modern. I recommend a glossy top to make the jelly look wet and lit.
It pairs well with minimalist jewelry and looks young without trying too hard. Think of it as the aesthetic nail version of color: bright, but edited.
Mirrored Metallic Shard Inlays
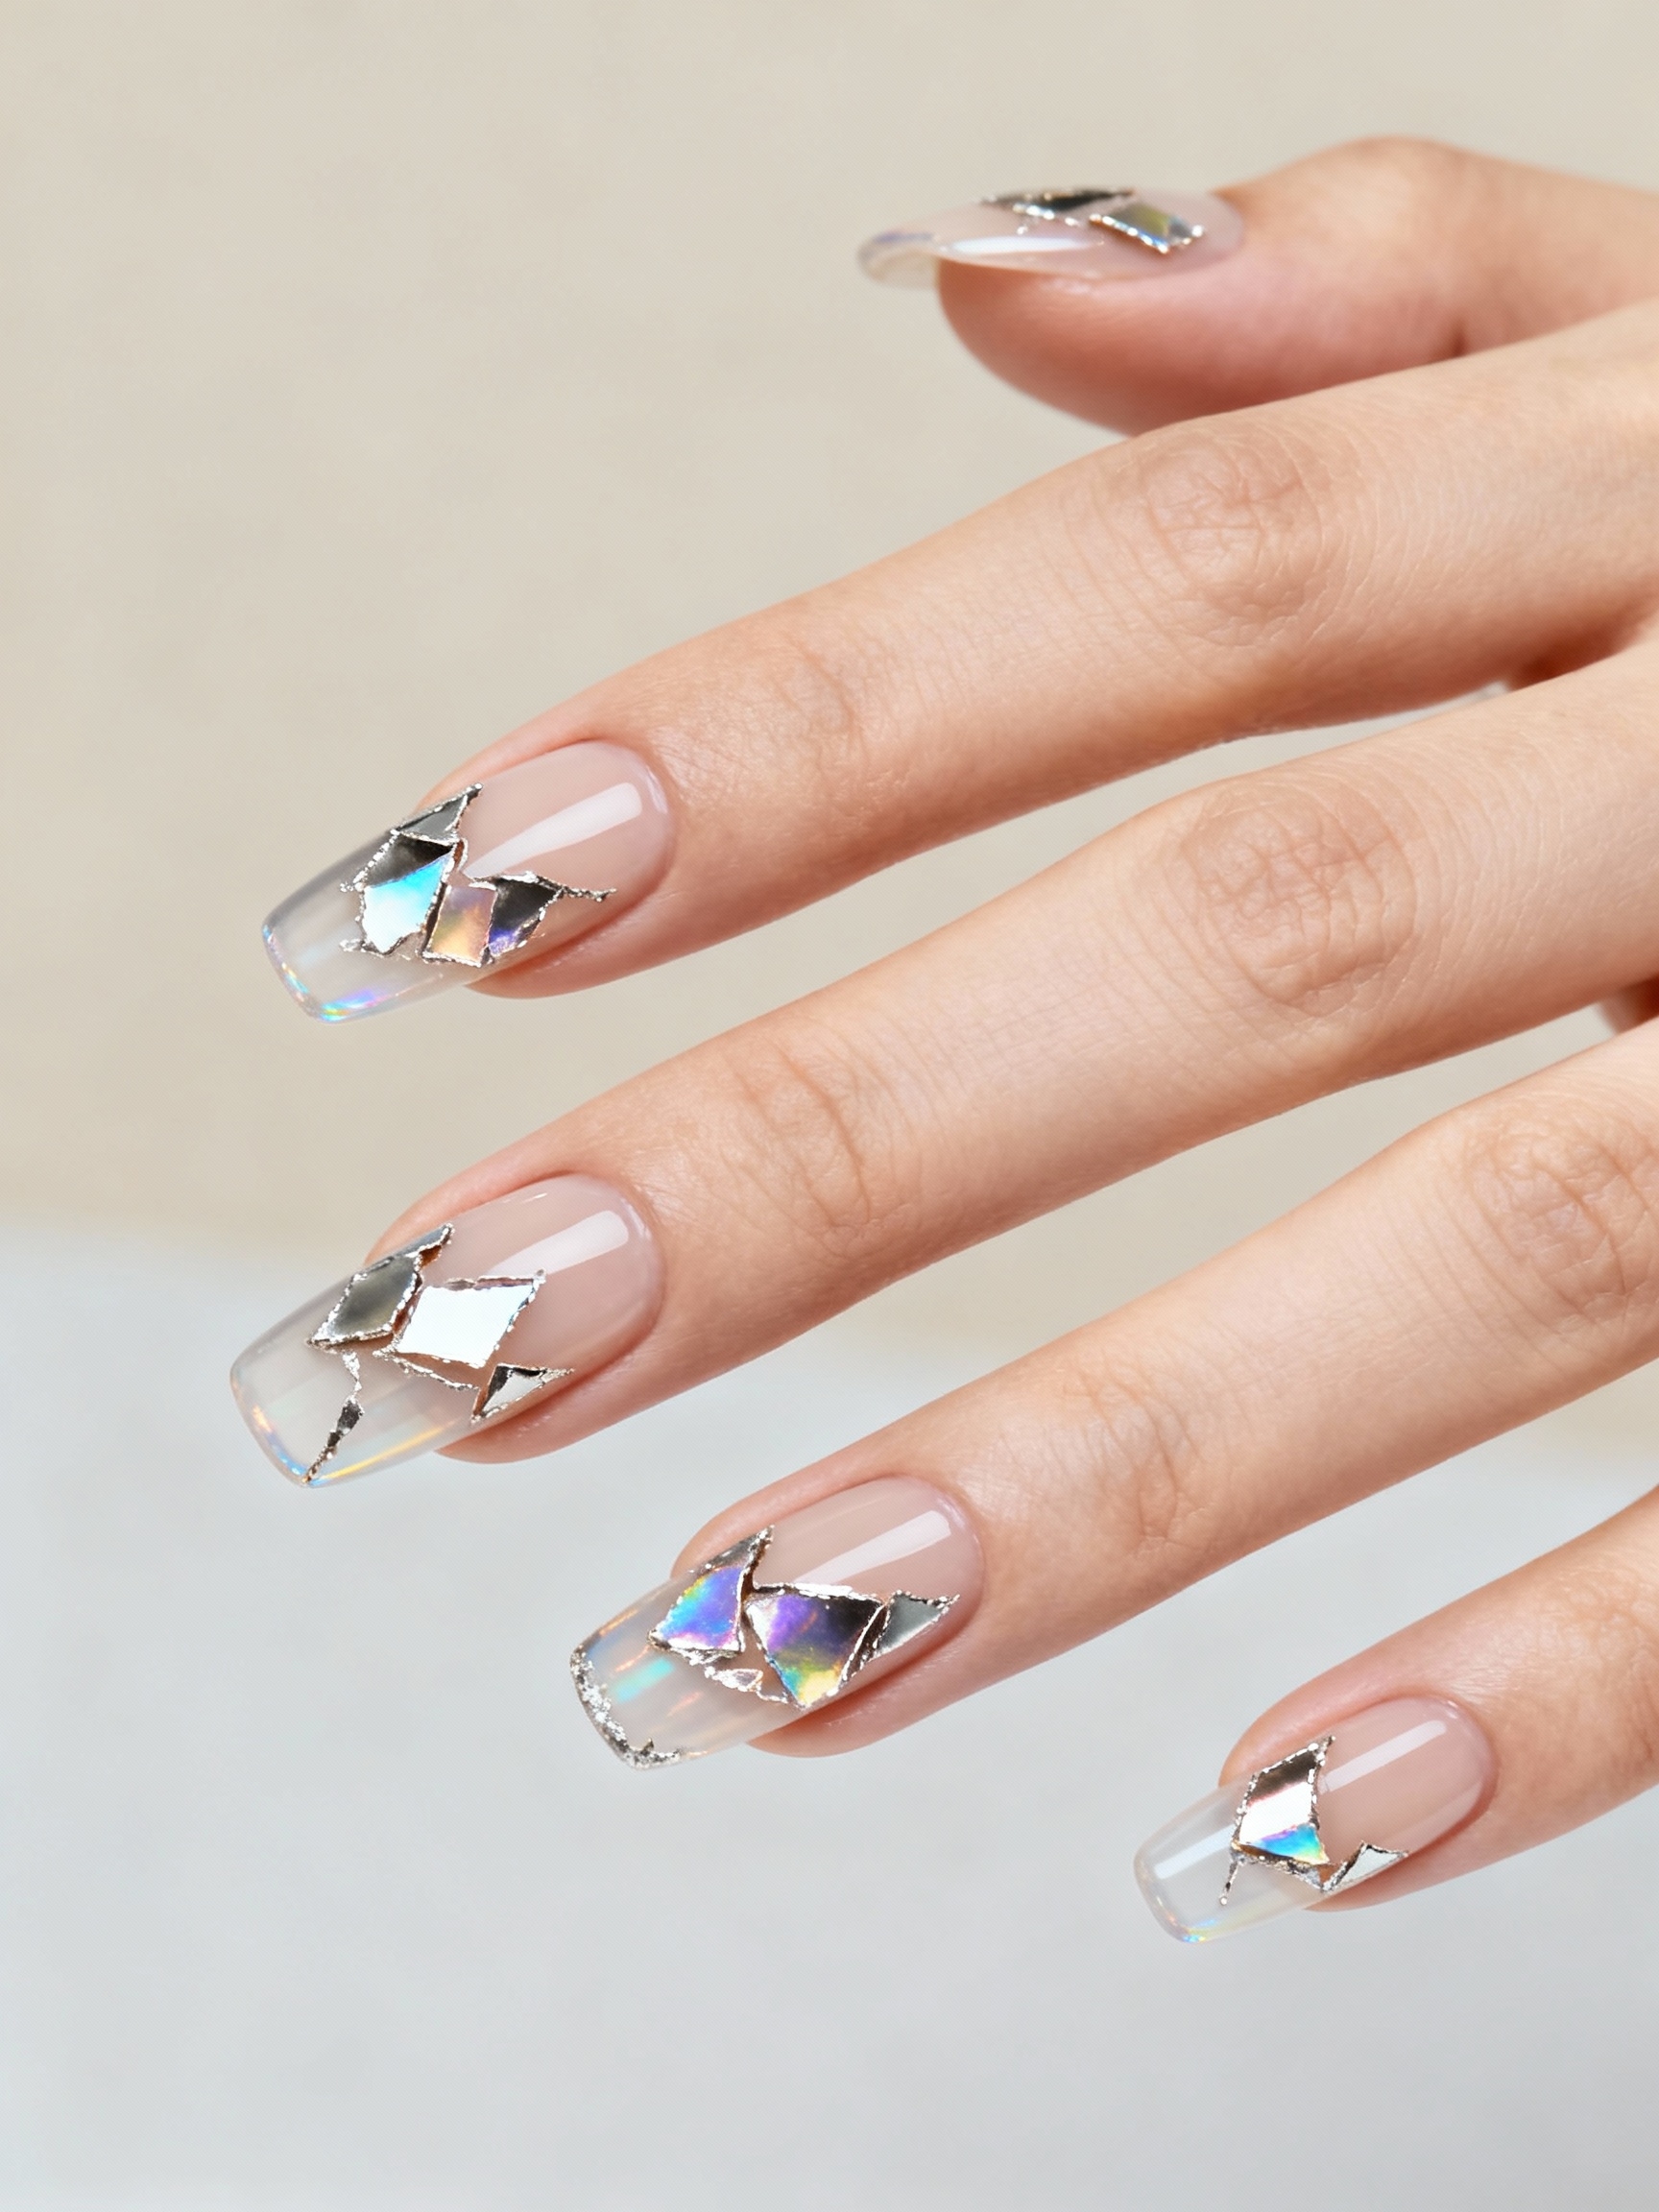
Shard inlays catch light like tiny mirrored mosaics. You layer ultra-thin metallic shards into clear acrylic, then seal them flat under a glassy top, so they flash up close and stay subtle from across the room. This is modern disco, far from chunky glitter.
Cluster the shards near the cuticle and float them in a jelly base for the most depth. Rose gold, chrome, and holographic all work, and because the pieces sit encapsulated, they wear longer than any raised art. It is the rare statement that survives a full set’s life. Pair it with an almond acrylic shape to stretch the fingers.
Common Mistakes to Avoid
The fastest way to make a unique set look cheap is to do too much. Piling three trends onto one hand fights itself, so pick one hero idea and let the rest of the nails stay quiet. Length is the other trap: going longer than your lifestyle can handle means art you chip in two days. And never pry a set off, because that peels layers of your real nail with it; soak it off or see your tech.
One more mistake worth naming is assuming a design will not suit your skin tone. It almost always will, with a small shade shift. Chrome, jelly, and bright color look striking on deep skin when you choose saturated, warm-leaning versions over muted, grayed-out ones. Skipping fills past three weeks is the last common slip, since a grown-out set lifts at the edges and lets water underneath. Book the fill, keep one hero detail, and the look stays sharp.
Pick One Detail and Own It
Unique never meant maximal. The acrylics that turn heads are the ones with a single sharp idea, chrome tips, a smoky swirl, one sculpted petal, carried out so cleanly that the restraint becomes the statement. The busiest hand in the room is rarely the one people remember.
So scroll back through these twelve, find the one detail that makes you pause, and bring a clear photo to your next appointment. Start with one hero look, keep the rest of the hand calm, and let your tech help you tune it to your length and lifestyle. The standout set is closer than it looks.