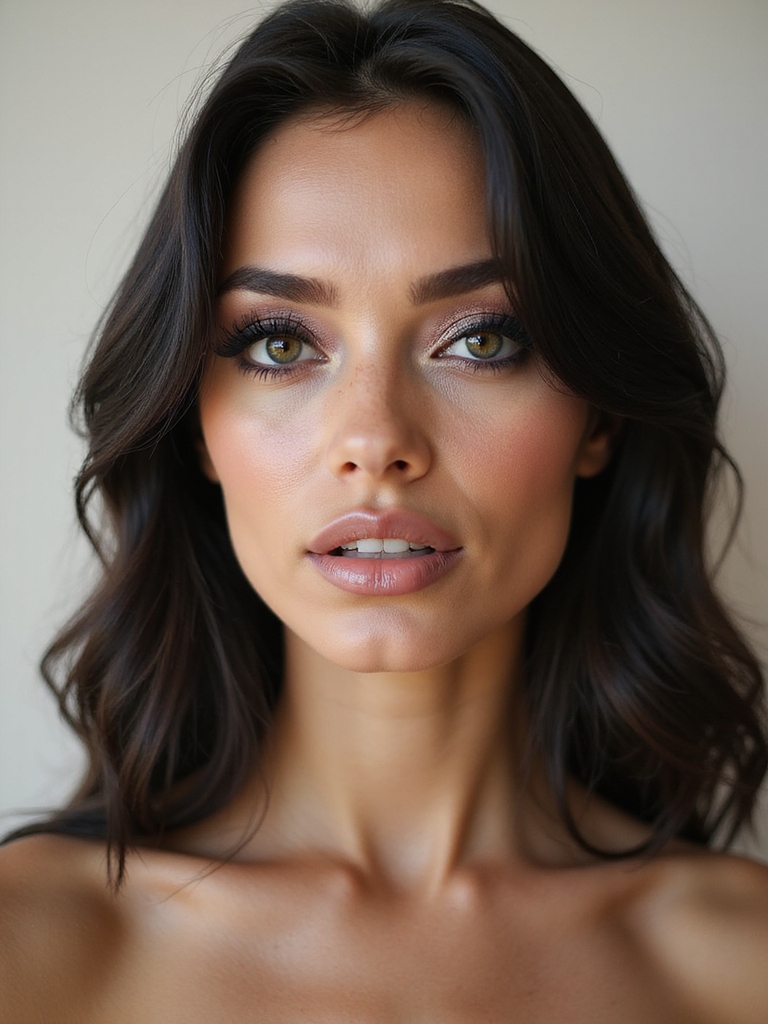
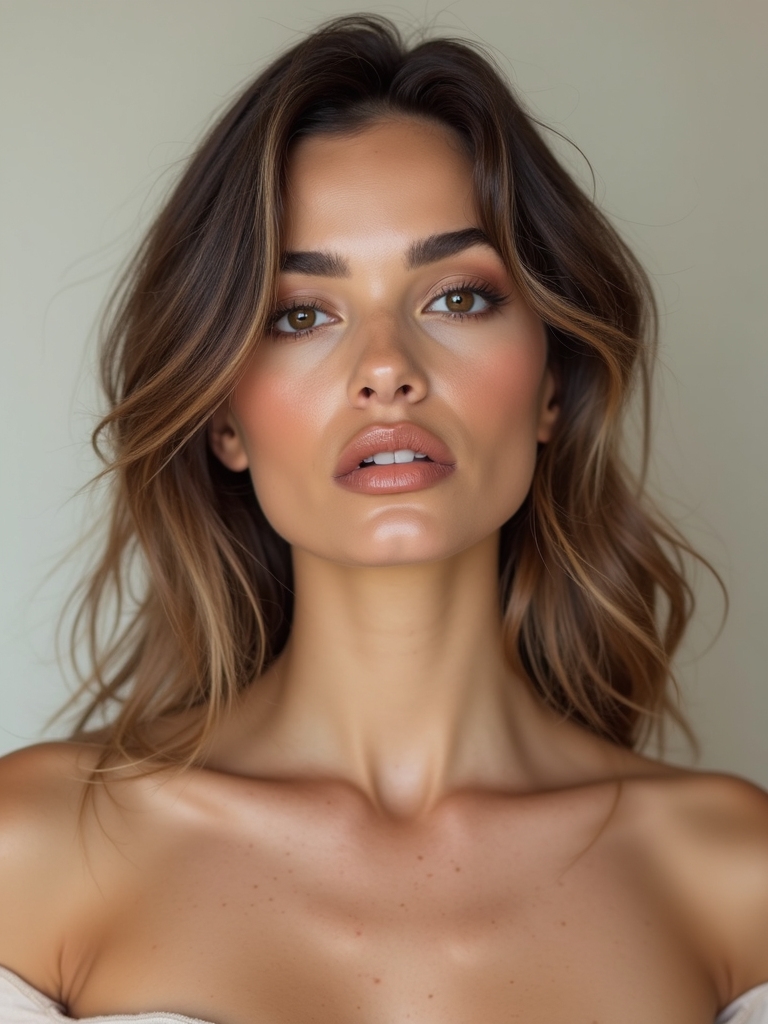
The first alt look I ever did on myself was a smudged black liner I slept in by accident, woke up loving, and then spent a year trying to recreate on purpose. That’s the whole spirit of alt makeup: it isn’t one subculture or one color. It’s permission to break the clean-girl rules and put the art back on your face.
So this is a playground, not a rulebook. Below are fifteen alt ideas, floating liner, metallic freckles, vinyl gloss, color-blocked brows, with the actual technique behind each and how it shifts across skin tones, because a lot of these were styled on fair faces and need a tweak to pop on deep and olive skin.
Quick Answers First
What even counts as alt makeup? Anything that breaks the polished-everyday formula on purpose: graphic liner, unexpected color placement, glossy or matte texture play. It’s a mood, not a single subculture.
Do I need special products? Mostly no. A black gel liner, a clear gloss, and one bright pigment cover most of this. A solid gel liner runs about $8 to $20 and does half the looks here.
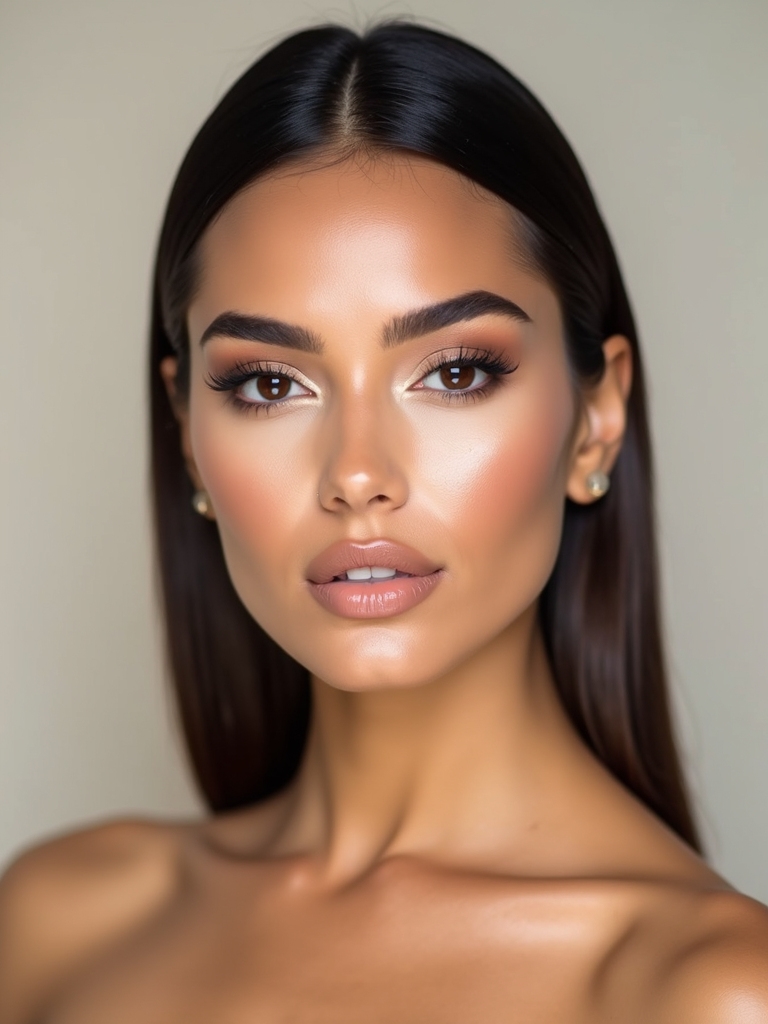
Will these work on deep skin? Yes, and several pop harder. Neons, jewel tones, and metallics glow brighter on deep and olive skin; just choose pigmented formulas over sheer ones so the color shows.
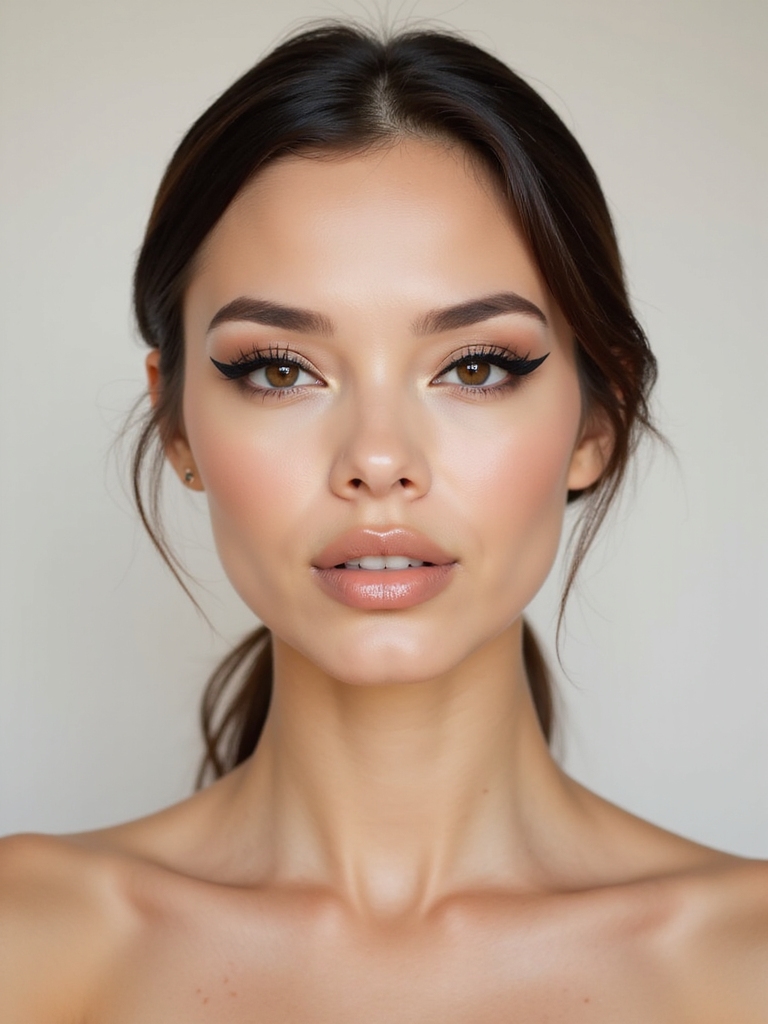
Smudged Creamy Tightline
This is the gateway alt look, the one I fell for by accident: a creamy black tightline smudged soft so the eye looks lined from the inside out. It’s grungy and a little undone, and it forgives a shaky hand completely. Here’s how to fake the slept-in version on purpose.
- Pack a creamy black pencil into the upper and lower waterline.
- Smudge both edges with a small brush or fingertip while it’s still movable.
- Press a little black or brown shadow over the smudge so it stays put all day.
- Keep skin bare and dewy so the eye looks intentional and styled.

Glossy Eyelids, Minimalist Face
Alt isn’t always dark. A high-shine glossy lid over an otherwise bare face is quietly subversive, all texture and no color. It’s the most editorial trick here and the one that needs the most planning, since gloss moves. Here’s how to keep it wearable.
- Prime and set the lid so the gloss has a dry base to grip.
- Use a dedicated eye gloss or clear brow gel, not lip gloss, which creases.
- Keep the rest of the face minimal, just skin, brows, and balm.
- Reapply midway through a night out, since gloss is the one finish that won’t last untouched.
New to alt makeup? Match a starting look to your comfort level.
🎯Dip a toe in
Smudged tightline, glossy lids, or a neon inner corner; subtle, fast, and easy to wash off if you chicken out.
🎯Go full art
Color-blocked brows, floating liner, or face gems; bold, graphic, and worth the extra ten minutes.
Floating Negative-Space Winged Liner
A floating wing draws the liner above the crease with a gap of bare lid underneath, so the line seems to hover. It’s the look that turns a plain eye into something graphic, and it photographs incredibly. The bare gap is the whole point, so precision matters here.
- Map the floating line on bare lid with a light pencil before any liquid.
- Use a fine brush and gel liner so the edge stays crisp over the crease.
- Leave a clean strip of bare lid below the line; that negative space is the design.
- On hooded eyes, draw the line with your eye open so it shows when you blink.
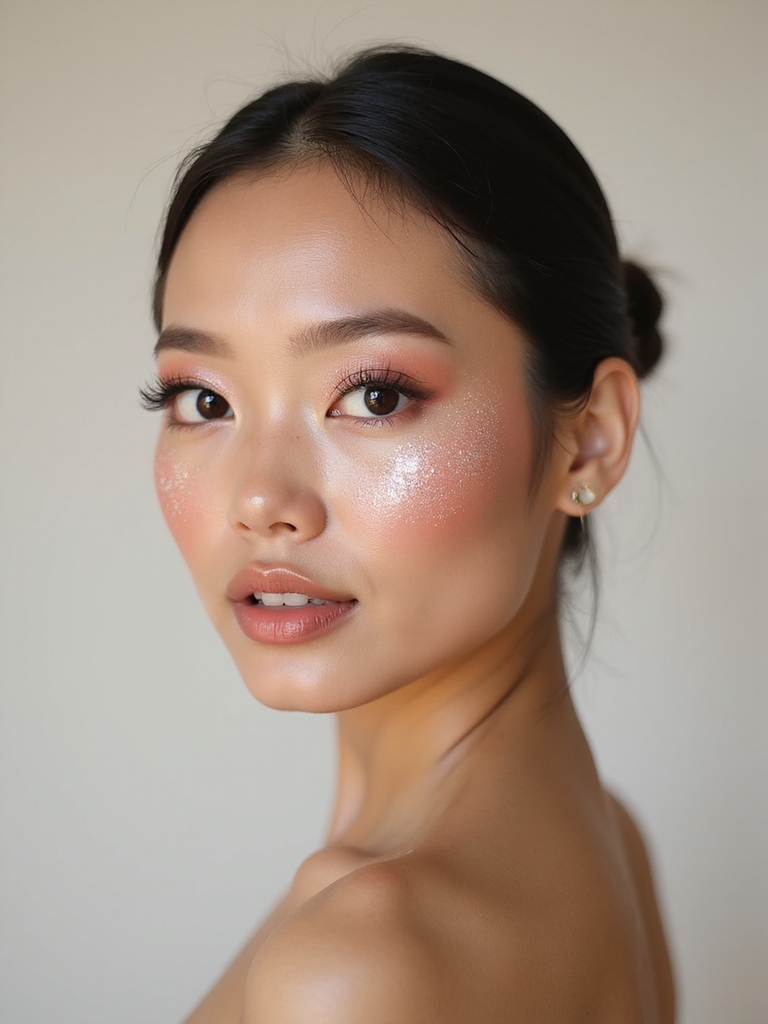
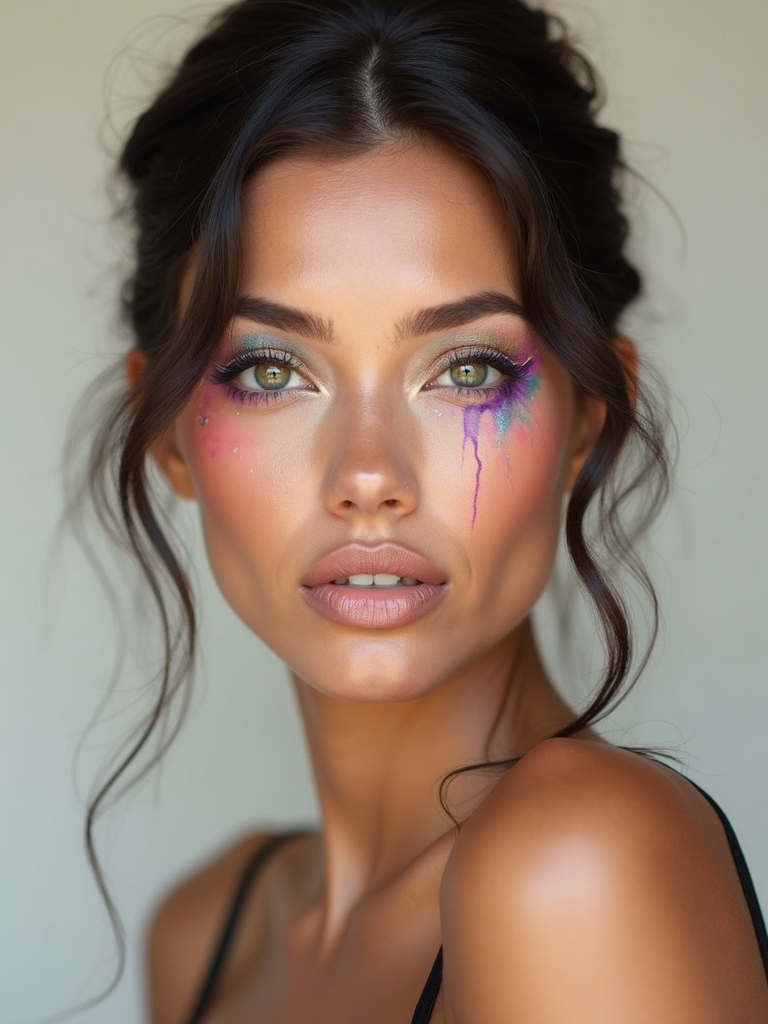
Metallic Freckles, Foiled Highlights
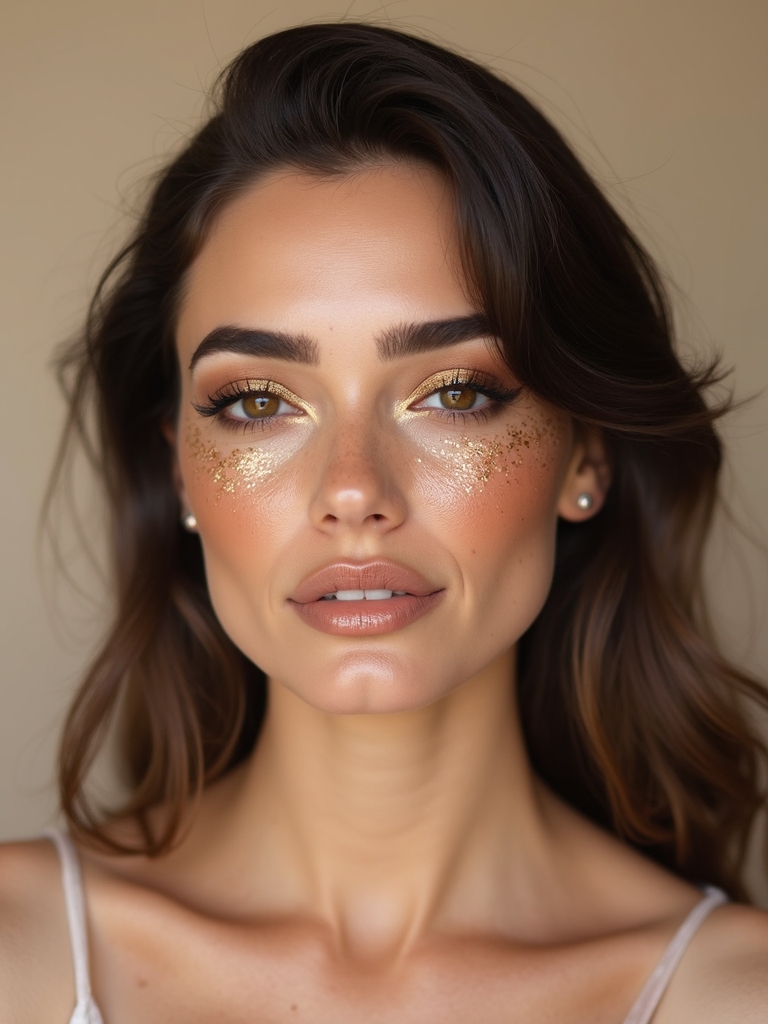
Metallic freckles scatter tiny dots of gold or silver foil across the nose and cheeks, then a foiled highlight on the high points ties it together. It’s playful and a little futuristic, like glitter grew up.
Keeping the Freckles Believable
I dot the freckles with a thin brush in two metallic tones so they look natural, then press a foil or liquid metallic onto the cheekbones. I tell clients the secret is keeping the dots irregular, so they look like real freckles, scattered and uneven.
Gold and bronze metallics glow on deep and olive skin; silver and pearl suit cooler fair skin. Either way, set everything else matte so the metal is the only thing catching light.
🅰️Texture play
Choose this if you like alt that’s subtle, glossy lids and smudged liner read edgy up close but still pass at work.
🅱️Graphic color
Choose this if you want to be seen, floating liner and color-blocked brows are loud, bold, and unmistakably alt.
Monochrome Metallic Draping
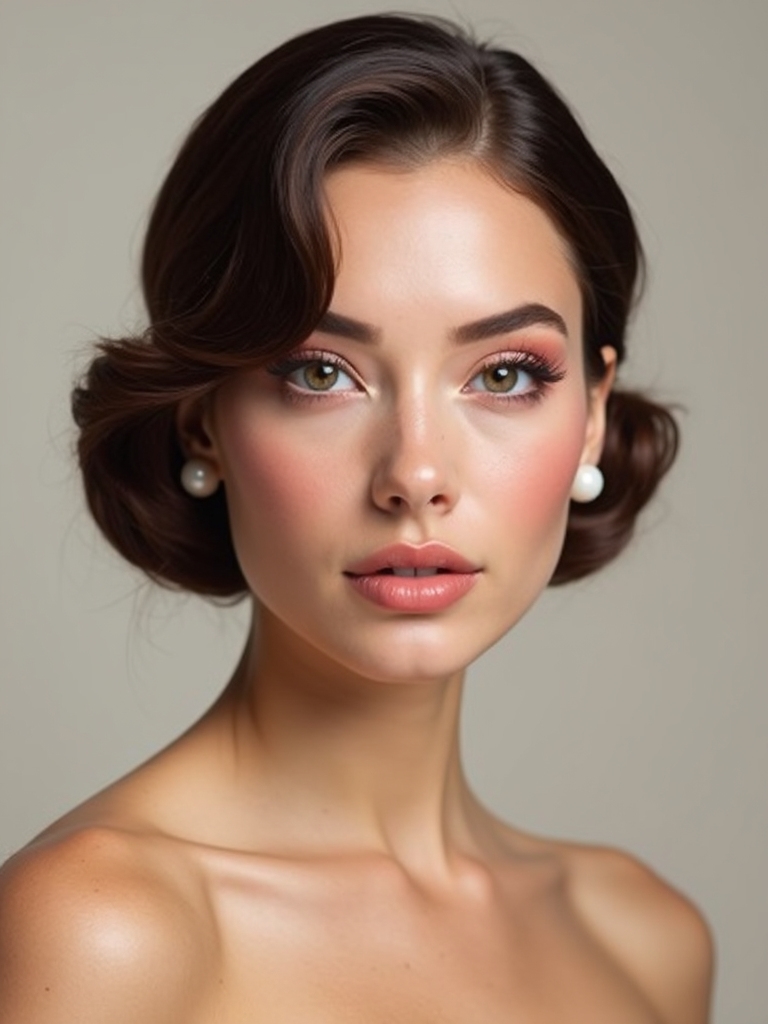
Draping sweeps blush up from the cheek toward the temple for a flushed, lifted glow, and the alt version adds a metallic sheen in the same tone across lid, cheek, and temple. The whole face glows in one color family, which is what makes it feel intentional rather than loud.
I work one cream tone everywhere, then a metallic topper on the high points. Pick a shade that flatters you and the draping does the lifting.
- Choose one tone, terracotta, plum, or copper, across eye and cheek.
- Sweep the blush high and back toward the temple for the lifted effect.
- On deep skin, a copper or bronze metallic glows where a pale pink disappears.
Electric Neon Inner-Corner Pop
One dot of electric neon in the inner corner is the cheapest way to make a simple eye look styled, and it’s pure alt energy. The rest of the eye can stay neutral so the pop does all the talking. Here’s how to make it glow.
- Tap a neon cream or pressed pigment into the inner corner with a fingertip.
- Pick a shade that contrasts your eye color for the strongest pop.
- Neon glows harder on deep skin, so go all the way in with coral, lime, or cobalt.
- Layer it over a white base if your neon looks weak on its own.
👍Why alt makeup is worth trying
- +Most looks run on products you already own plus one bright pigment.
- +It’s forgiving; smudge and blur are features, not failures.
- +Brights and metallics pop noticeably harder on deep and olive skin.
👎What to keep in mind
- –Graphic and glossy looks need a primed, set base or they smear.
- –Gloss and bold color want a touch-up through a long night.
- –Piling on several statements at once muddies the whole face.
Smudged Liner, Vinyl Gloss Shine
This one layers two alt ideas: a smudged grunge liner with a vinyl gloss over the lid for wet, patent shine. It’s moody and high-impact, the kind of eye that looks like a fashion editorial.
Layering Matte and Gloss
I smudge the liner first and let it set, then layer eye gloss only over the center of the lid so the shine catches light. The contrast between matte smudge and wet gloss is what makes it interesting.
It suits every skin tone, and on deep skin a smudged espresso or jewel liner under the gloss looks richer than flat black. Just know the gloss needs a touch-up through the night.
Pastel Lashes, Tinted Brows
Color on the lashes and brows is one of the easiest alt switches, a pastel mascara on the tips and a matching brow tint that turns a familiar face unfamiliar in the best way. It’s soft, dreamy, and a little fairy-tale.
Choosing a Wearable Pastel
I coat lashes in a clear mascara first, then a pastel one on the tips only, and brush a wash of the same tone through the brows. Keeping the color on the tips keeps it soft and wearable.
Pastels read clearest on darker lashes if you build them, and on deep skin a brighter, more pigmented pastel shows up where a chalky one fades. Pair it with bare skin so the color leads.
“If a bold color looks muddy on you, it’s usually the base, not the shade. Lay a white or skin-tone primer under brights so they stay true, and the same neon that looked dull suddenly glows.”
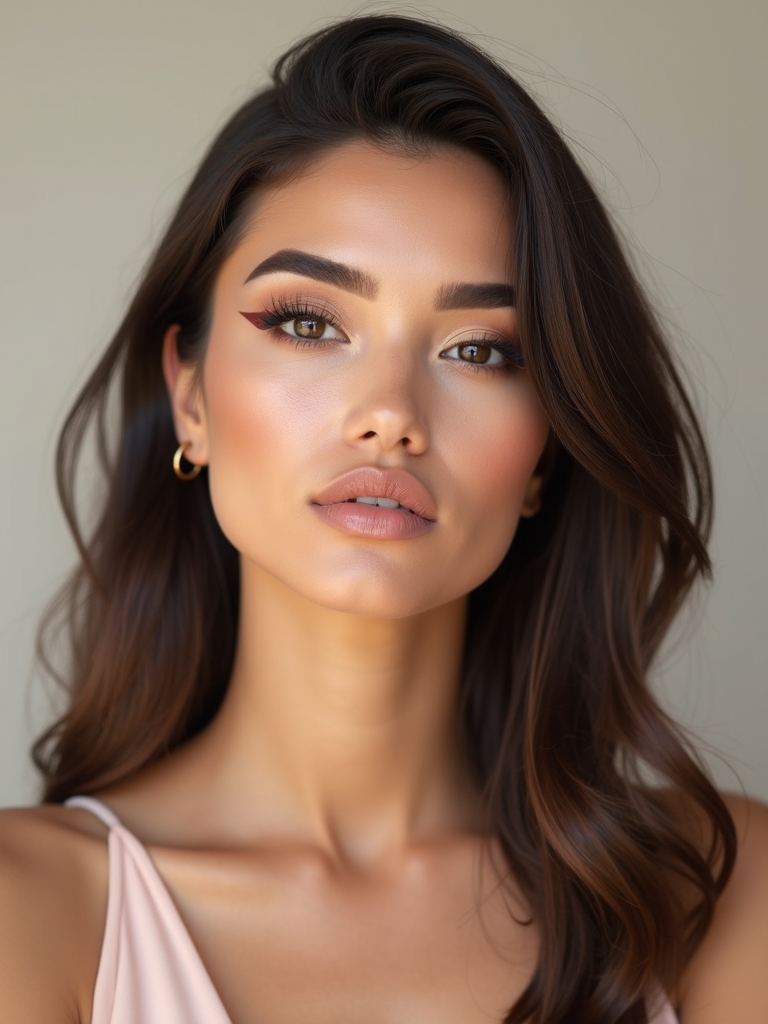
Glossy Feline Winged Gaze
A long, feline wing with a glossy lid is the sleek end of alt, all elongation and shine. Clients ask me for this one constantly. The wing stretches the eye out toward the temple, and a clear gloss over the lid keeps it wet and modern.
I draw the wing long and lifted, then add gloss only after the liner sets so it doesn’t drag. It’s a striking look on every skin tone, and it pairs with a bare lip so the eye stays the focus. For the liner itself, the cat-eye makeup guide goes deeper on shaping the wing.
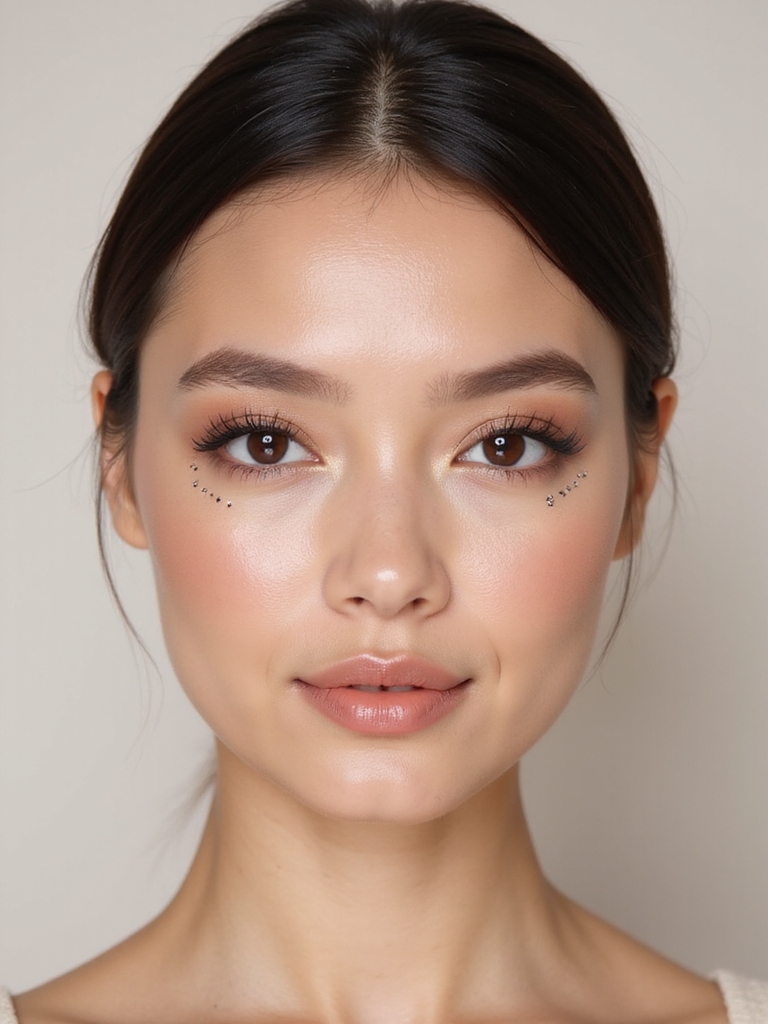
Freestyle Face Stickers
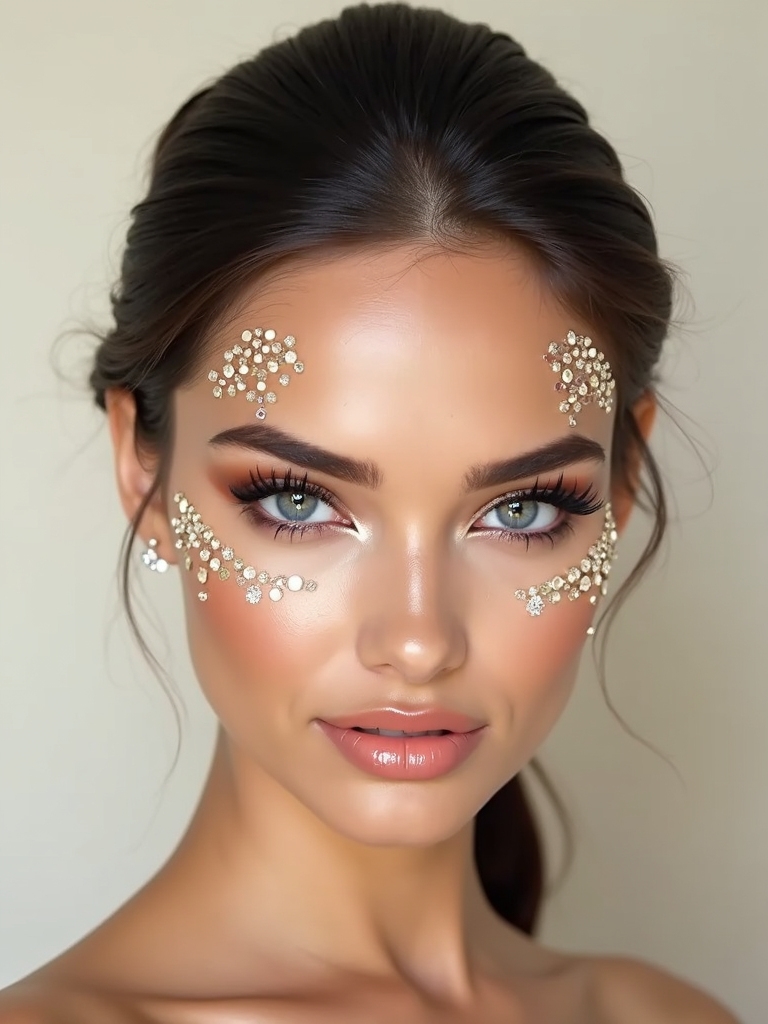
Face stickers and gems are the most forgiving alt look going, because there’s no blending and no skill, just placement. Stars near the temple, a row of gems under the brow, a cluster at the inner corner. Here’s how to make them look styled and deliberate.
- Do your eye makeup first, then place gems last with a dot of lash glue.
- Cluster them in odd numbers and let them trail thinner outward.
- Match metal gems to your undertone: gold for warm, silver for cool.
- Press each one for a few seconds so it actually stays through the night.
Blurred Overdrawn Cupid’s Bow
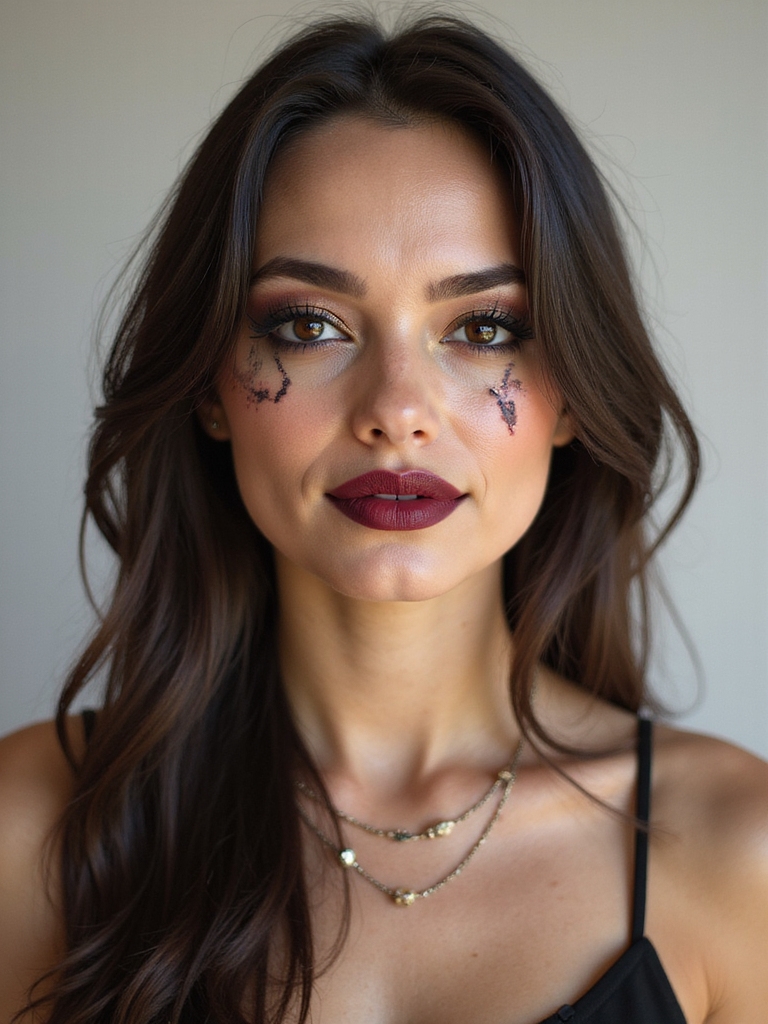
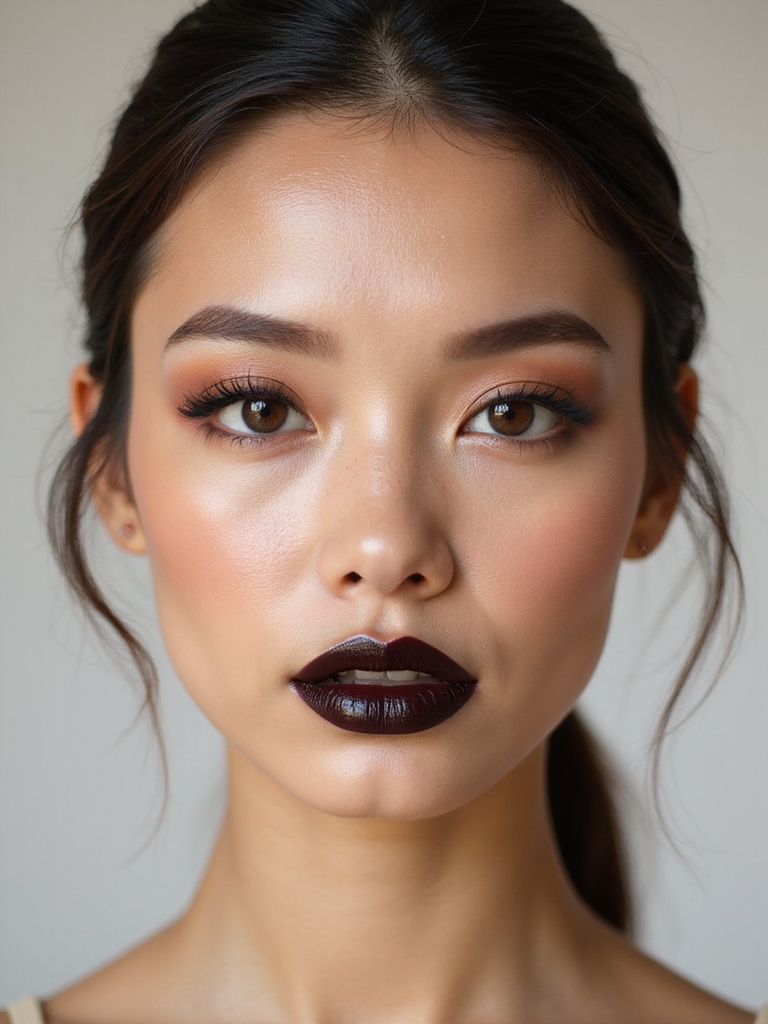
A blurred, slightly overdrawn cupid’s bow gives a soft, bitten-but-bigger lip that leans more grunge than glam. The blur is what keeps it alt and a little undone, like the color faded just so.
I overline the bow by a hair, fill with a creamy tint, then blot and blur the edges with a fingertip for a soft, faded finish.
- Overline only the cupid’s bow and center, never the full lip line.
- Blot and press so the color stains rather than sits on top.
- On deep skin, a berry or brick stain blurs softer than a pale nude.
Ethereal Prism Luminous Skin
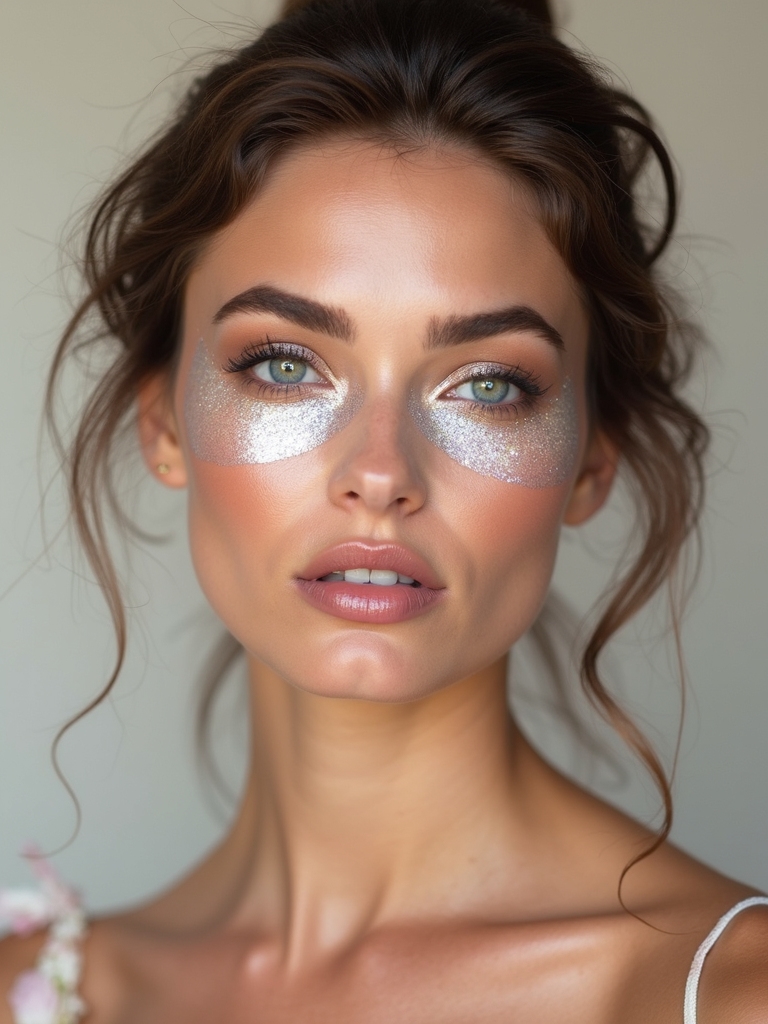
Prism skin is the dreamy, otherworldly end of alt, a multichrome highlight that shifts color, pink to blue to green, as the light moves across the face. It turns plain glowing skin into something a little alien and lovely. Here’s how to wear it without looking sweaty.
- Place the prism highlight only on the high points: tops of cheeks, brow bone, cupid’s bow.
- Press it on with a finger over a dewy base so it melts in.
- Keep the rest of the skin soft-matte so the shift looks like a glow, not oil.
- It shows beautifully on every skin tone, since the multichrome shifts against any depth.
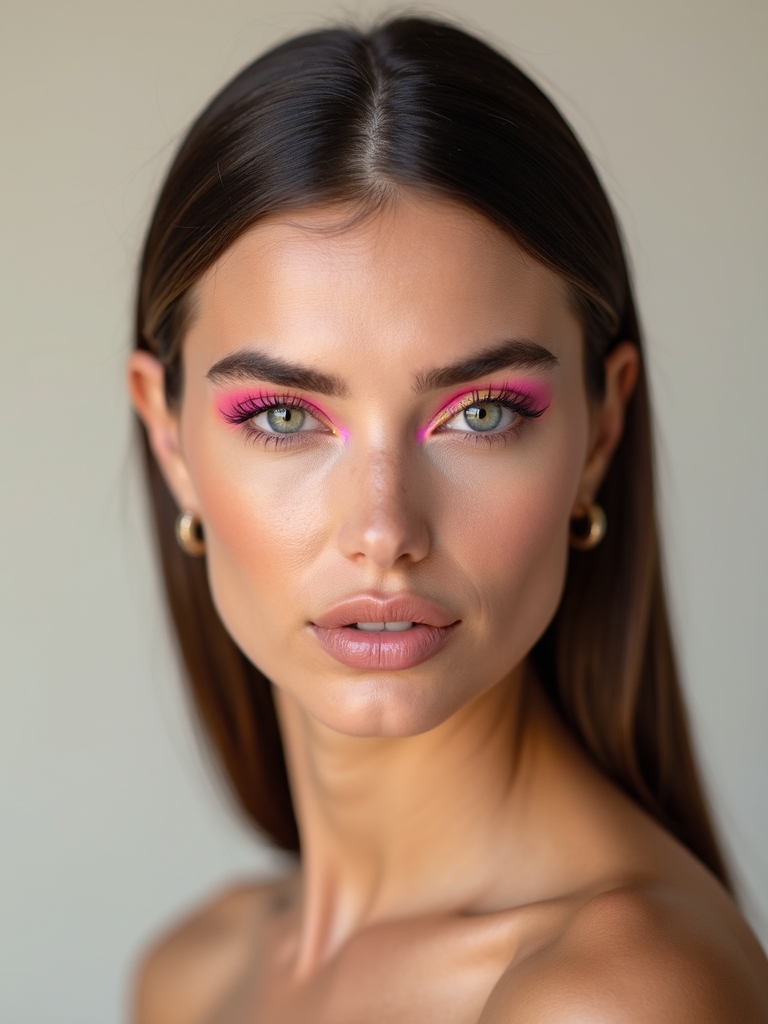
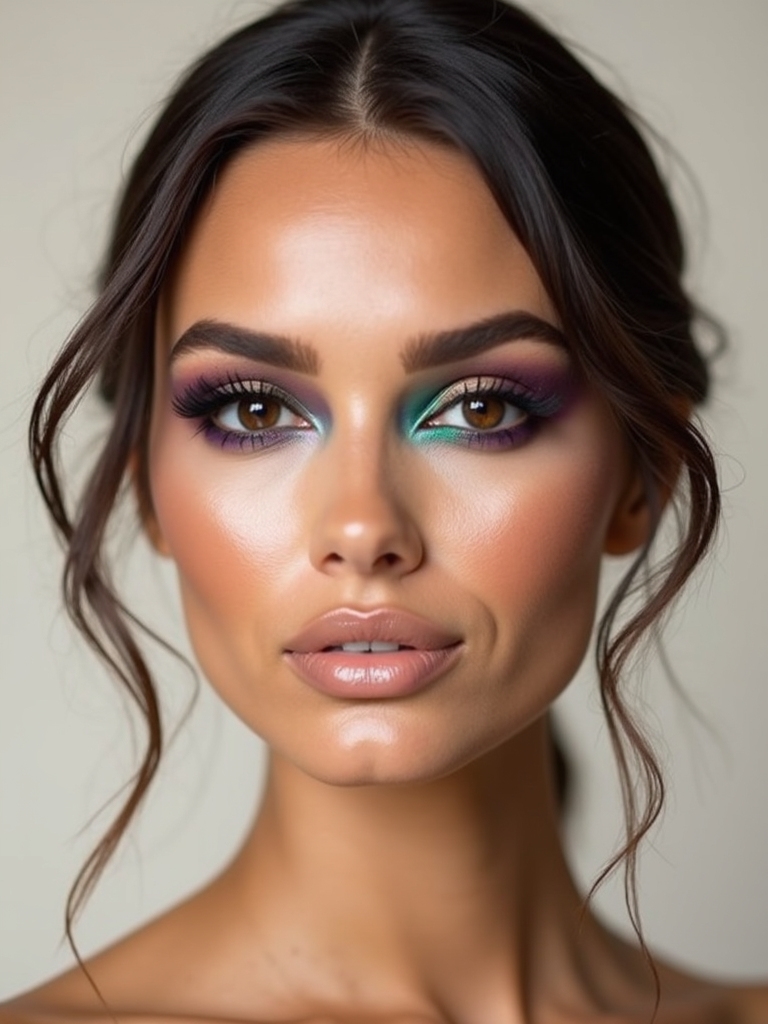
Color-Blocked Brows and Creases
Color-blocking treats the brow and crease like two panels of bold, separate color, a blue brow over an orange crease, say, with hard edges between them. It’s the most graphic, art-school look here and a real statement.
I lay each color as a clean block and keep the edges sharp with a little concealer between them. The contrast is the whole idea, so pick two colors that fight a little. It’s bold on every skin tone, and brights especially sing on deep skin, so don’t be shy with pigment.
Floating Crease Line With Dots
A floating crease line draws a single bold stroke through the crease, then punctuates it with tiny dots for a graphic, almost punctuation-mark effect. It’s minimal but striking, and it gives a plain eye real structure.
I sketch the line with gel and a fine brush, following the natural crease, then add dots with the brush tip. Keep the line clean and the dots even, and it looks deliberate. A bright line over a bare lid pops hardest, especially in a contrasting color on deep skin.
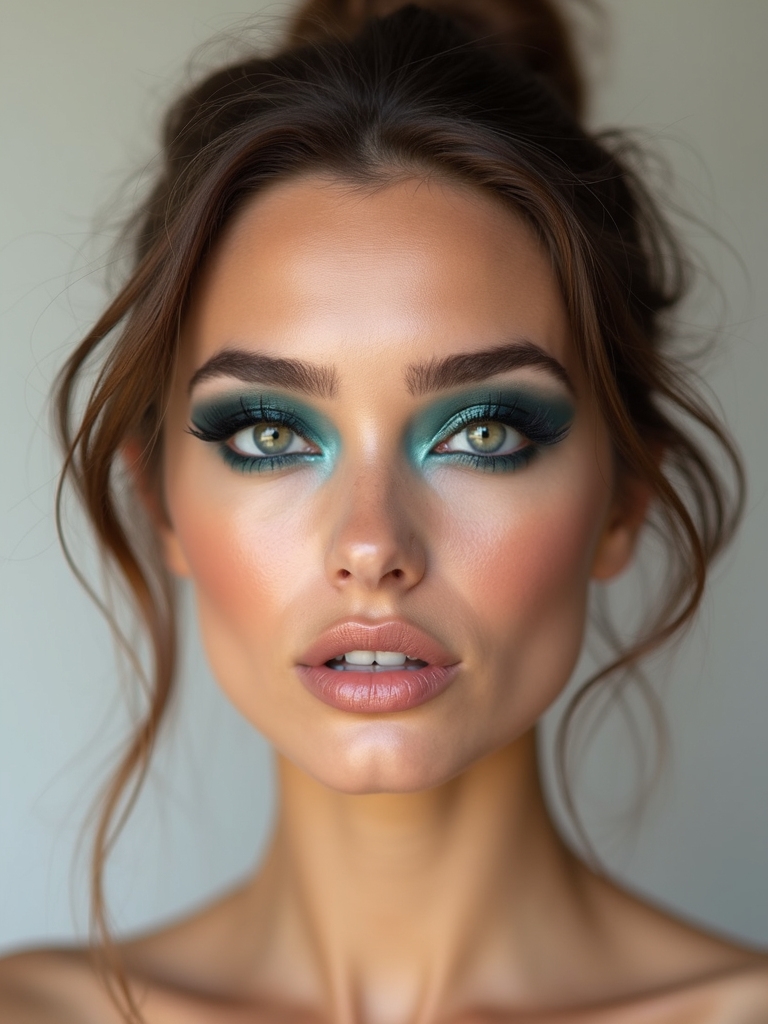
Jewel-Toned Reverse Smoky Eye
A reverse smoky flips the smoky eye upside down, the depth sits low along the lower lash line, in a rich jewel tone like emerald or sapphire. It’s unexpected and a little rebellious, which is the whole alt point.
I smoke a jewel shadow under the lower lashes and keep the lid clean or lightly washed, so the weight sits low. Blending the lower edge soft is what keeps it from looking like a bruise.
- Smoke the jewel tone along the lower lash line and blend the bottom edge out.
- Keep the lid bare or barely washed so the focus stays low.
- Jewel tones glow on deep and olive skin; sapphire and emerald especially pop.
Common Mistakes to Avoid
The error I see most with alt looks is skipping the base. Graphic liner and bold color need a smooth, set lid to grip, so prime and set first or your crisp line will smear into the crease by lunch. The second is going heavy everywhere at once: a floating wing, color-blocked brows, and a bold lip on the same face cancel each other out. Pick one statement and let the rest of the face stay quiet so the alt element actually lands.
A couple of practical notes. Match your brights to your undertone and depth instead of copying the exact shade in a photo, since neons and jewel tones read very differently on deep, olive, and fair skin. And use the right product for the texture: gel liner for graphic shapes, a dedicated eye gloss for shine, lash glue for gems.
The wrong base is why a look slides or lifts within an hour. For a softer everyday version of all this, the everyday makeup routine dials it back.
Alt Makeup, Answered
?What’s the easiest alt look for a beginner?
A smudged tightline or a neon inner corner. Both run on one product, forgive a shaky hand, and wash off easily, so there’s no precision or blending to master before you start experimenting.
?How do I keep graphic liner from smudging?
Prime and set the lid first so the liner has a dry, matte base to grip, use a gel liner over a liquid pen for staying power, and let each layer set before you blink. A clear setting layer on top locks it for a long day.
?Do alt looks work on deep skin tones?
Very well, often better. Neons, jewel tones, and metallics glow harder against deep and olive skin. Choose pigmented or layered formulas over sheer ones, and lay a white or skin-tone primer under brights so the color reads true.
?Is alt makeup too much for everyday?
Not the subtle end of it. Glossy lids, a smudged liner, or a single neon corner read edgy up close but still pass at work or school. Save the color-blocked brows and floating wings for nights you want to be seen.
?How do I make face gems and stickers stay on?
Apply them last, after your eye makeup, with a tiny dot of lash glue rather than the sticker’s own backing, which rarely holds. Press each one for a few seconds, and avoid setting spray directly over them so the edges don’t lift.
Make It Yours
Alt makeup is the rare corner of beauty with no right answer. Whether you smudge a liner, float a wing, scatter gems, or color-block your brows, the only real rule is that it should feel like you put yourself on your face rather than a filter. Start with one look, keep the rest quiet, and let it be a little imperfect.
Pick whichever of these fifteen makes you want to grab a brush tonight, and treat the first few tries as low-stakes practice. The point was never polish; it’s expression. Once one look feels like second nature, start mixing them into something only you would wear.