A client once booked a full set three weeks before her flight, before she had packed a single swimsuit. That is what tropical nails do at the desk: they are the first vacation purchase, the one that shows up in every photo whether or not the trip lives up to the brochure.
The looks below run from barely-there sunset fades to full hibiscus statement art, and a few of them survive sand, sunscreen, and pool water better than others. I will tell you which ones hold, what the hand-painted versions actually cost, and where a beginner should start so you do not waste a salon visit on something that chips by day two.
Tropical Nails at a Glance
- Tropical sets live and die by the gloss; a thick, glassy topcoat is what makes ombré and jelly finishes look wet and sunlit instead of flat.
- Hand-painted art like palm fronds, hibiscus, and monstera adds $15-40 to a gel base and needs a steady tech; press-on versions start around $8 for a DIY week.
- Most of these hold two to three weeks in gel, but the art chips first, so leave the salon with a tiny matching polish for quick touch-ups.
Sunset Ombré Glossy Gradients
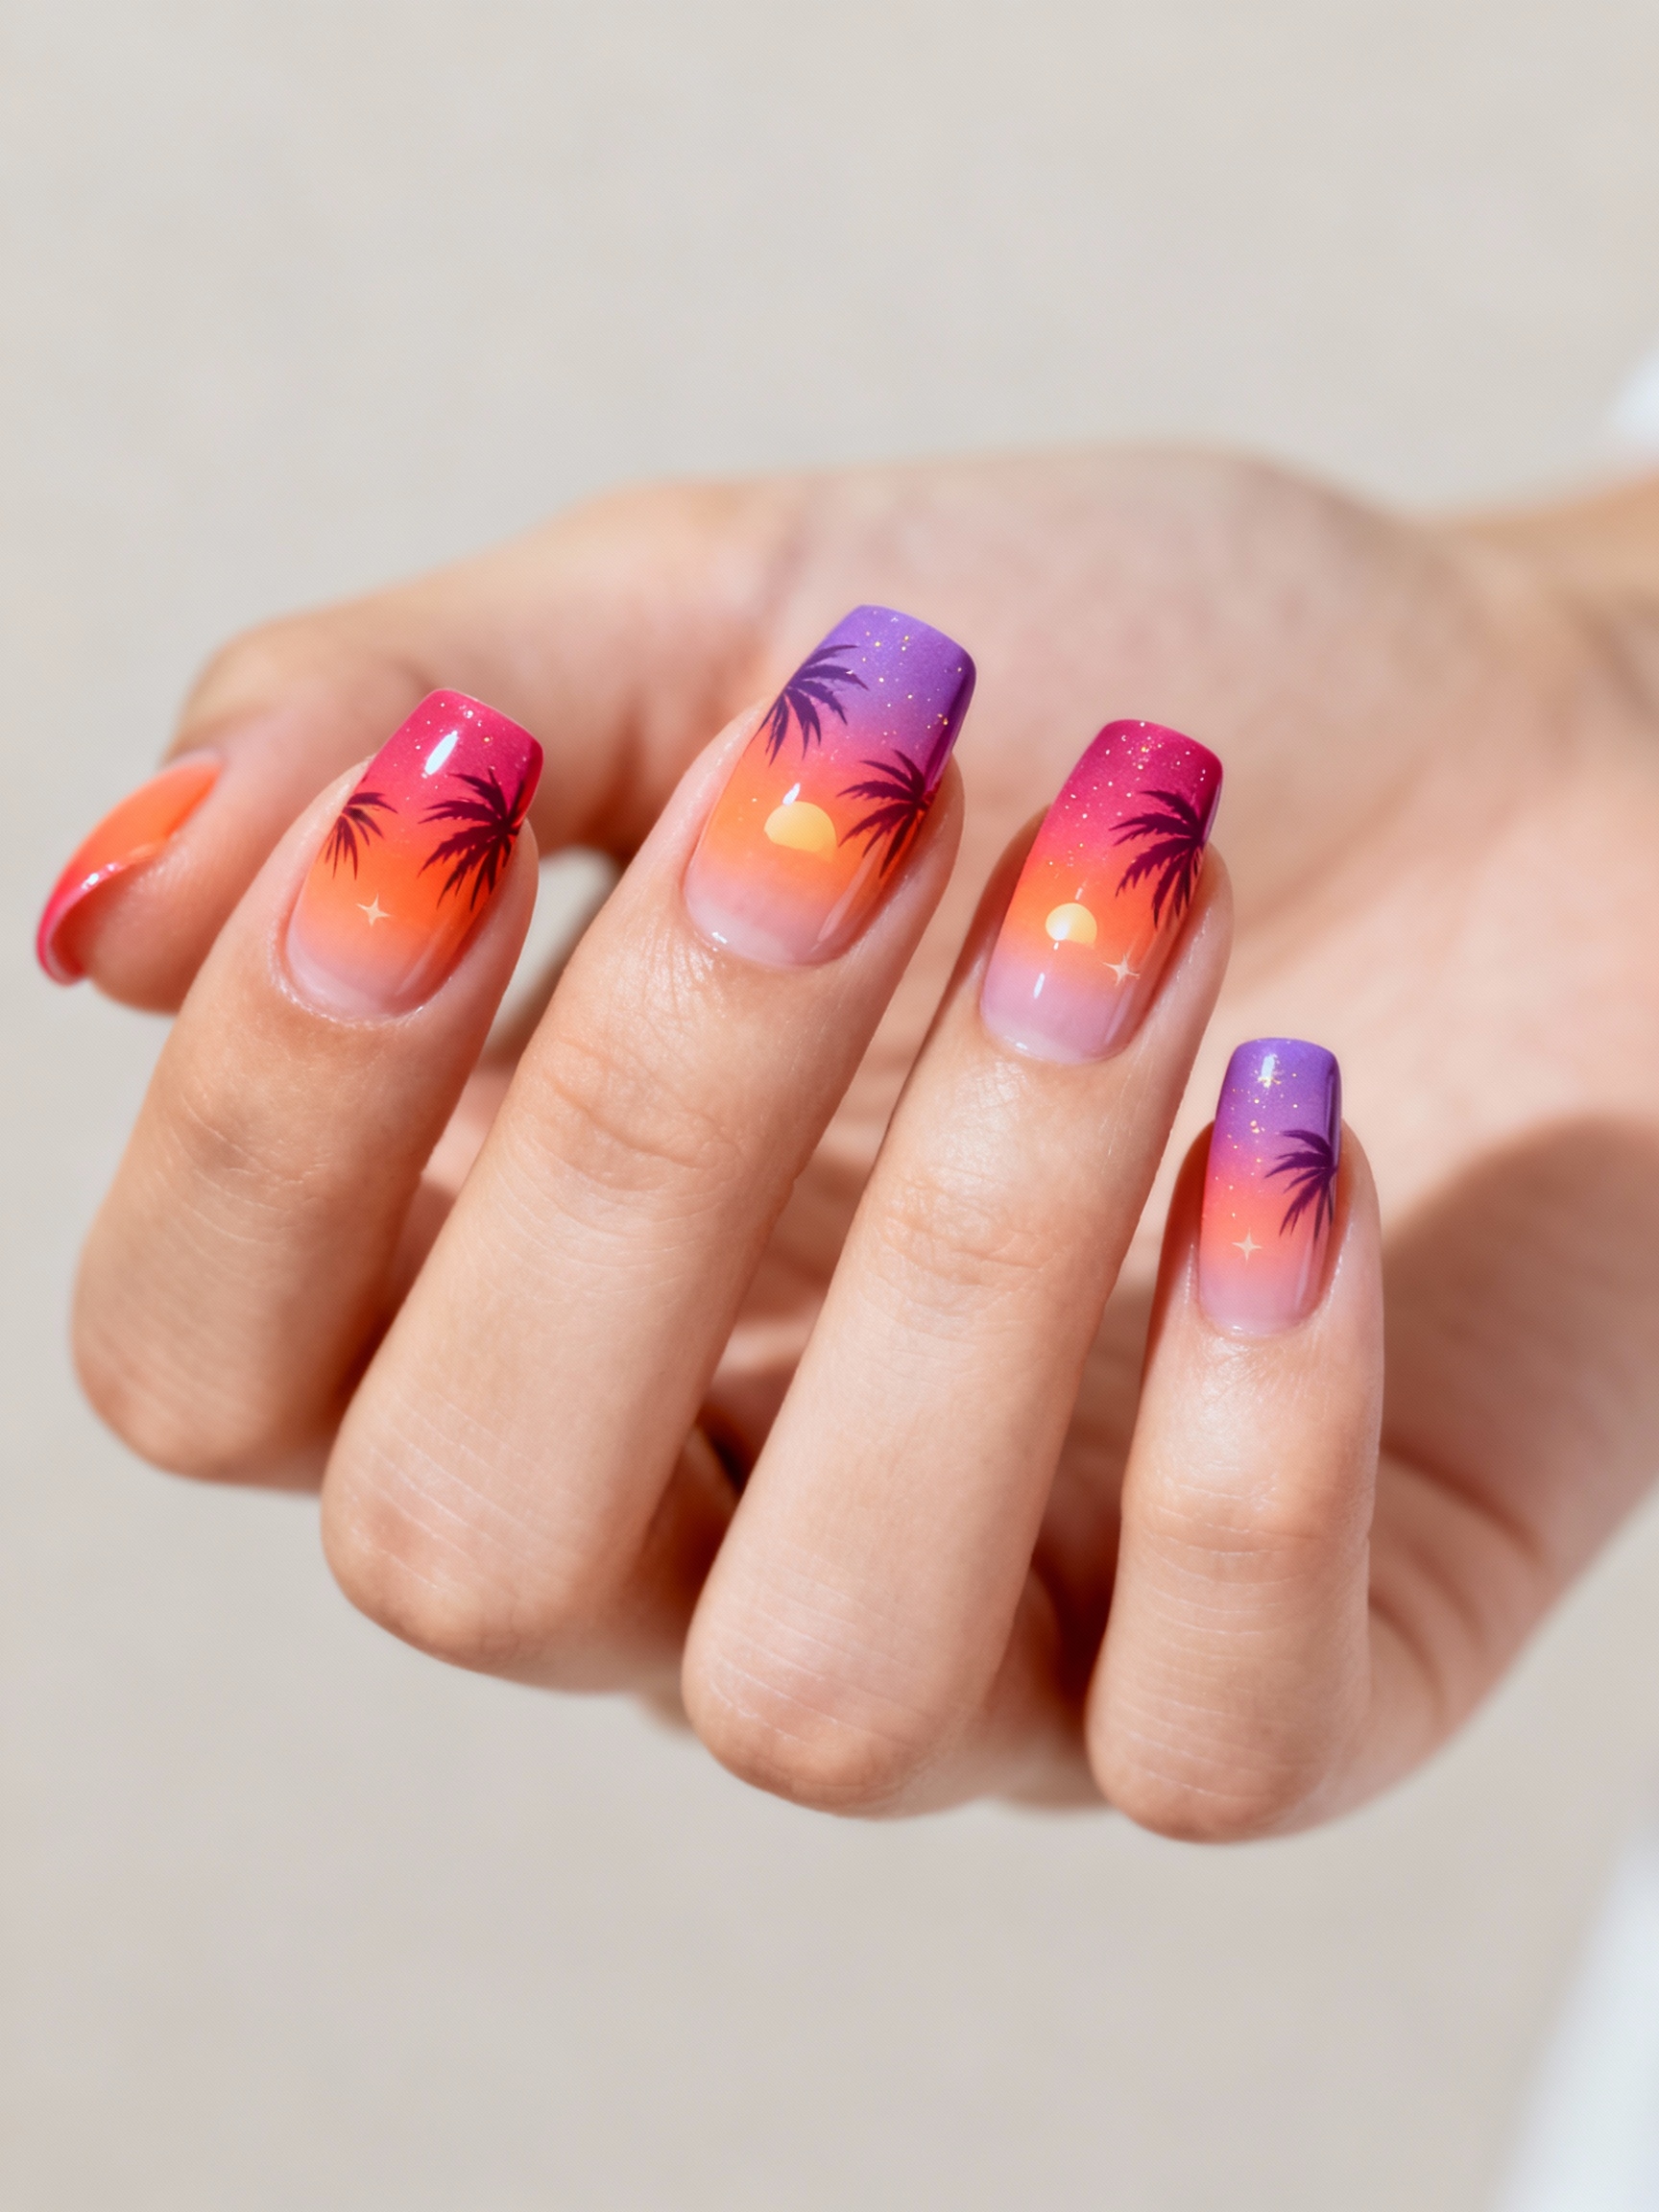
The sunset ombré is the set people book the week before a flight, and it earns the attention. Done well, it fades coral into tangerine into a bruised violet, the exact gradient of a sky over water at seven o’clock. I build it in thin sheer layers and seal each pass so the colors keep their depth, the way they do in a good set of beach nails.
The gloss is half the look. A thick, glassy topcoat melts the bands into one another for that wet, lit-from-the-side glow that photographs at golden hour. A hand-blended gel ombré runs about $45-60 and holds two to three weeks. A whisper of micro-shimmer over the top catches light without tipping into glitter.
- Keep the layers thin; thick coats muddy the fade and bubble under the lamp
- Pair it with plain gold rings and let the gradient carry the look
- For a quieter version, fade just the tips and leave the base sheer

Palm-Frond Silhouettes on a Nude Base
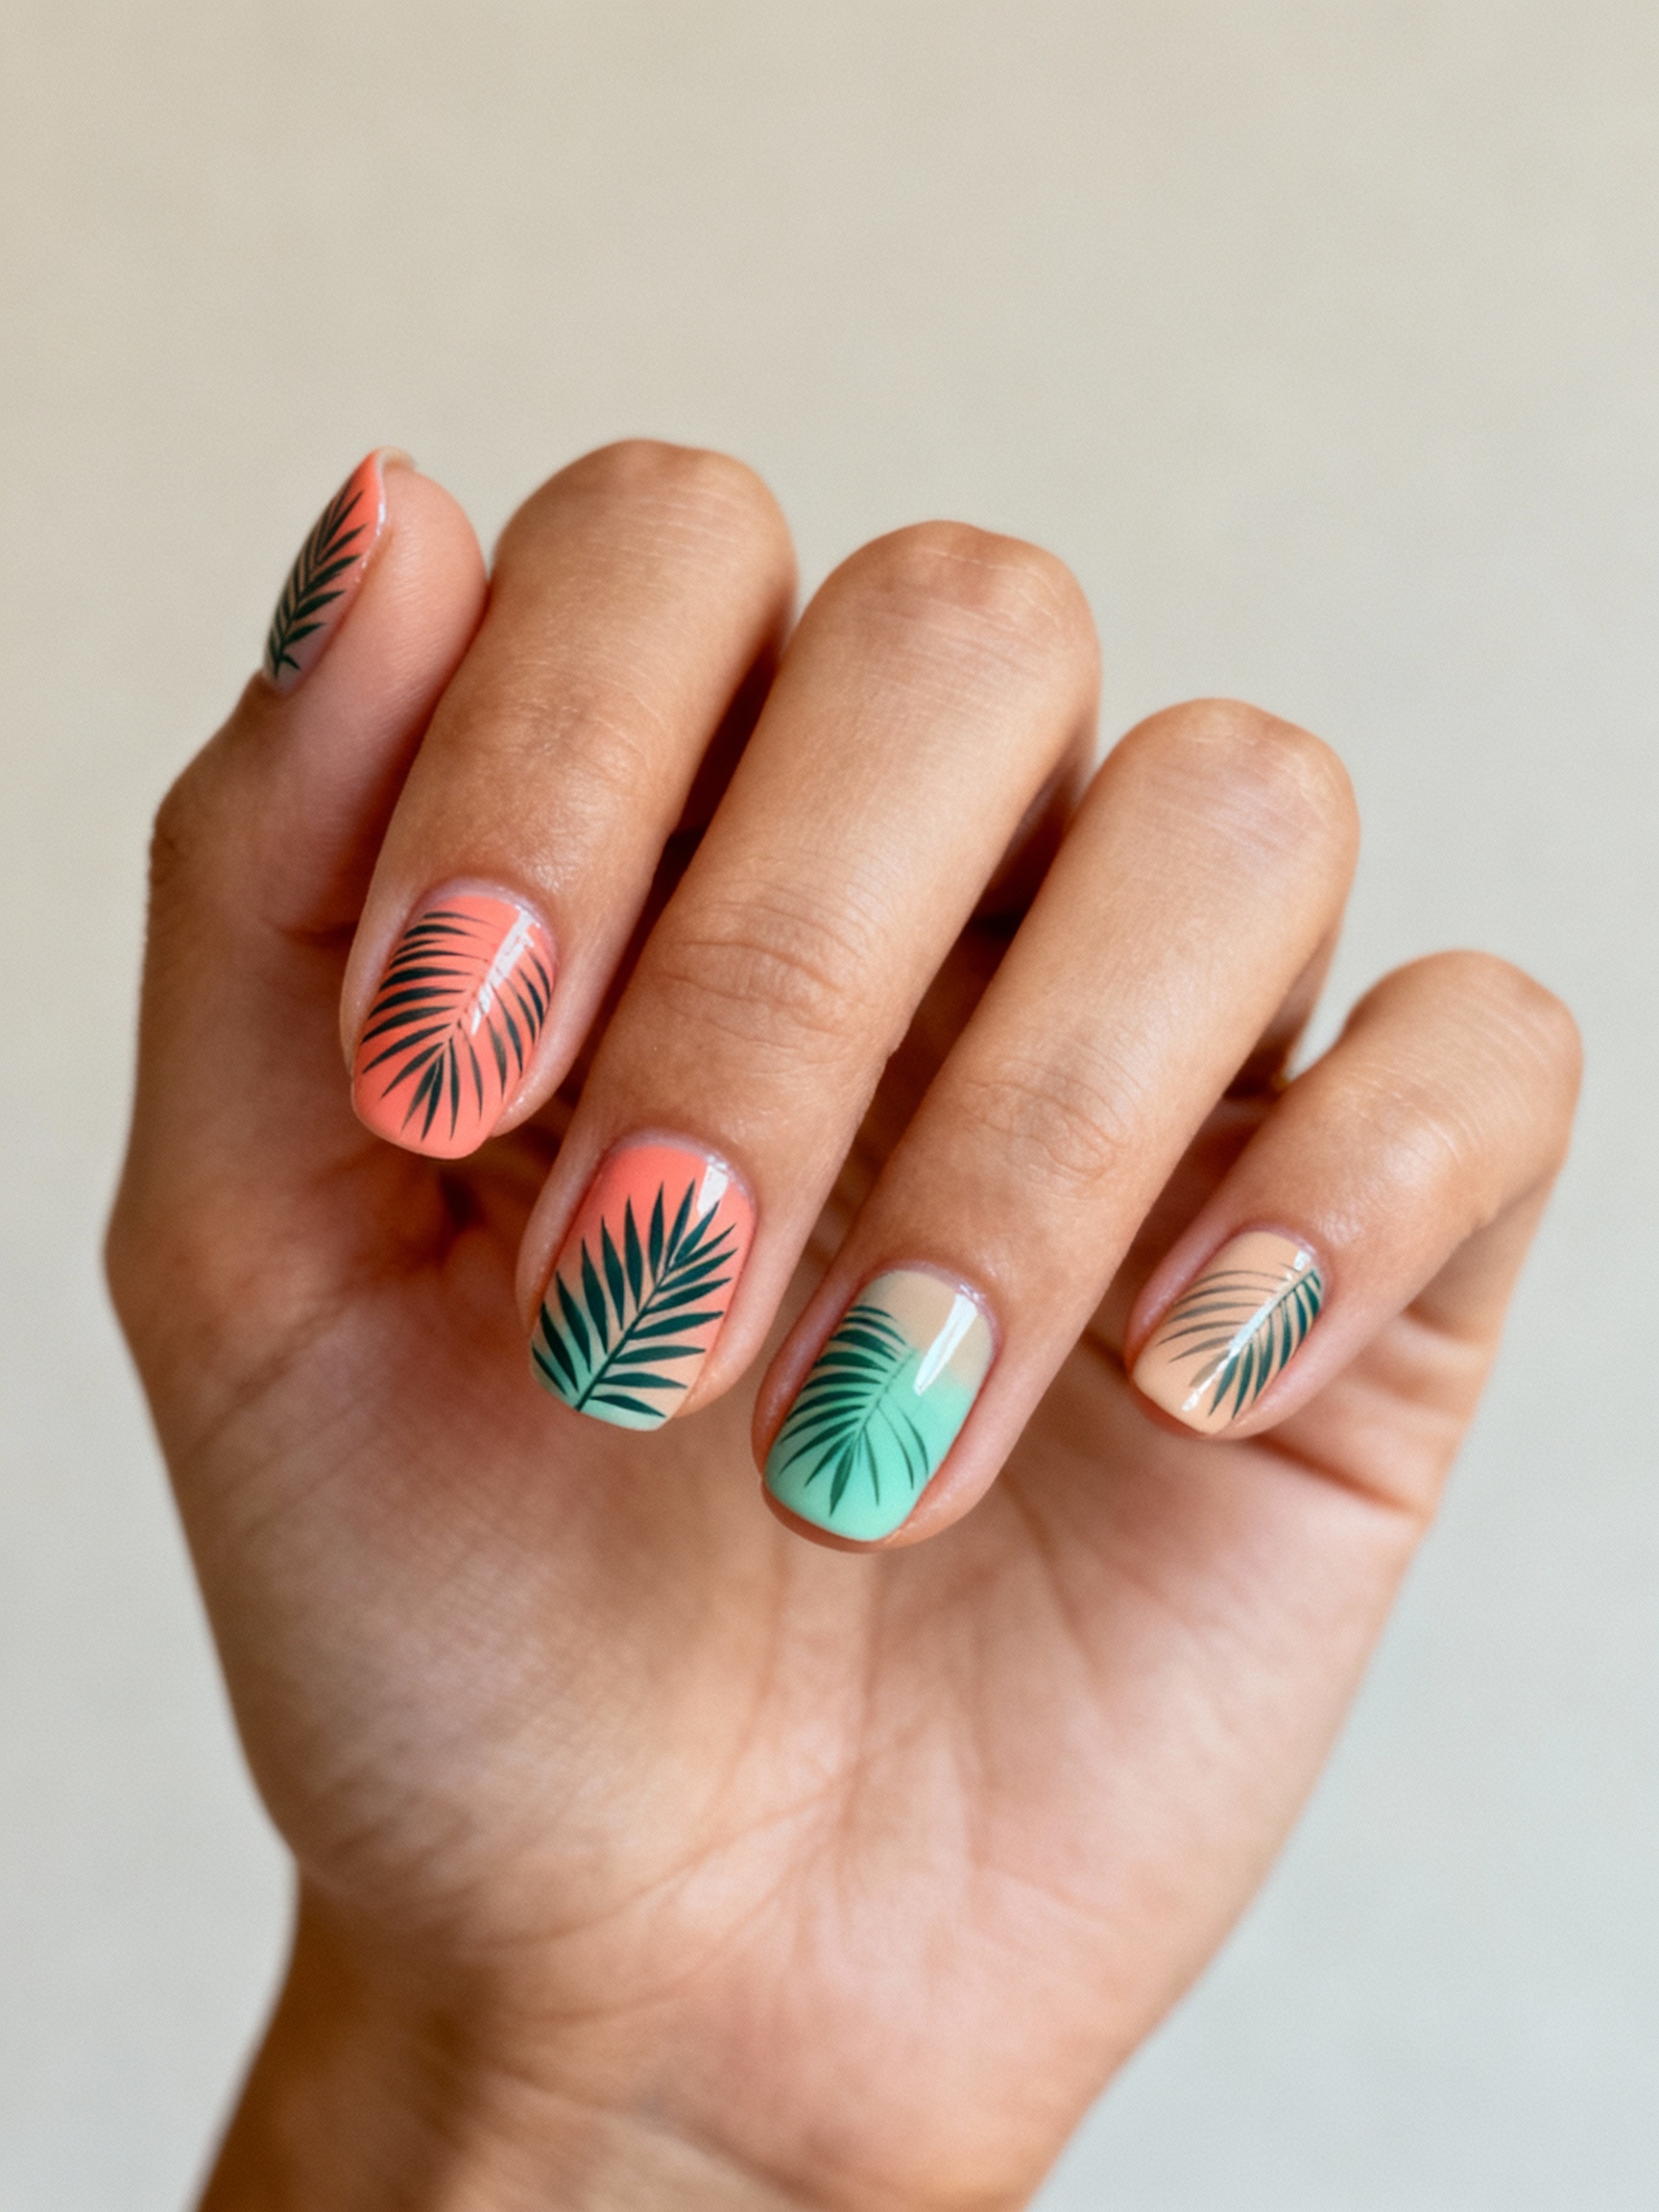
Palm fronds are the gateway tropical art because they forgive a shaky hand. Over a sunlit base of sandy nude, coconut cream, or a faded lime wash, you trace wispy, tapered silhouettes in inky polish and seal them glassy. Leaving plenty of bare nail around each frond is what keeps the look calm.
One accent nail of fronds against four bare ones feels like a fashion editor’s choice, while a full hand leans more souvenir. I usually talk first-timers into the single accent. It costs less, chips less, and still says vacation across every photo.
Use a micro-detail brush and vary the leaf lengths so the fronds look like they are moving. Sketch them in lightly first if you are nervous; a faint pencil guide under the gel disappears once you paint over it.
📋For a Clean Sunset Fade
- ✓Lay an opaque nude or white base so the sheer colors read bright, not muddy
- ✓Sponge while the gel is wet, working coral into tangerine into violet in thin passes
- ✓Cure, then flood with a thick glossy top to melt the bands into one fade
Lacquered Hibiscus Blooms With Gold
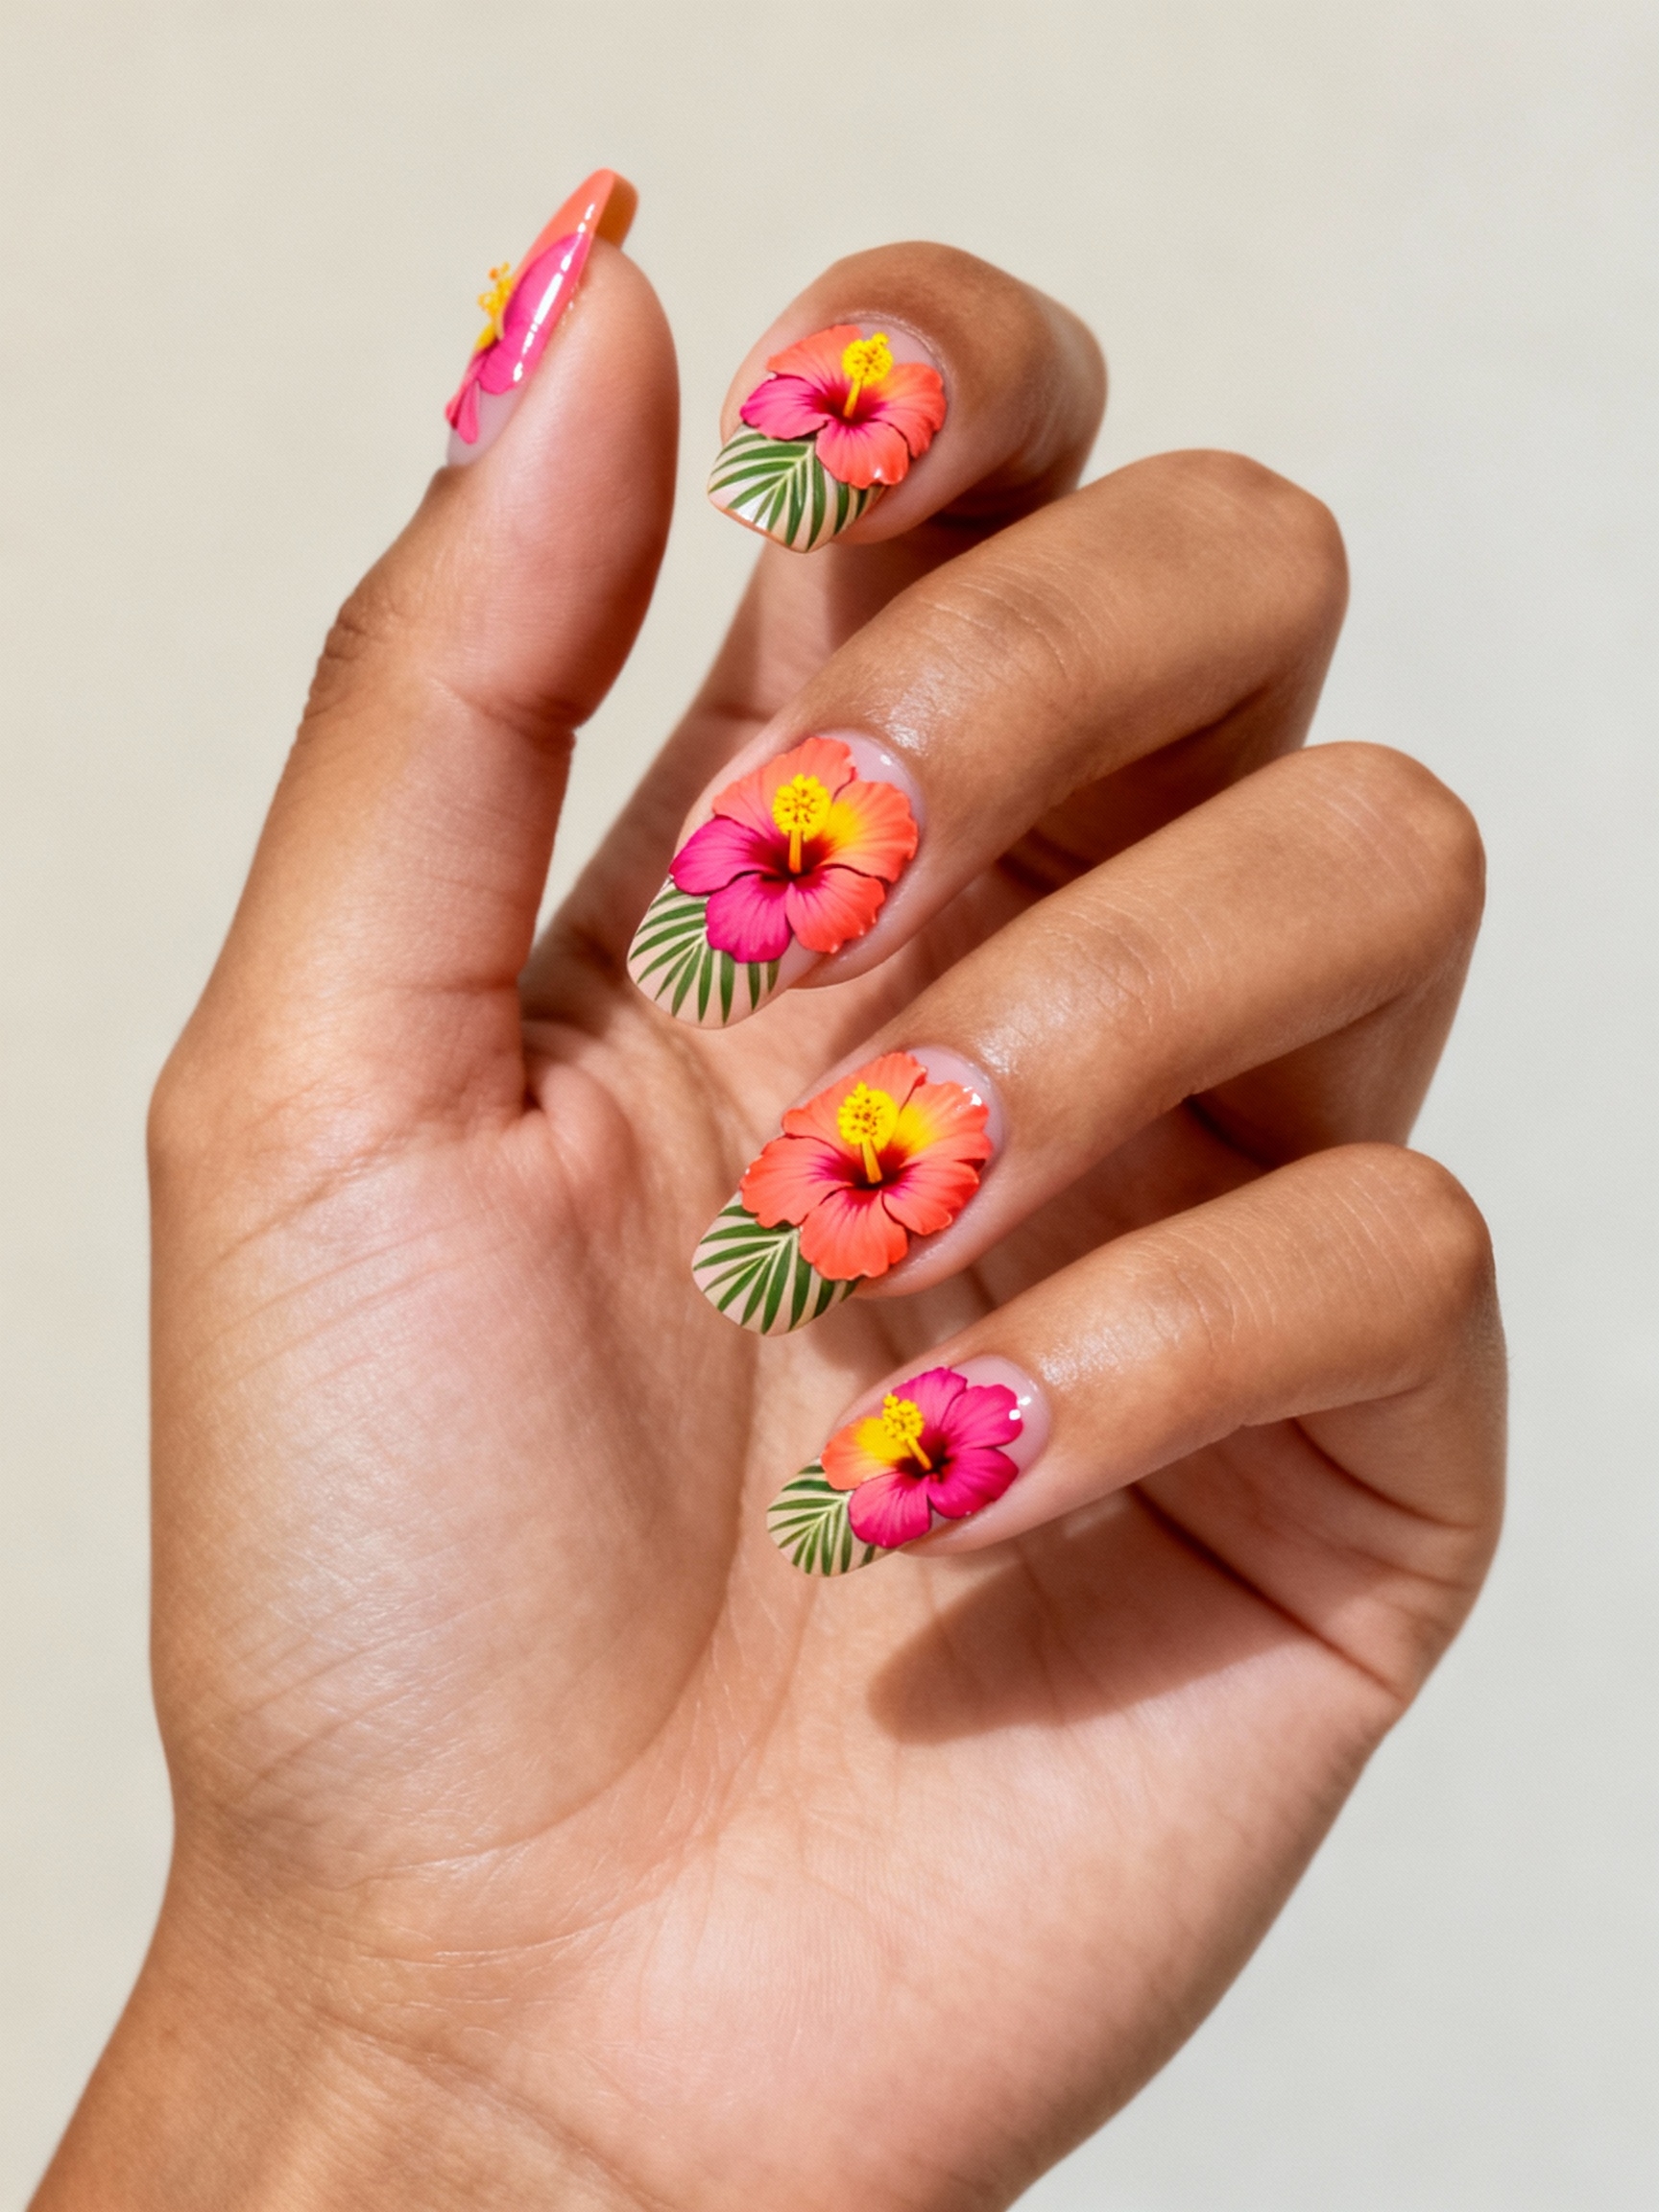
When someone wants the full island statement, hibiscus is the bloom I paint. The petals go down in two coats of lacquered coral or raspberry, then get anchored with glossy inky centers and a faint dusting of gold pollen at the heart. Here is the order that keeps it looking lush rather than crowded:
- Lay the plush petals first in two coats so the color stays saturated and even
- Drop a glossy near-black center while the petals are still tacky so it sits flush
- Keep one bloom per hand, or cluster a few on a single accent nail for couture energy
- Finish with a glassy topcoat and a nightly drop of cuticle oil so the shine holds on the trip
Neon Tropical Gradients
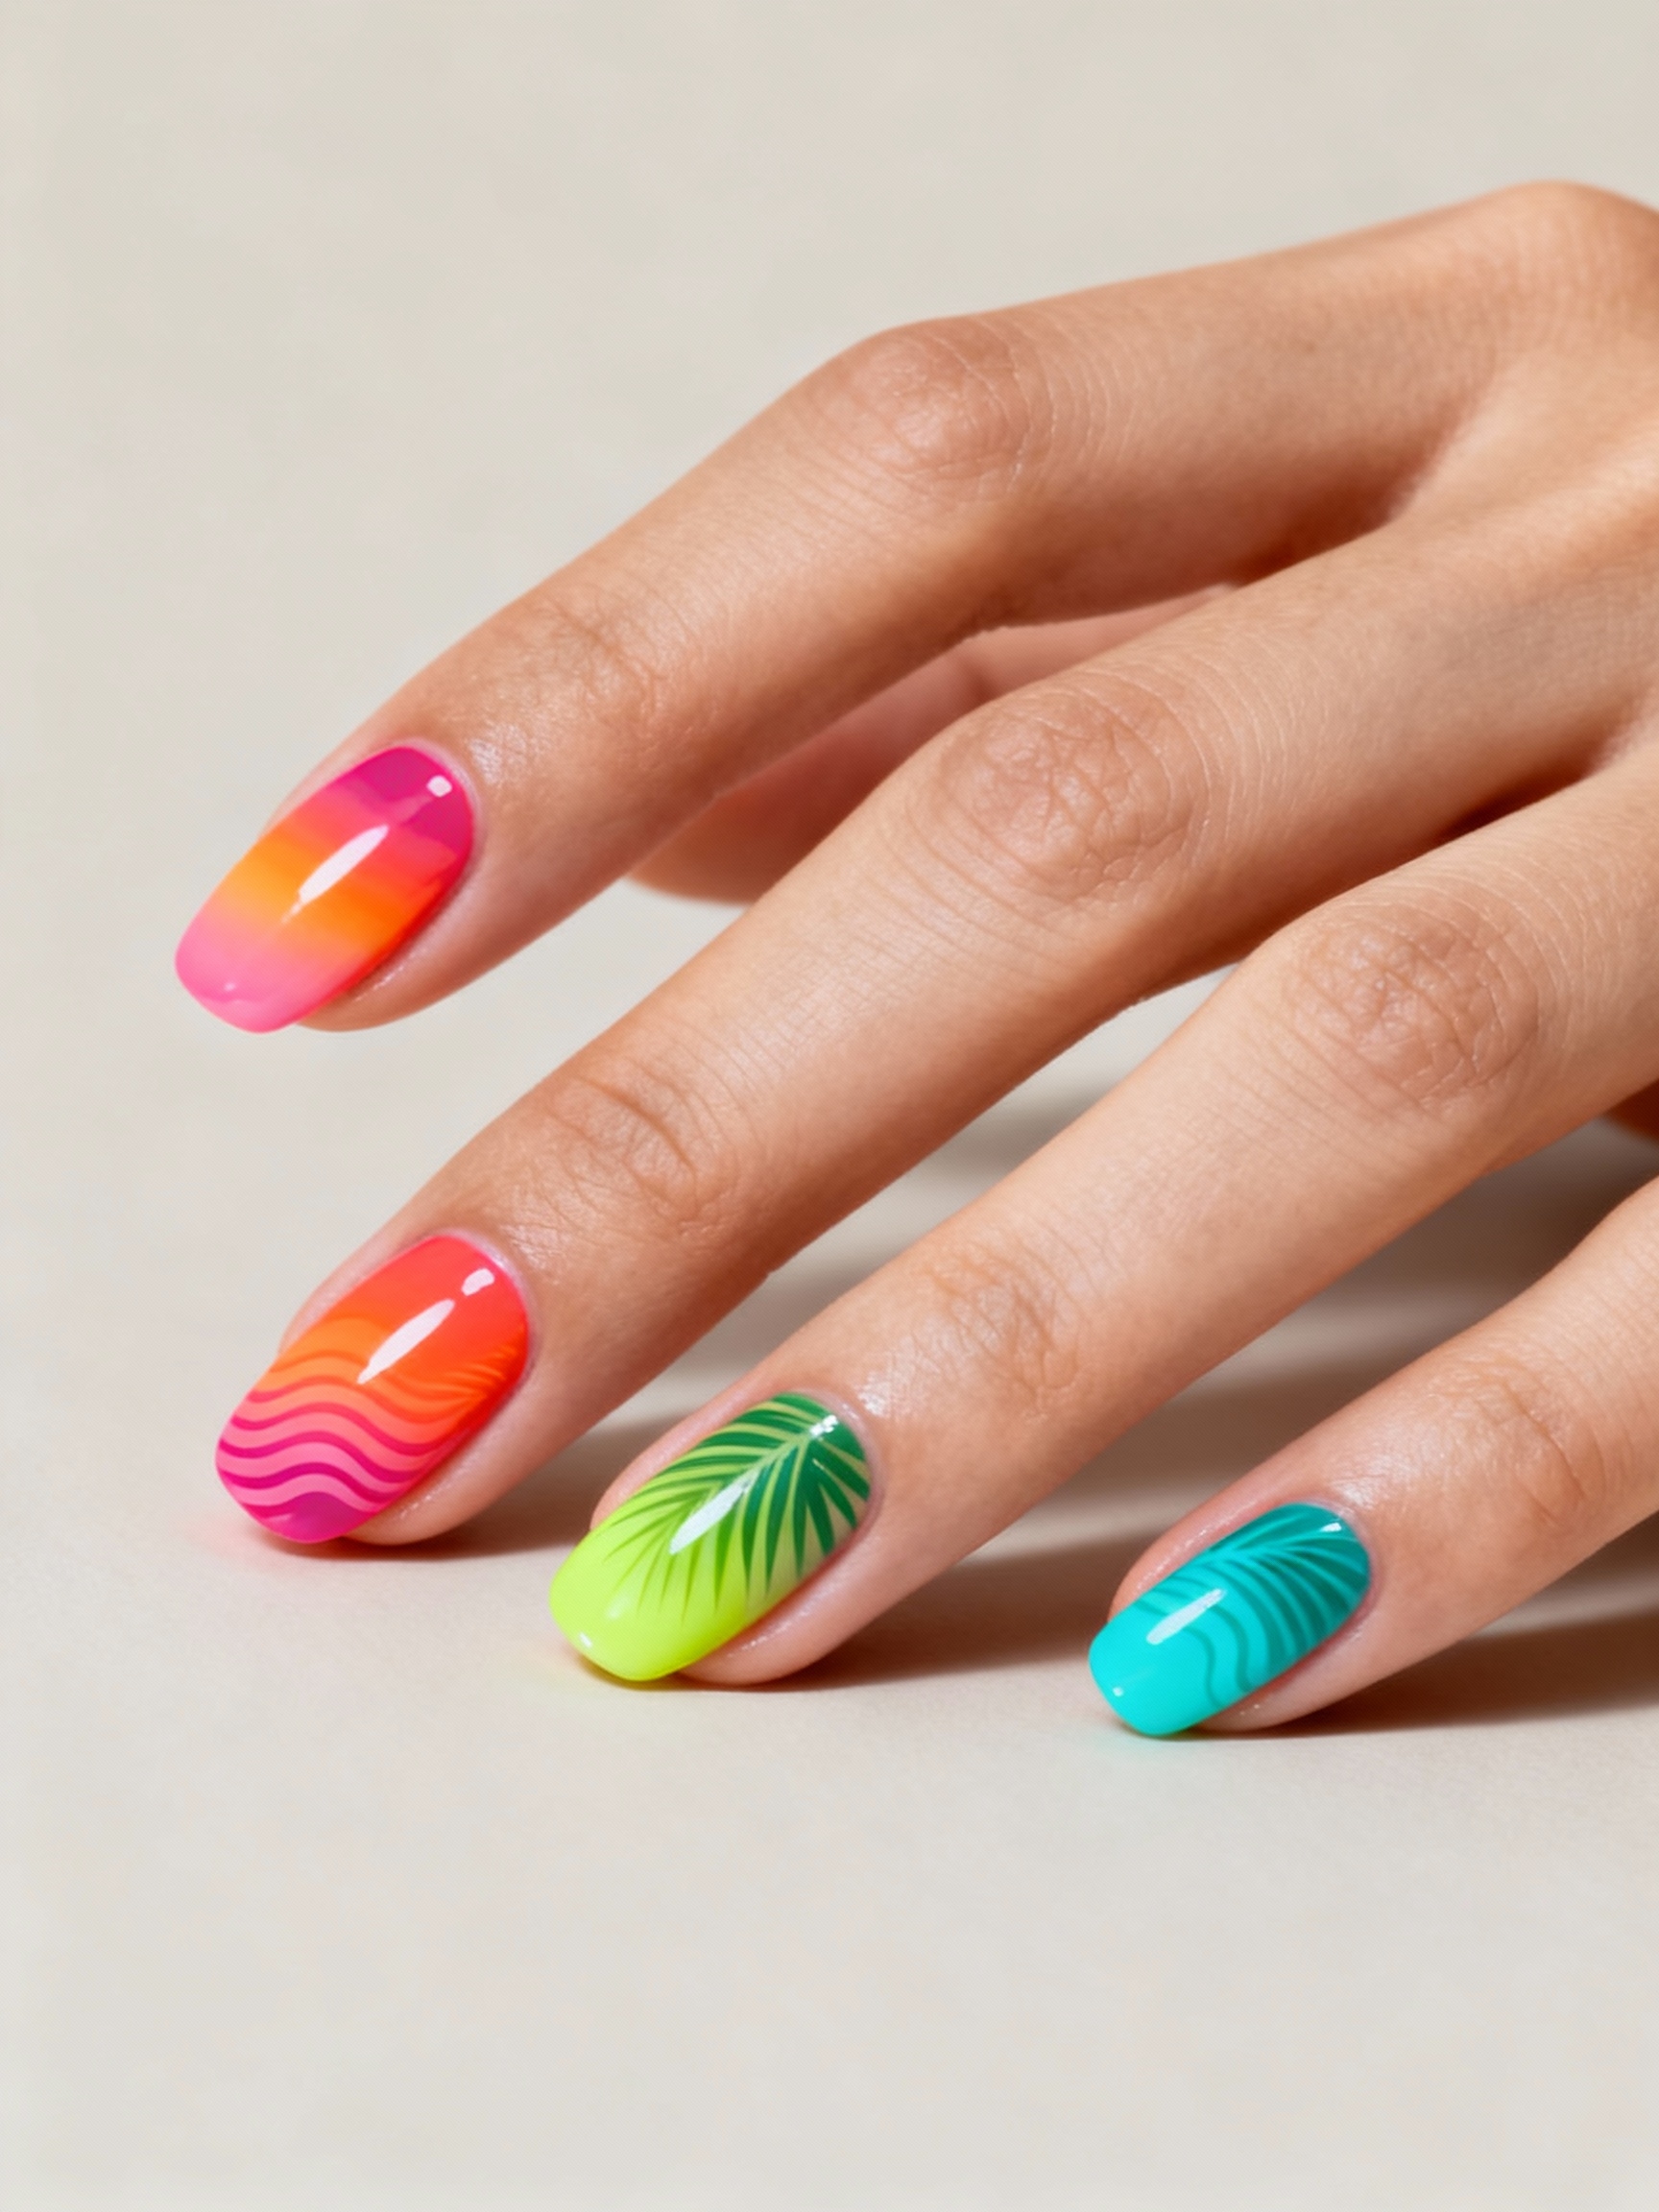
Neon is the loudest tropical option, sweeping from a fiery sunset into an electric turquoise sea across the hand. The blend feathers oranges into fuchsias, then cools them down at the tips.
Make Neon Actually Glow
The piece beginners skip is the base. Neon pigment is sheer, so over bare nail it dulls to a sad, patchy version of itself. Lay an opaque white or pale base first and the colors light up like a sign.
Crisp palm-silhouette accents on one or two nails give the blend a postcard moment and stop it from looking like a highlighter accident. It is playful, loud, and surprisingly wearable once the base does its job.
Two things people get wrong about bright tropical sets:
❌ Myth: Neon polish glows straight from the bottle.
✅ Reality: Neon pigment is sheer and needs an opaque white base to light up; over bare nail it goes dull and patchy.
❌ Myth: Bright tropical color only works on a tan.
✅ Reality: Saturated corals, fuchsias, and emeralds pop hardest against deep and cool-toned skin; it is the muddy, grayed-out pastels that wash people out.
Zesty Citrus Nail Art
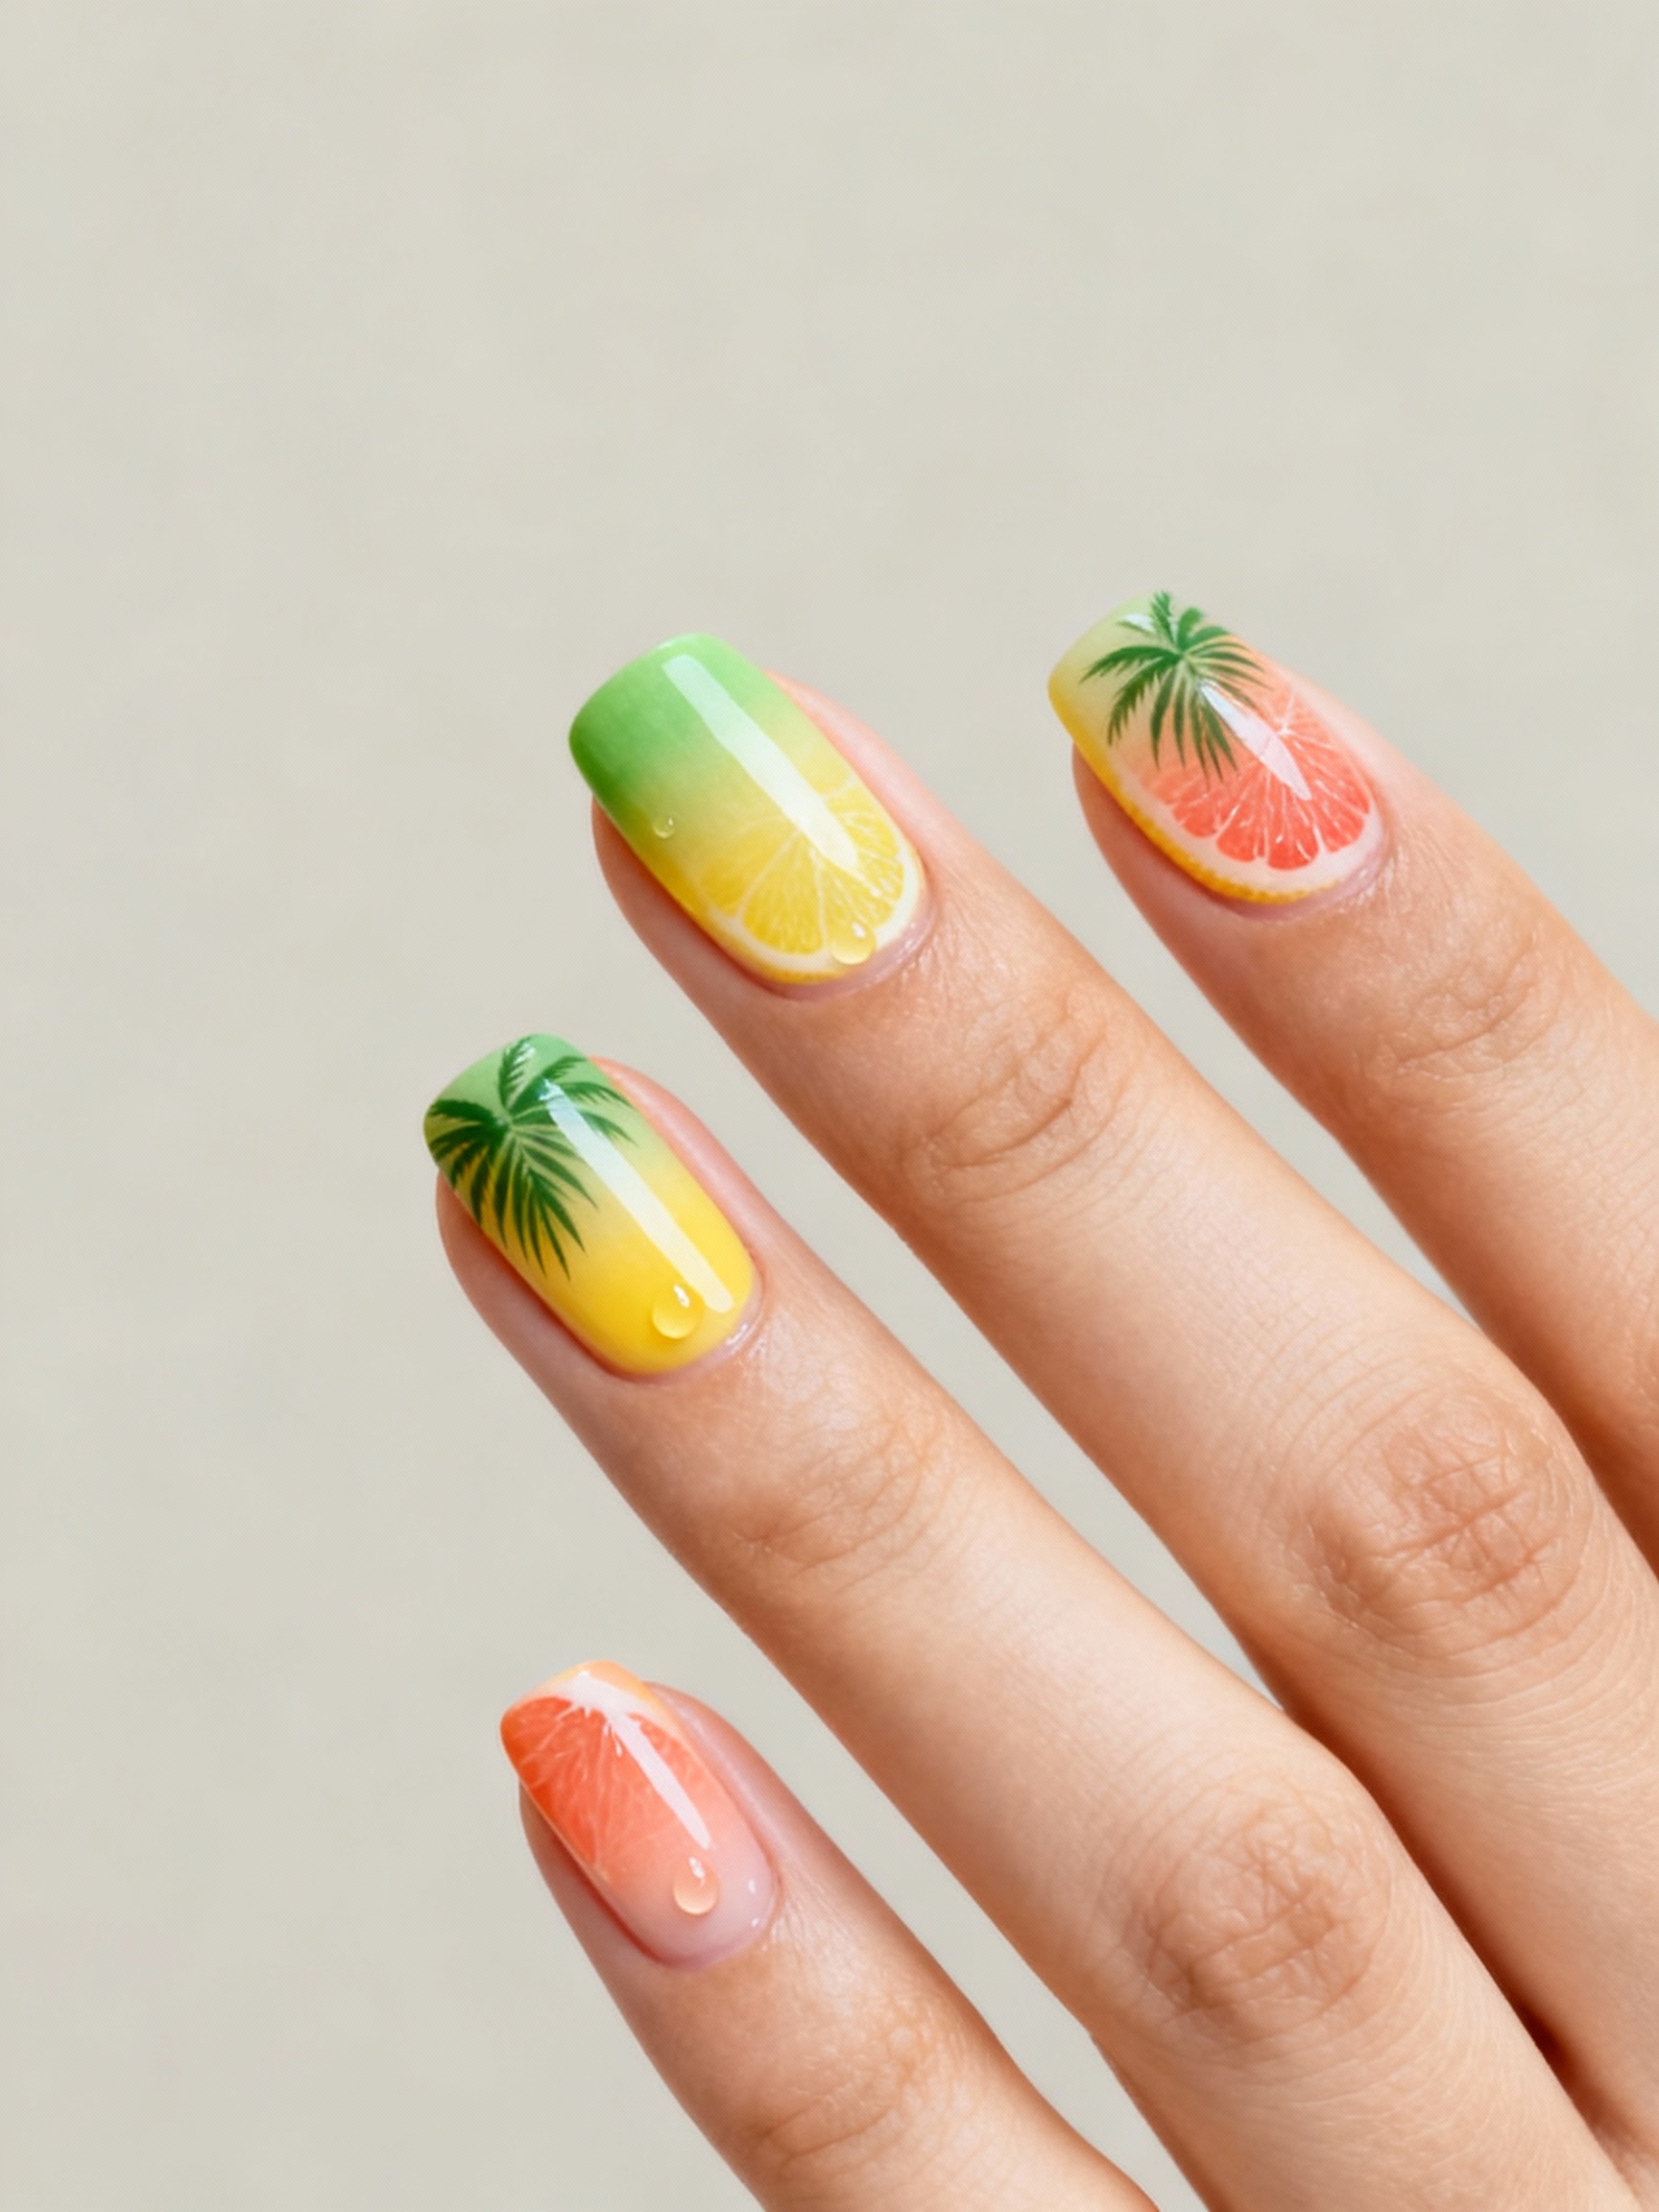
Citrus art is the one that makes people smile in the chair; I have never painted a lemon tip without the person grinning at their own hand. Think pale-yellow bases with crisp white French edges and tiny lemon decals, or a juicy grapefruit gradient that glows pink at the tip. The rule is to keep it fresh and stop short of kitschy, which usually means one fruit motif per hand.
Lime-slice decals look cleaner than freehand for most people, and they sit flat under a gel top so nothing snags. Pair the whole thing with dewy skin and thin gold rings. If you want the brightness without the fruit, a plain juicy palette does plenty of the work on its own, the way the best summer nails do.
Translucent Aqua Jelly With Shimmer
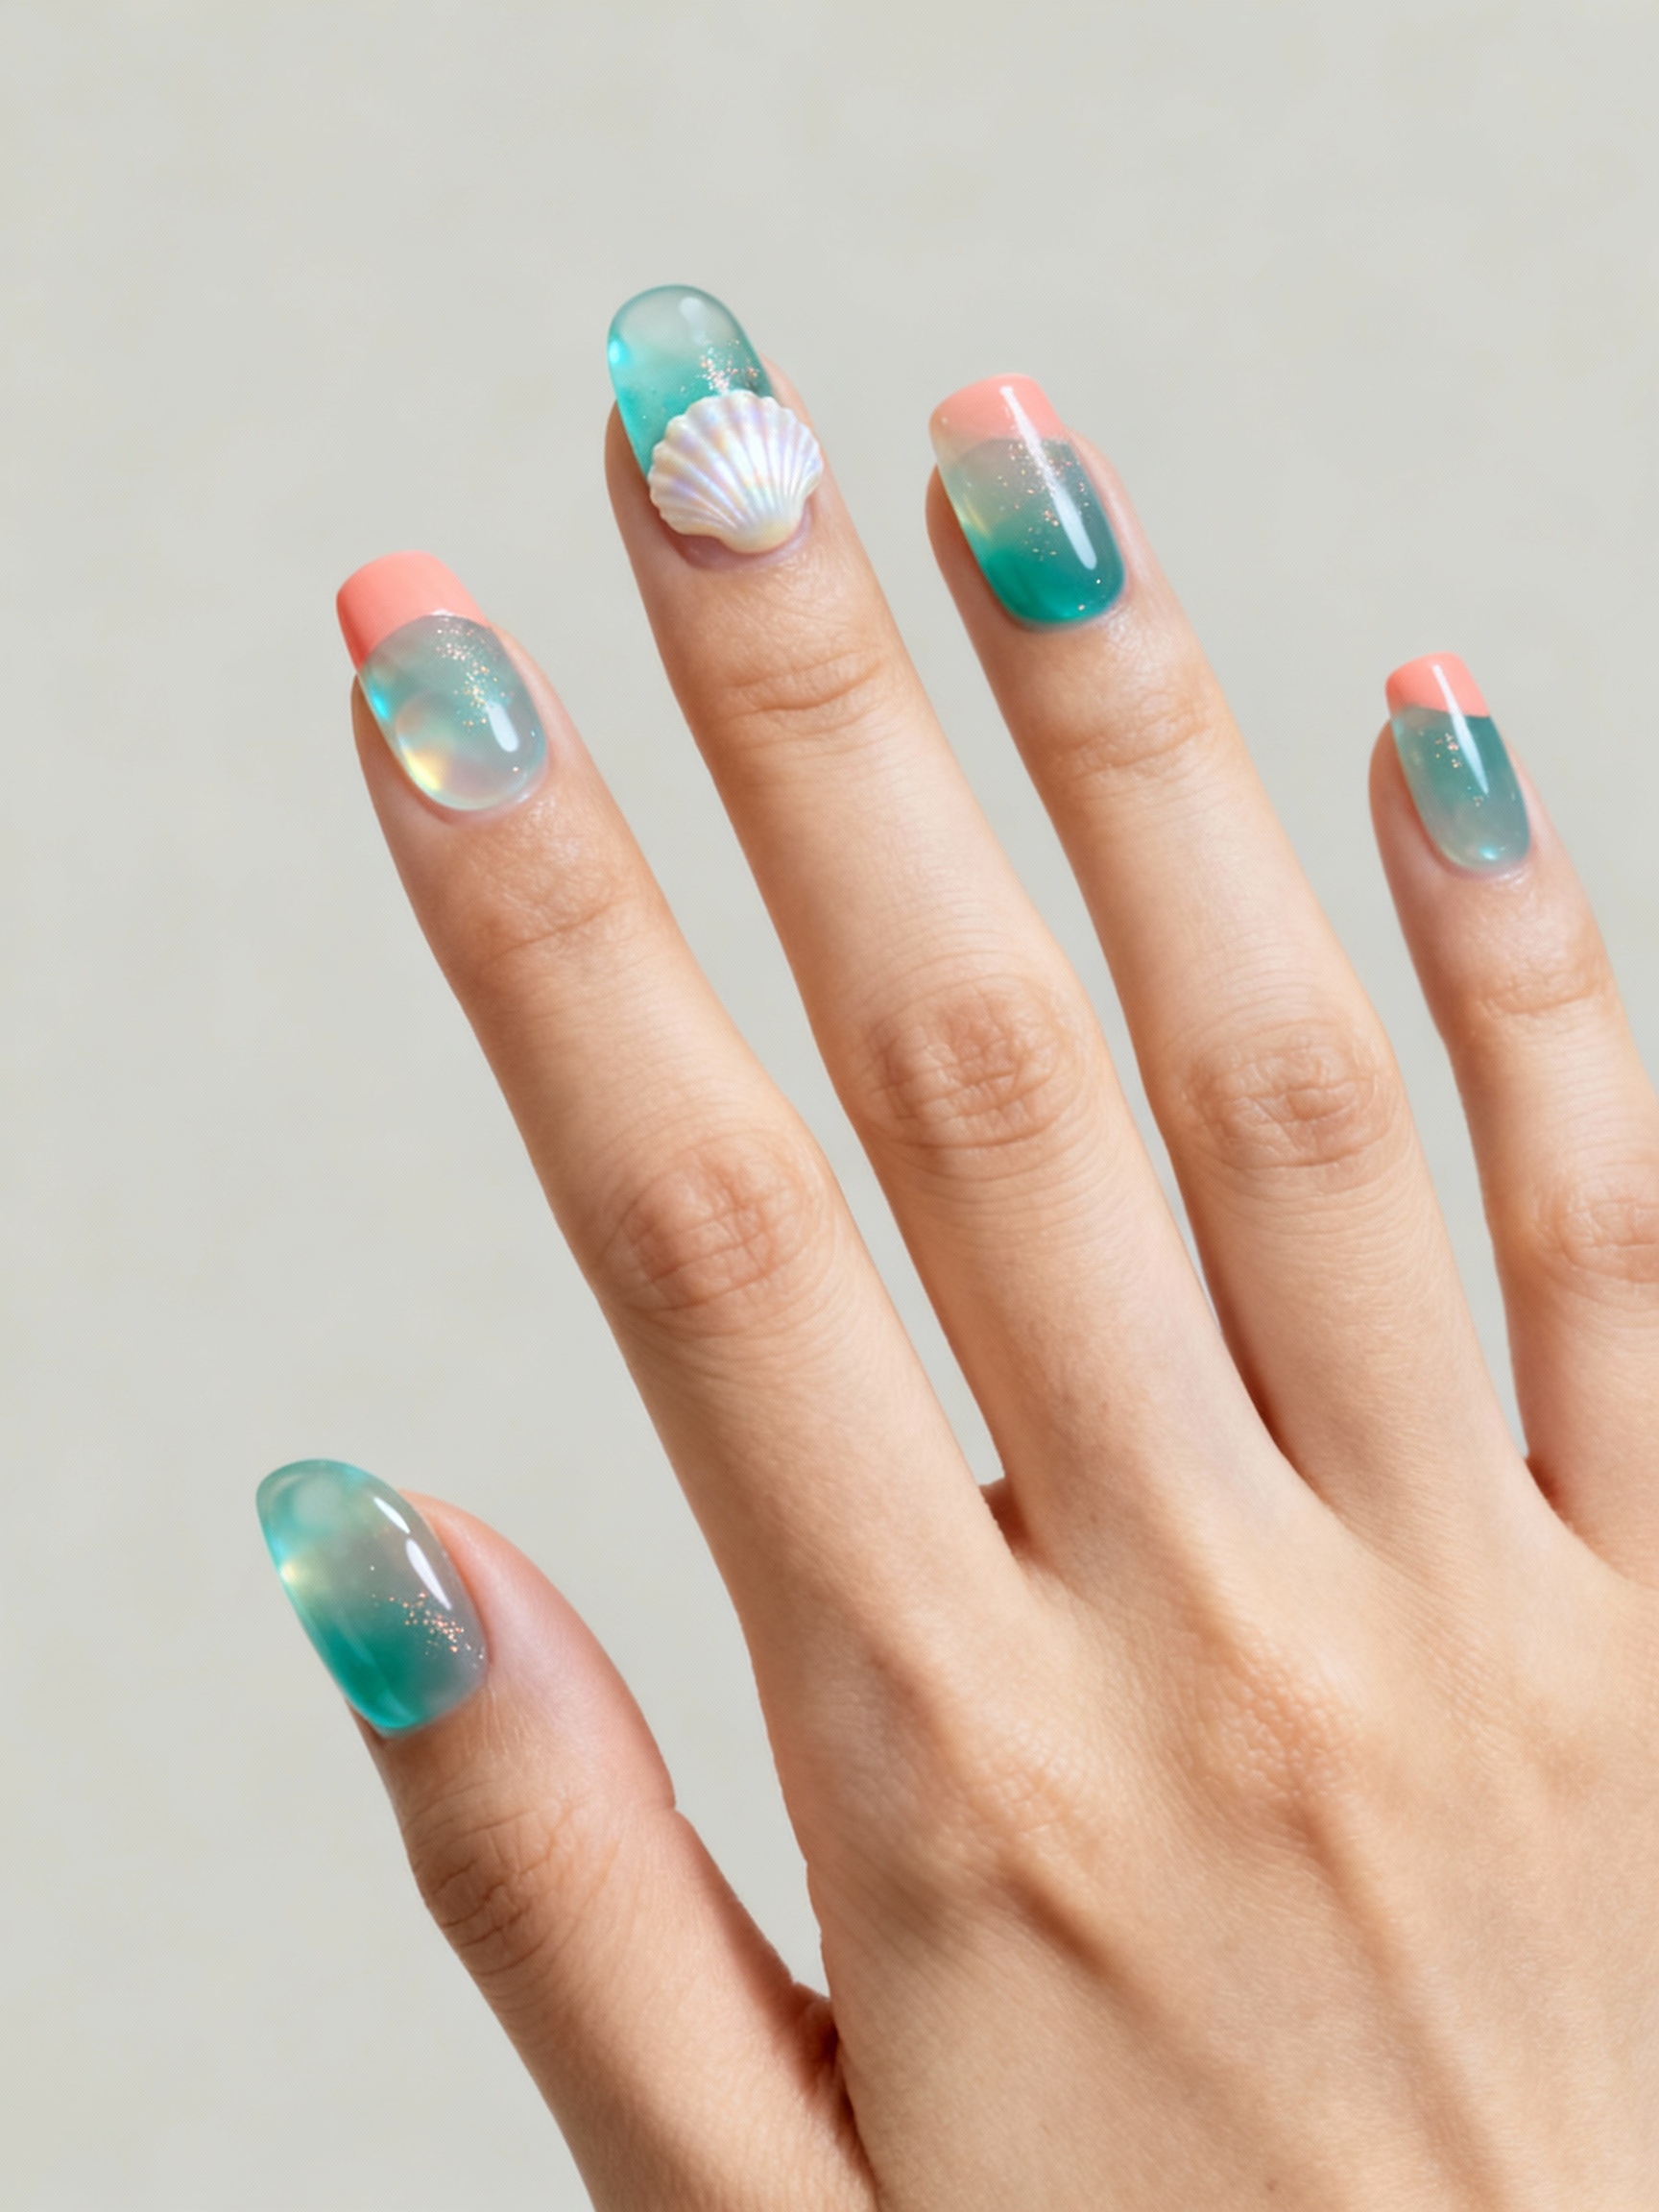
Aqua jelly turns fingertips into tide pools: translucent, glossy, and catching light at every angle. You layer a sheer aqua or teal jelly, then seal it under a glassy top for that waterline glow.
Why Jelly Beats Opaque for Travel
The sheer formula is forgiving. It hides minor ridges, grows out without a hard line, and a chip barely shows because there is no solid block of color to break. That makes it the set I push for anyone flying somewhere they cannot easily find a salon.
A whisper of iridescent shimmer in the jelly mimics sun ripples on water. Keep it light. Too much and the tide-pool effect turns into a disco, which is a different vacation entirely.
A tropical set is the one manicure people book for the trip before they have packed a single thing. It is the first vacation purchase, and the one that shows up in every photo.
Sunset Coral With Whispered Gold
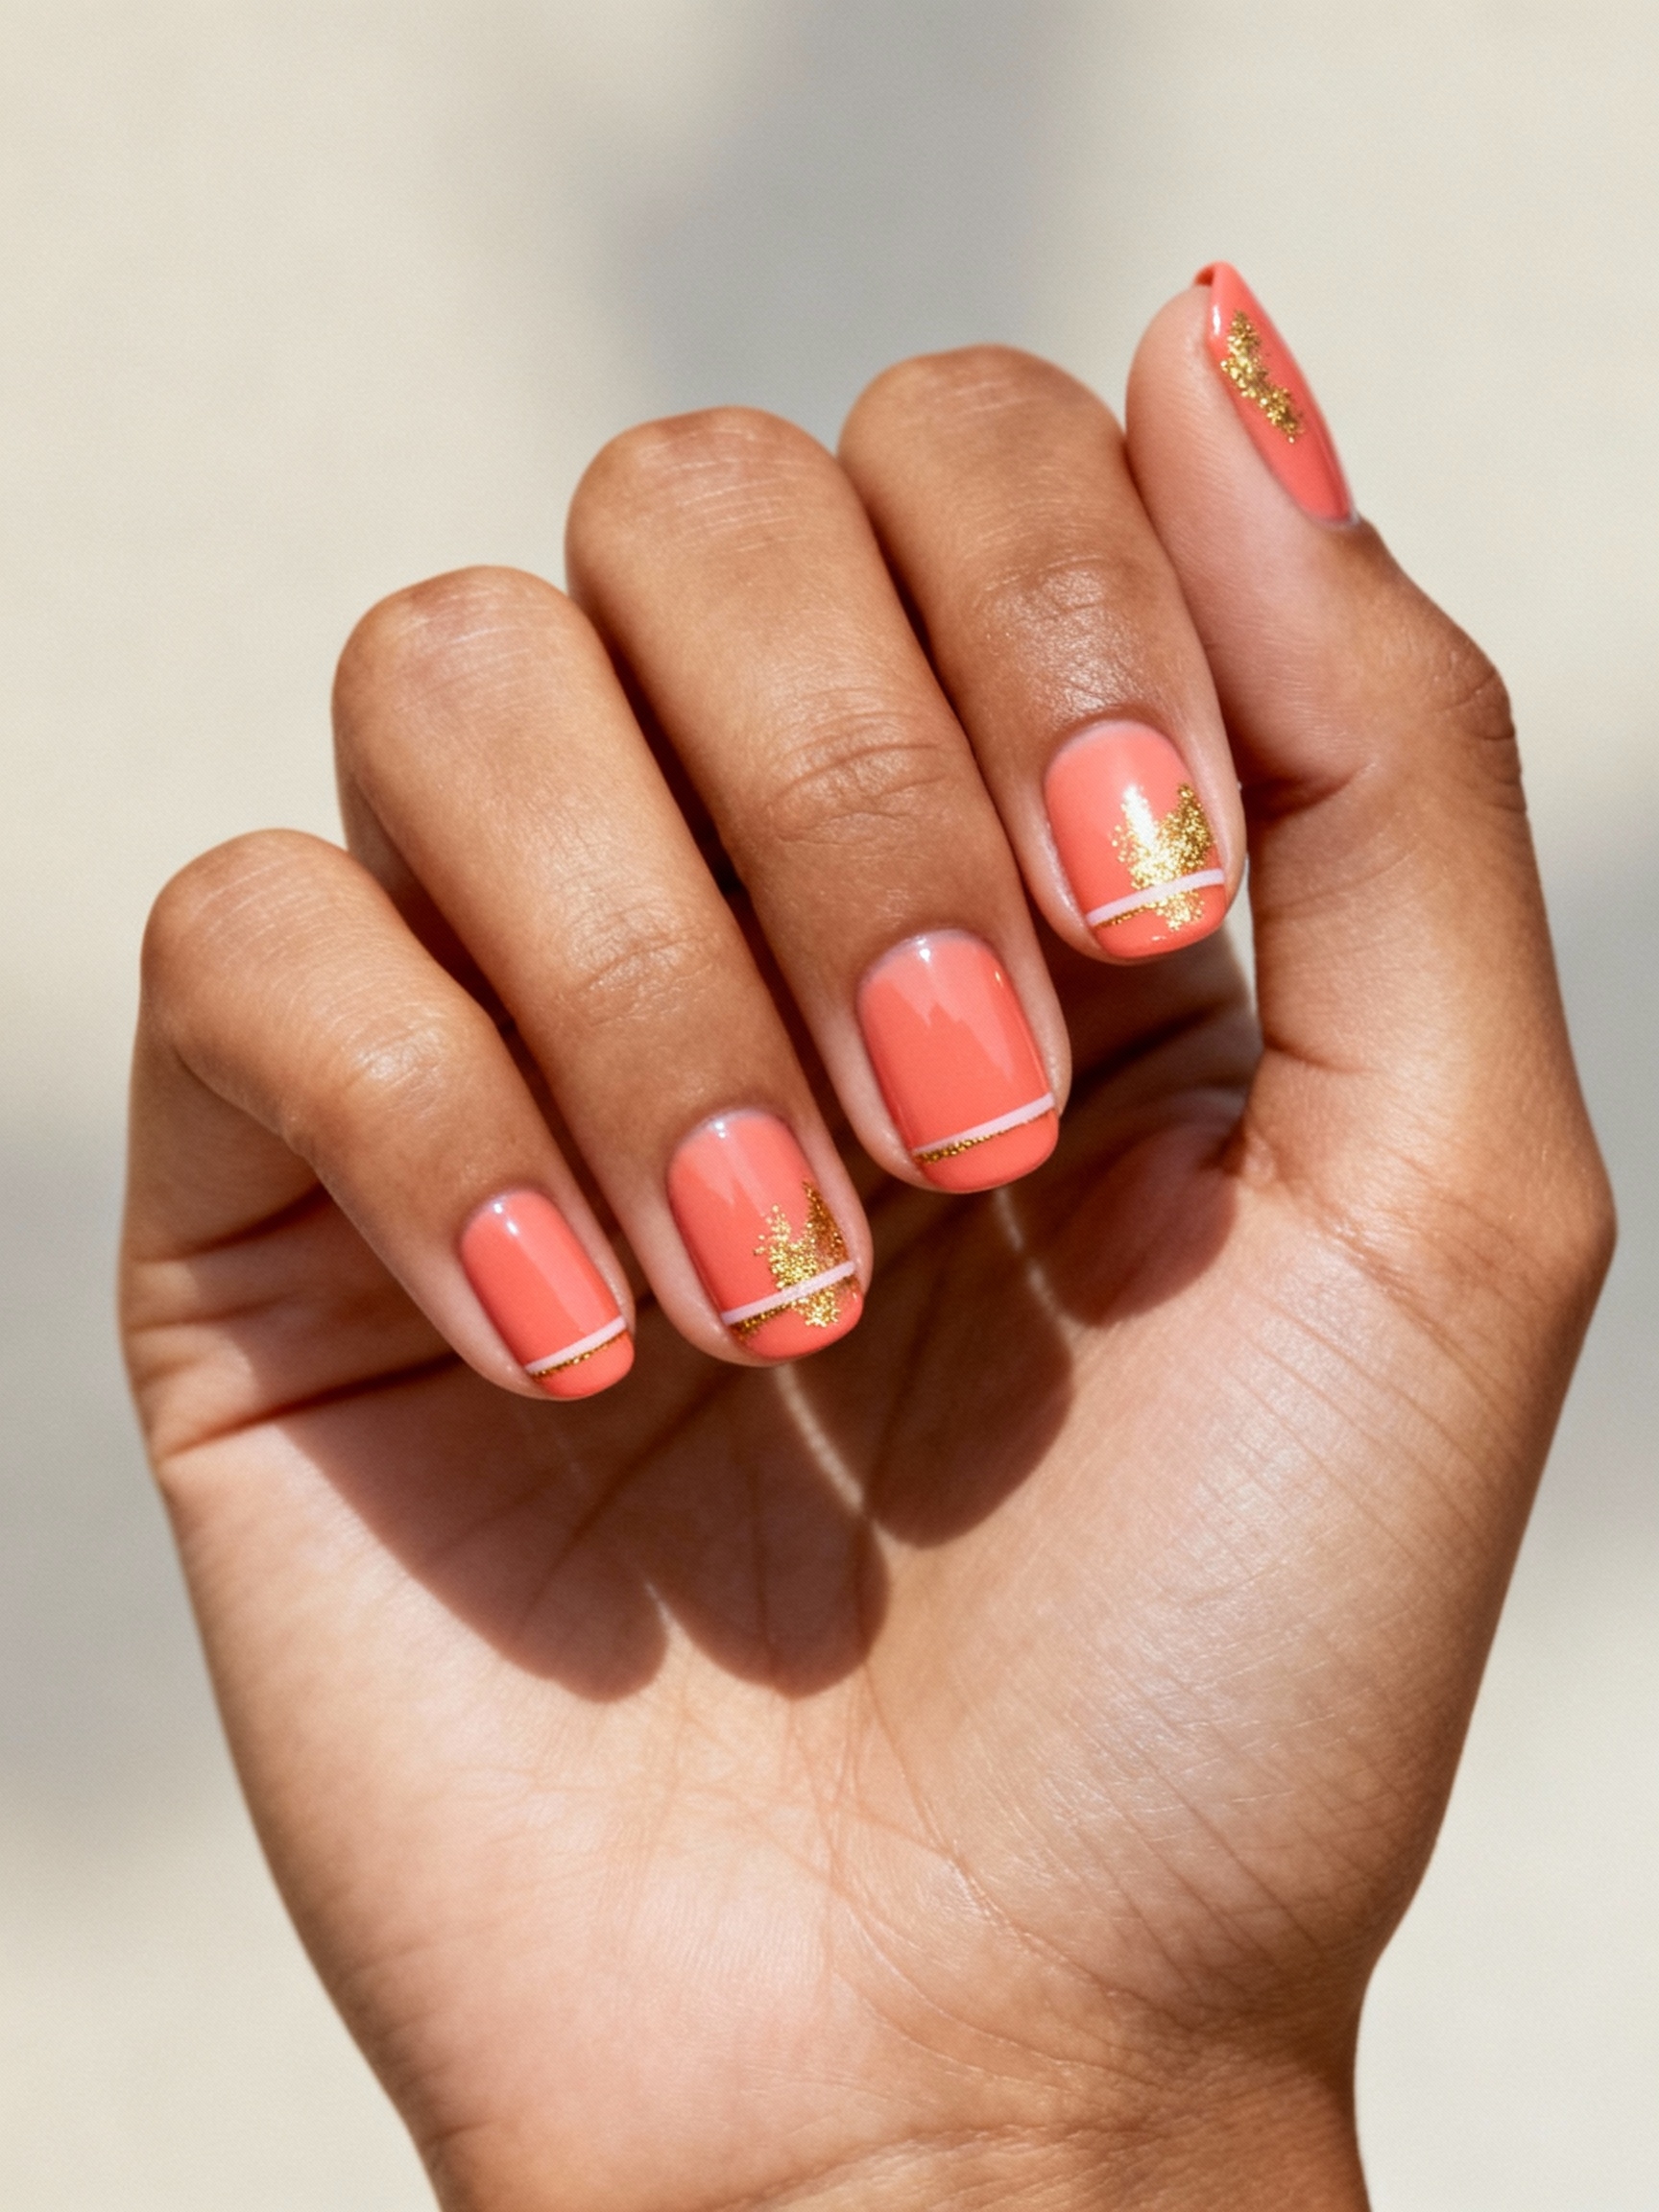
Not everyone wants a literal palm tree on their hand, and this is the look I offer them instead. A creamy coral base, washed with the softest gold accents, gives a sun-flushed glow that works at a beach dinner and a Monday meeting alike. It is tropical in spirit, office-safe in practice.
The gold has to stay quiet to look modern: a whisper-thin line, or a single metallic dot near the cuticle, nothing more. Negative space keeps the coral and gold breathing so the hand looks calm. This is the set that travels home from vacation and still earns compliments, much like a good summer vacation set.
- Match the coral to your undertone; peachy corals flatter warm hands, pink-corals cool ones
- Apply gold with a striping brush for control, then cap it under gloss so it cannot lift
- Skip a second metallic element; one gold accent per nail is the ceiling
Sun-Kissed Colorful French Tips
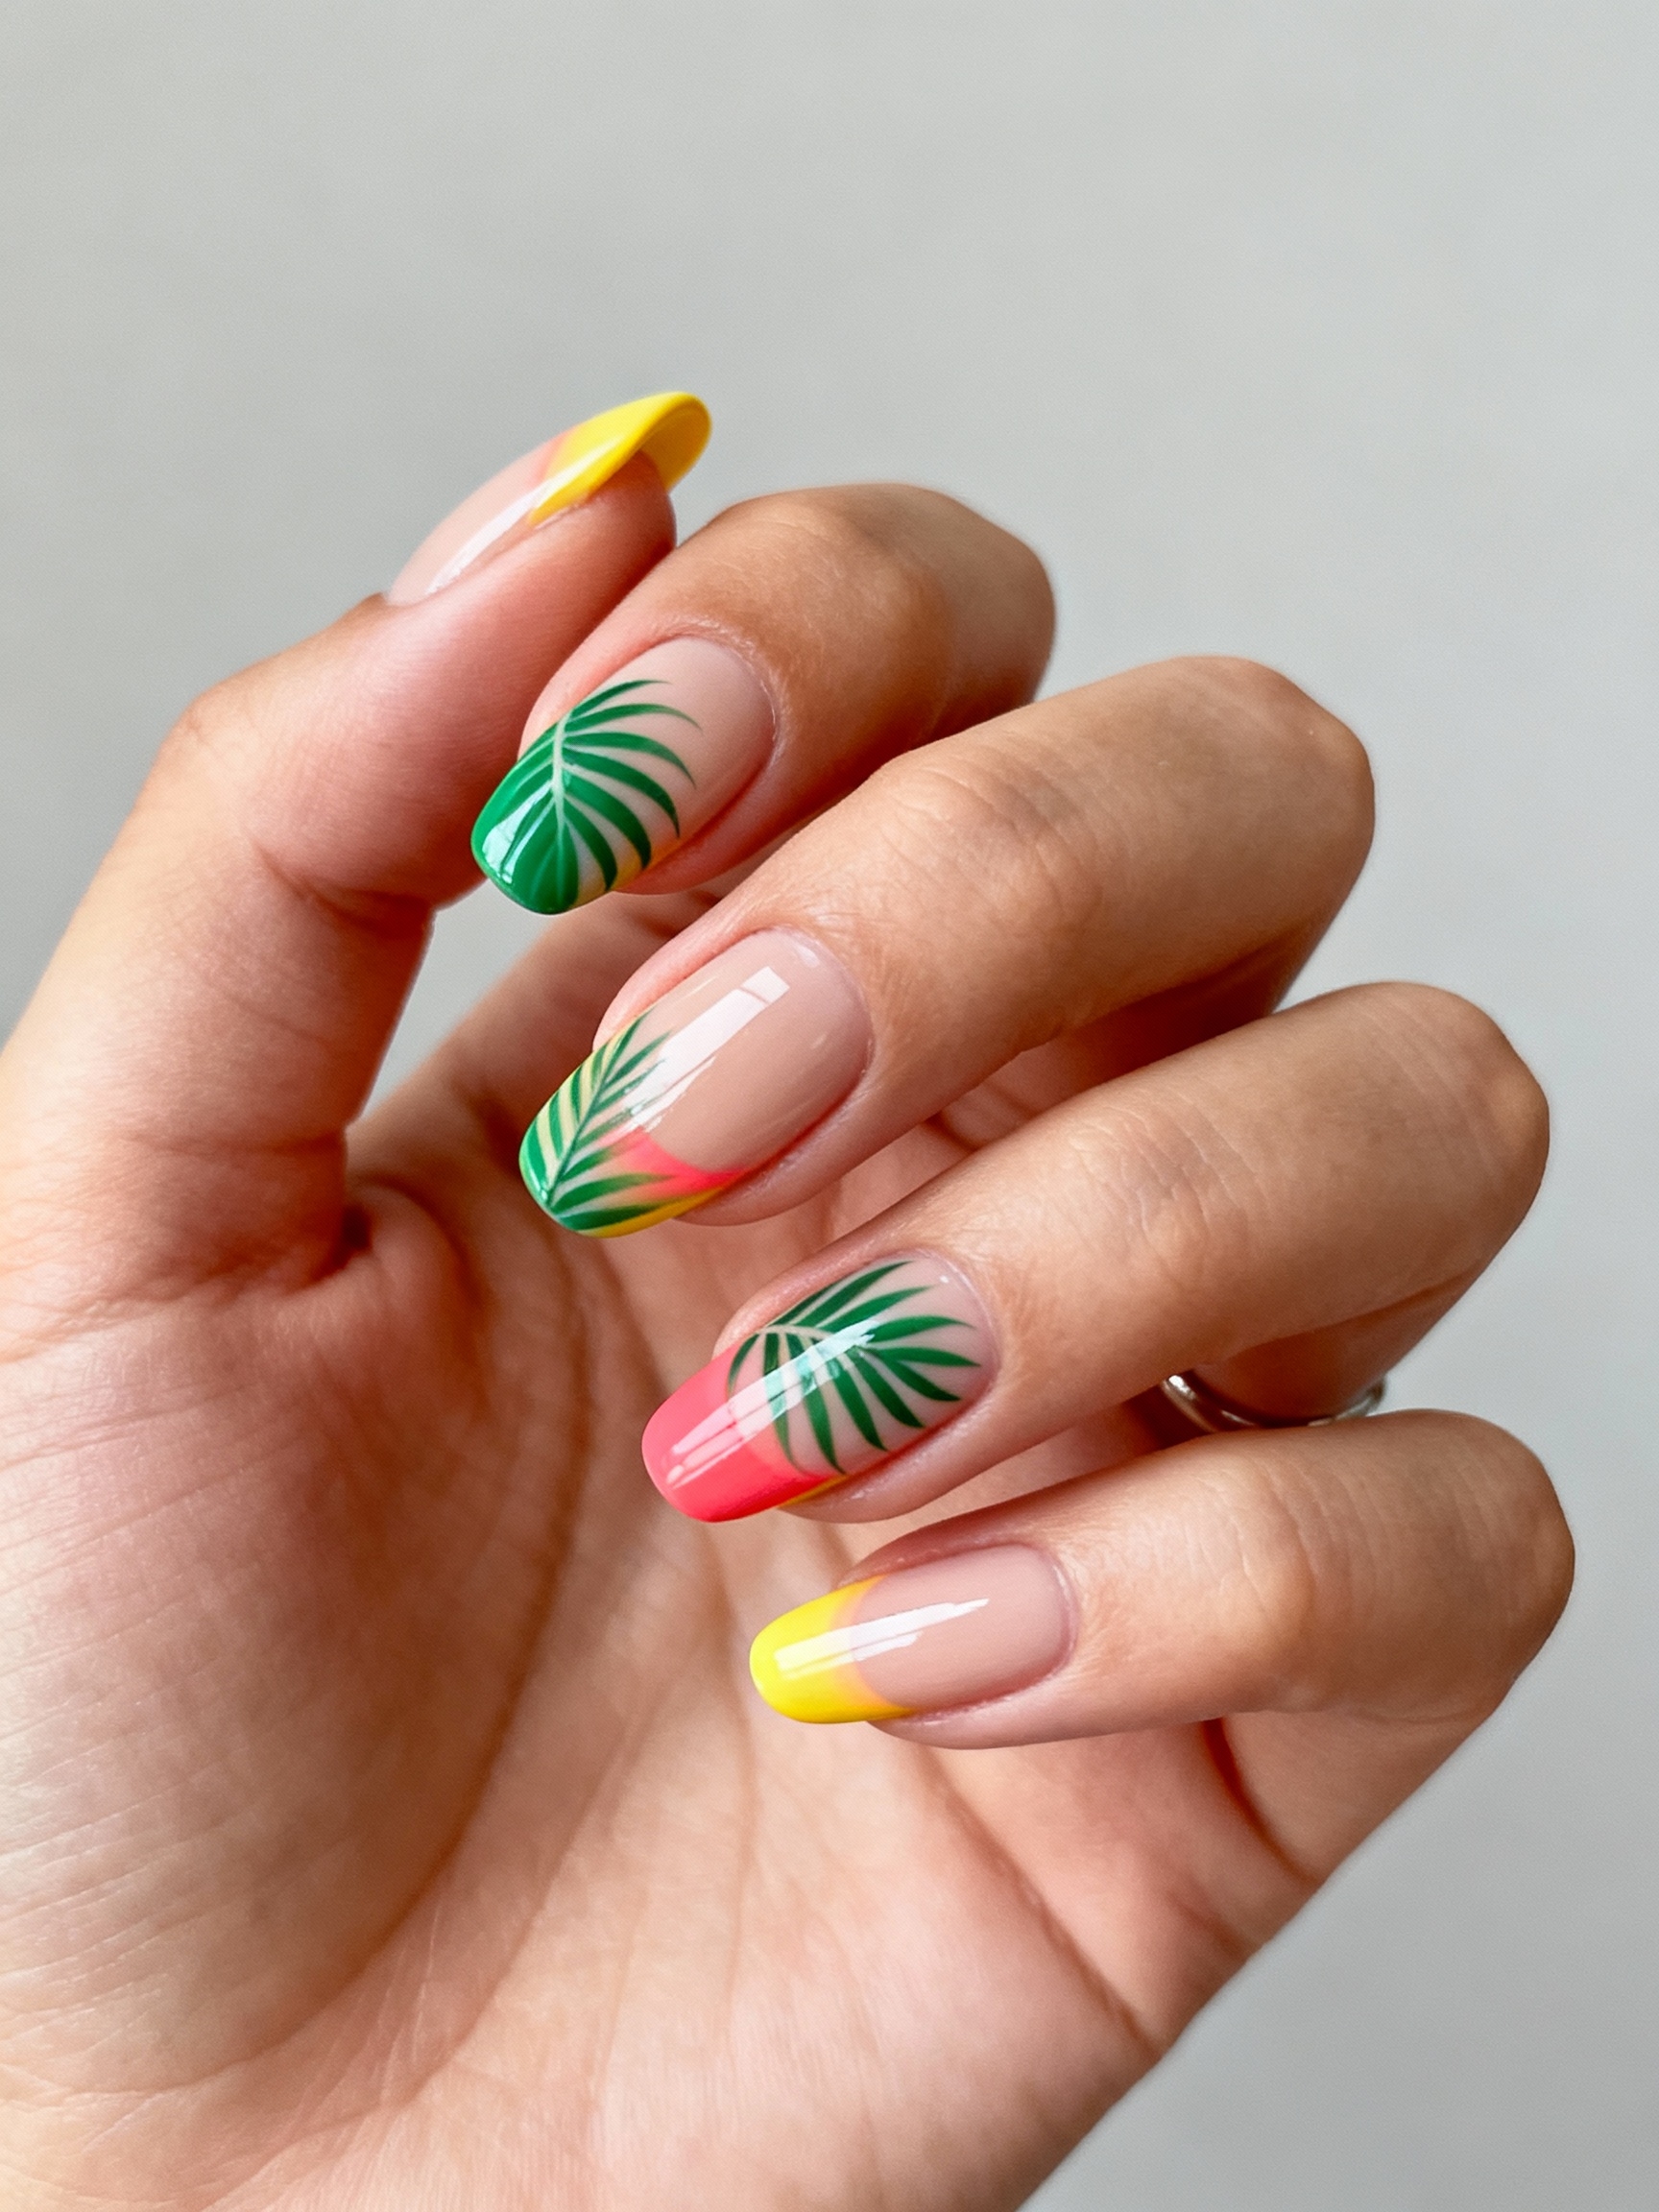
A tropical French tip is the classic with its collar turned up. You swap the white edge for palm-green, hibiscus-pink, or sunset-orange and suddenly a wedding-safe shape feels like a poolside one. Glossy sheer bases under slender bright arcs keep it polished.
There is range here for every comfort level. Want subtle? Run a tonal ombré tip that barely shifts from the base. Feeling bold? Alternate a different bright per finger for a fruit-bowl hand. Both photograph well and play nicely with gold jewelry.
The shape carries the elegance, so a clean arc matters more than the color. If freehand tips stress you out, the same effect works with guide tape or as a colored take on almond French tips.
Sleek Emerald Monstera Line Art
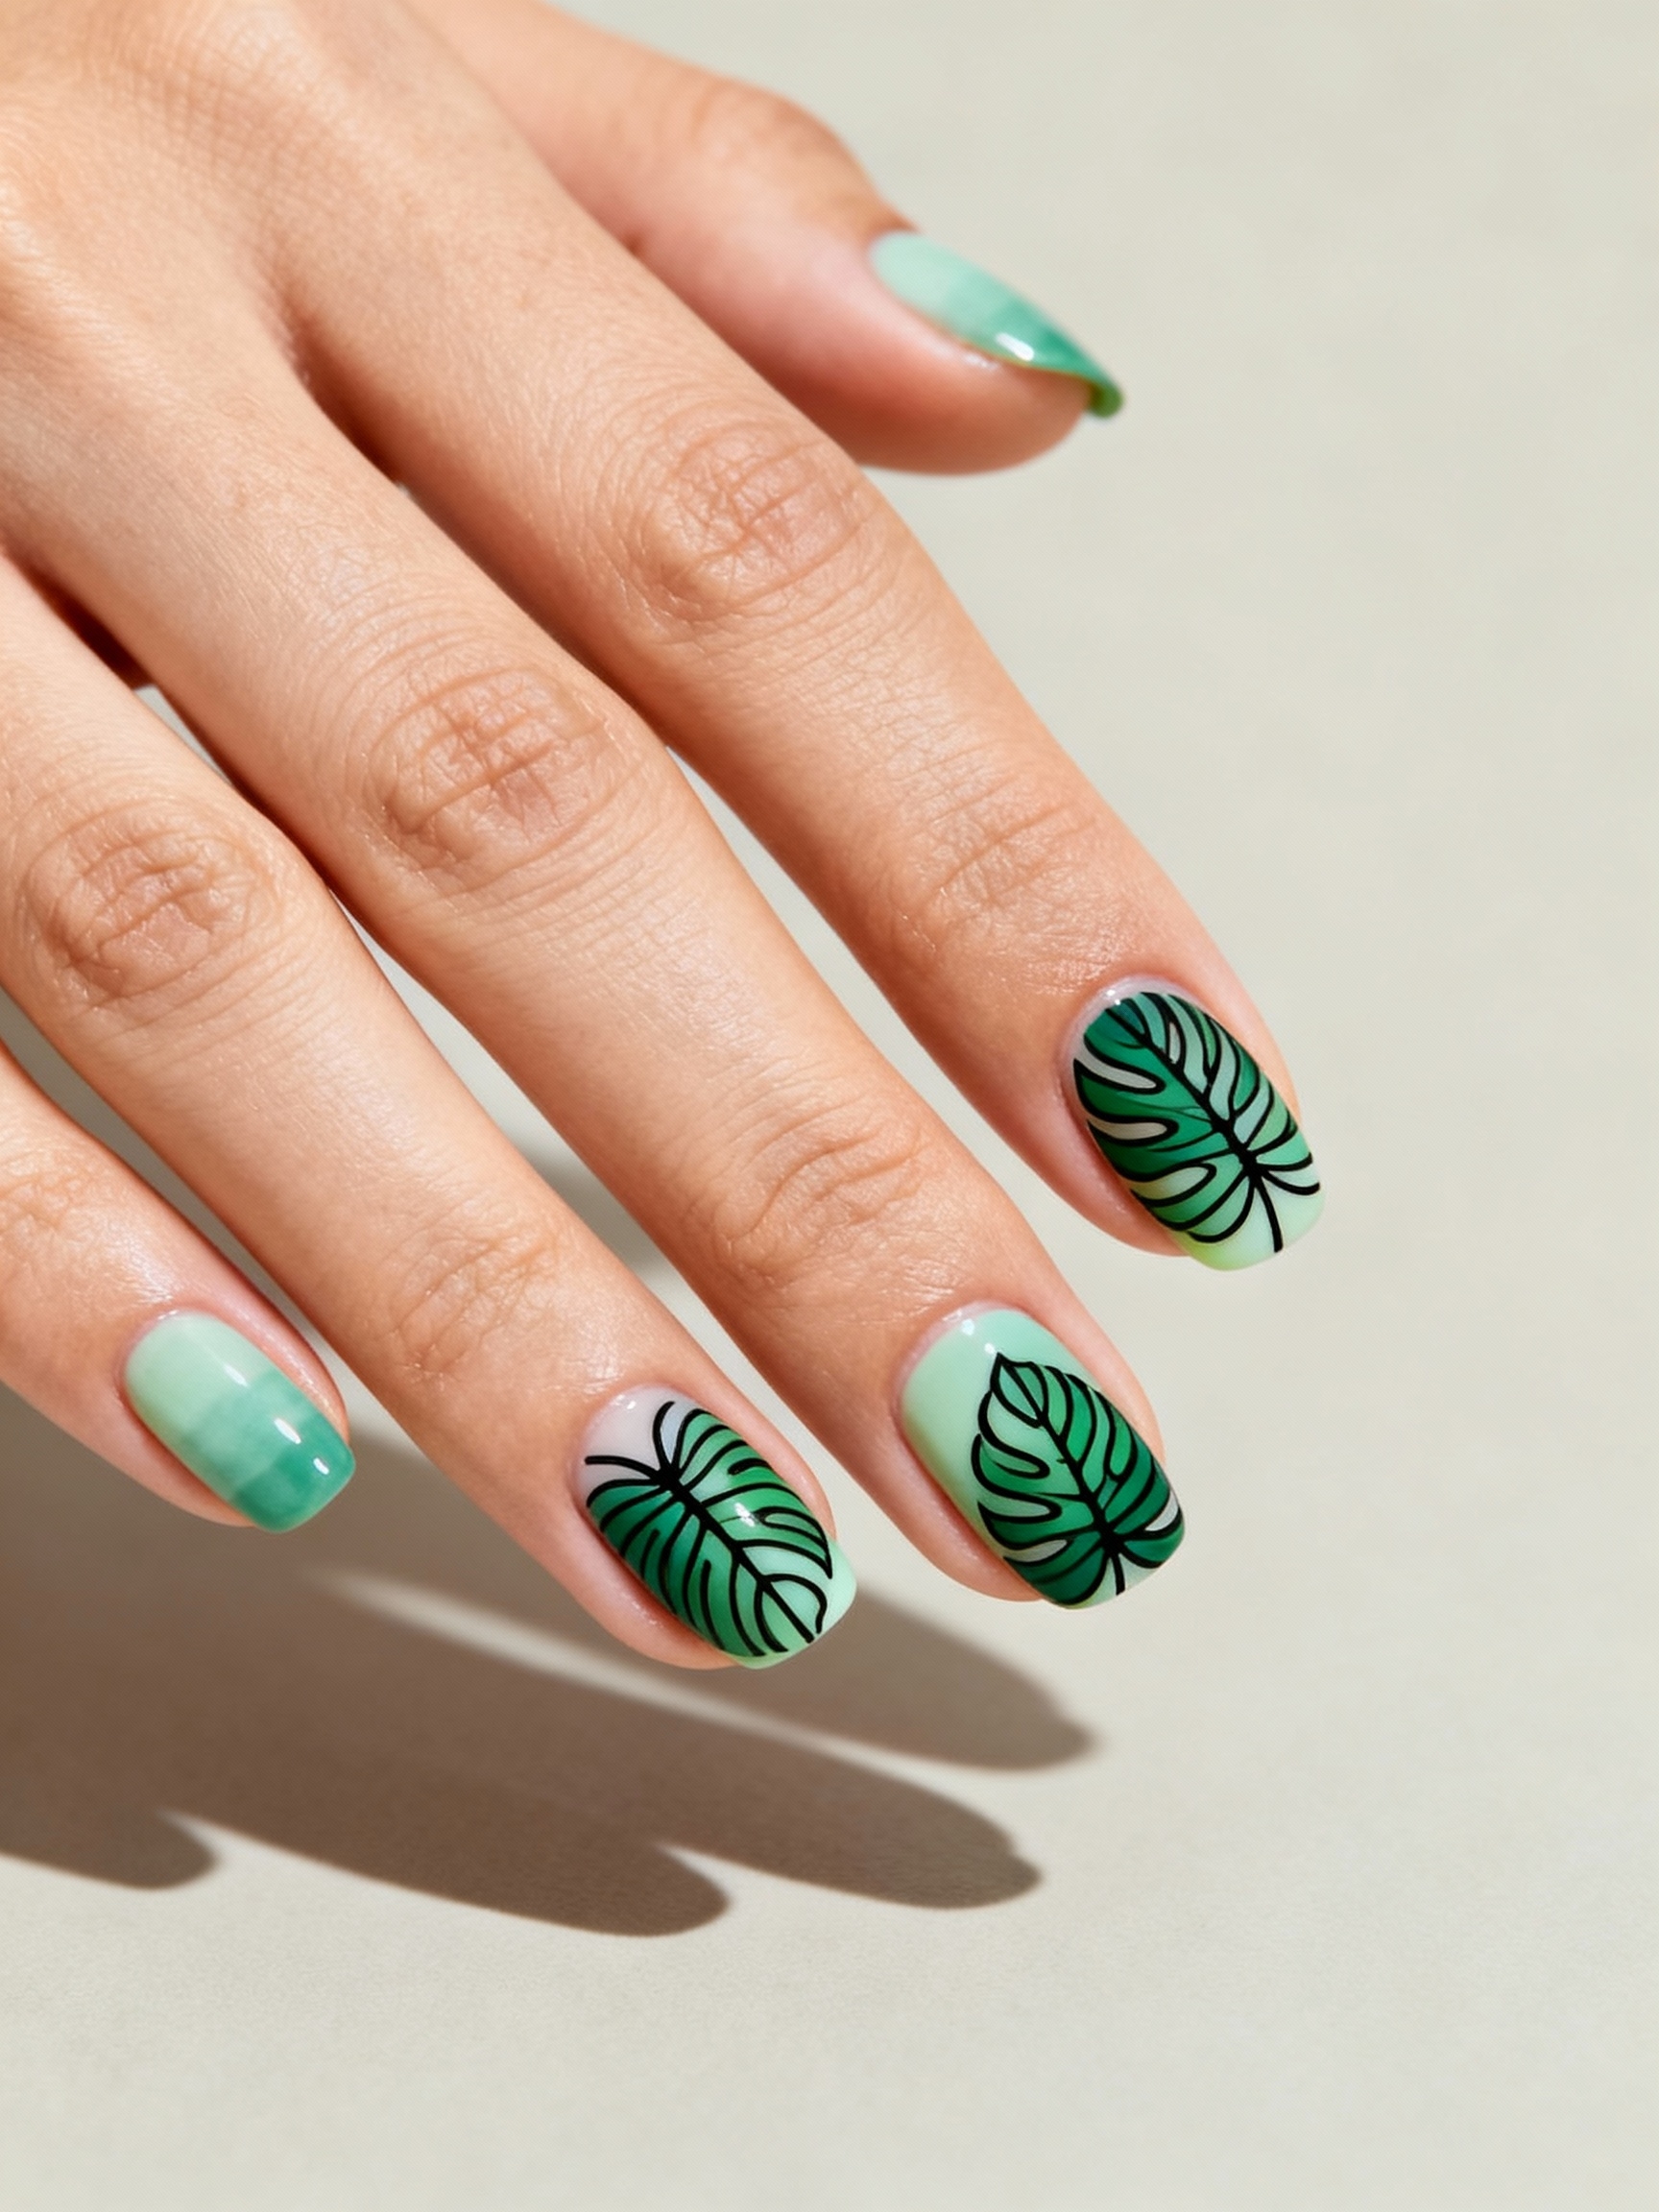
Monstera line art is the grown-up cousin of the painted leaf: graphic, a little lush, and very resort-ready. I sketch slender emerald fronds over a sheer nude or milky pink, letting the negative space do most of the talking. Crisp lines feel modern, and softening a few edges with micro-curves keeps them from looking like a logo.
This is the look that looks expensive without a single rhinestone. It pairs with warm skin and a glossy top, and it suits people who want the tropical nod kept quiet. A fine brush and a light hand are the whole game.
- Start sheer so the green lines have room to breathe
- Vary the line weight along each frond so it looks drawn, not stamped
- Map the leaves lightly before committing to the gel
Seashell-Accented Pearlescent French
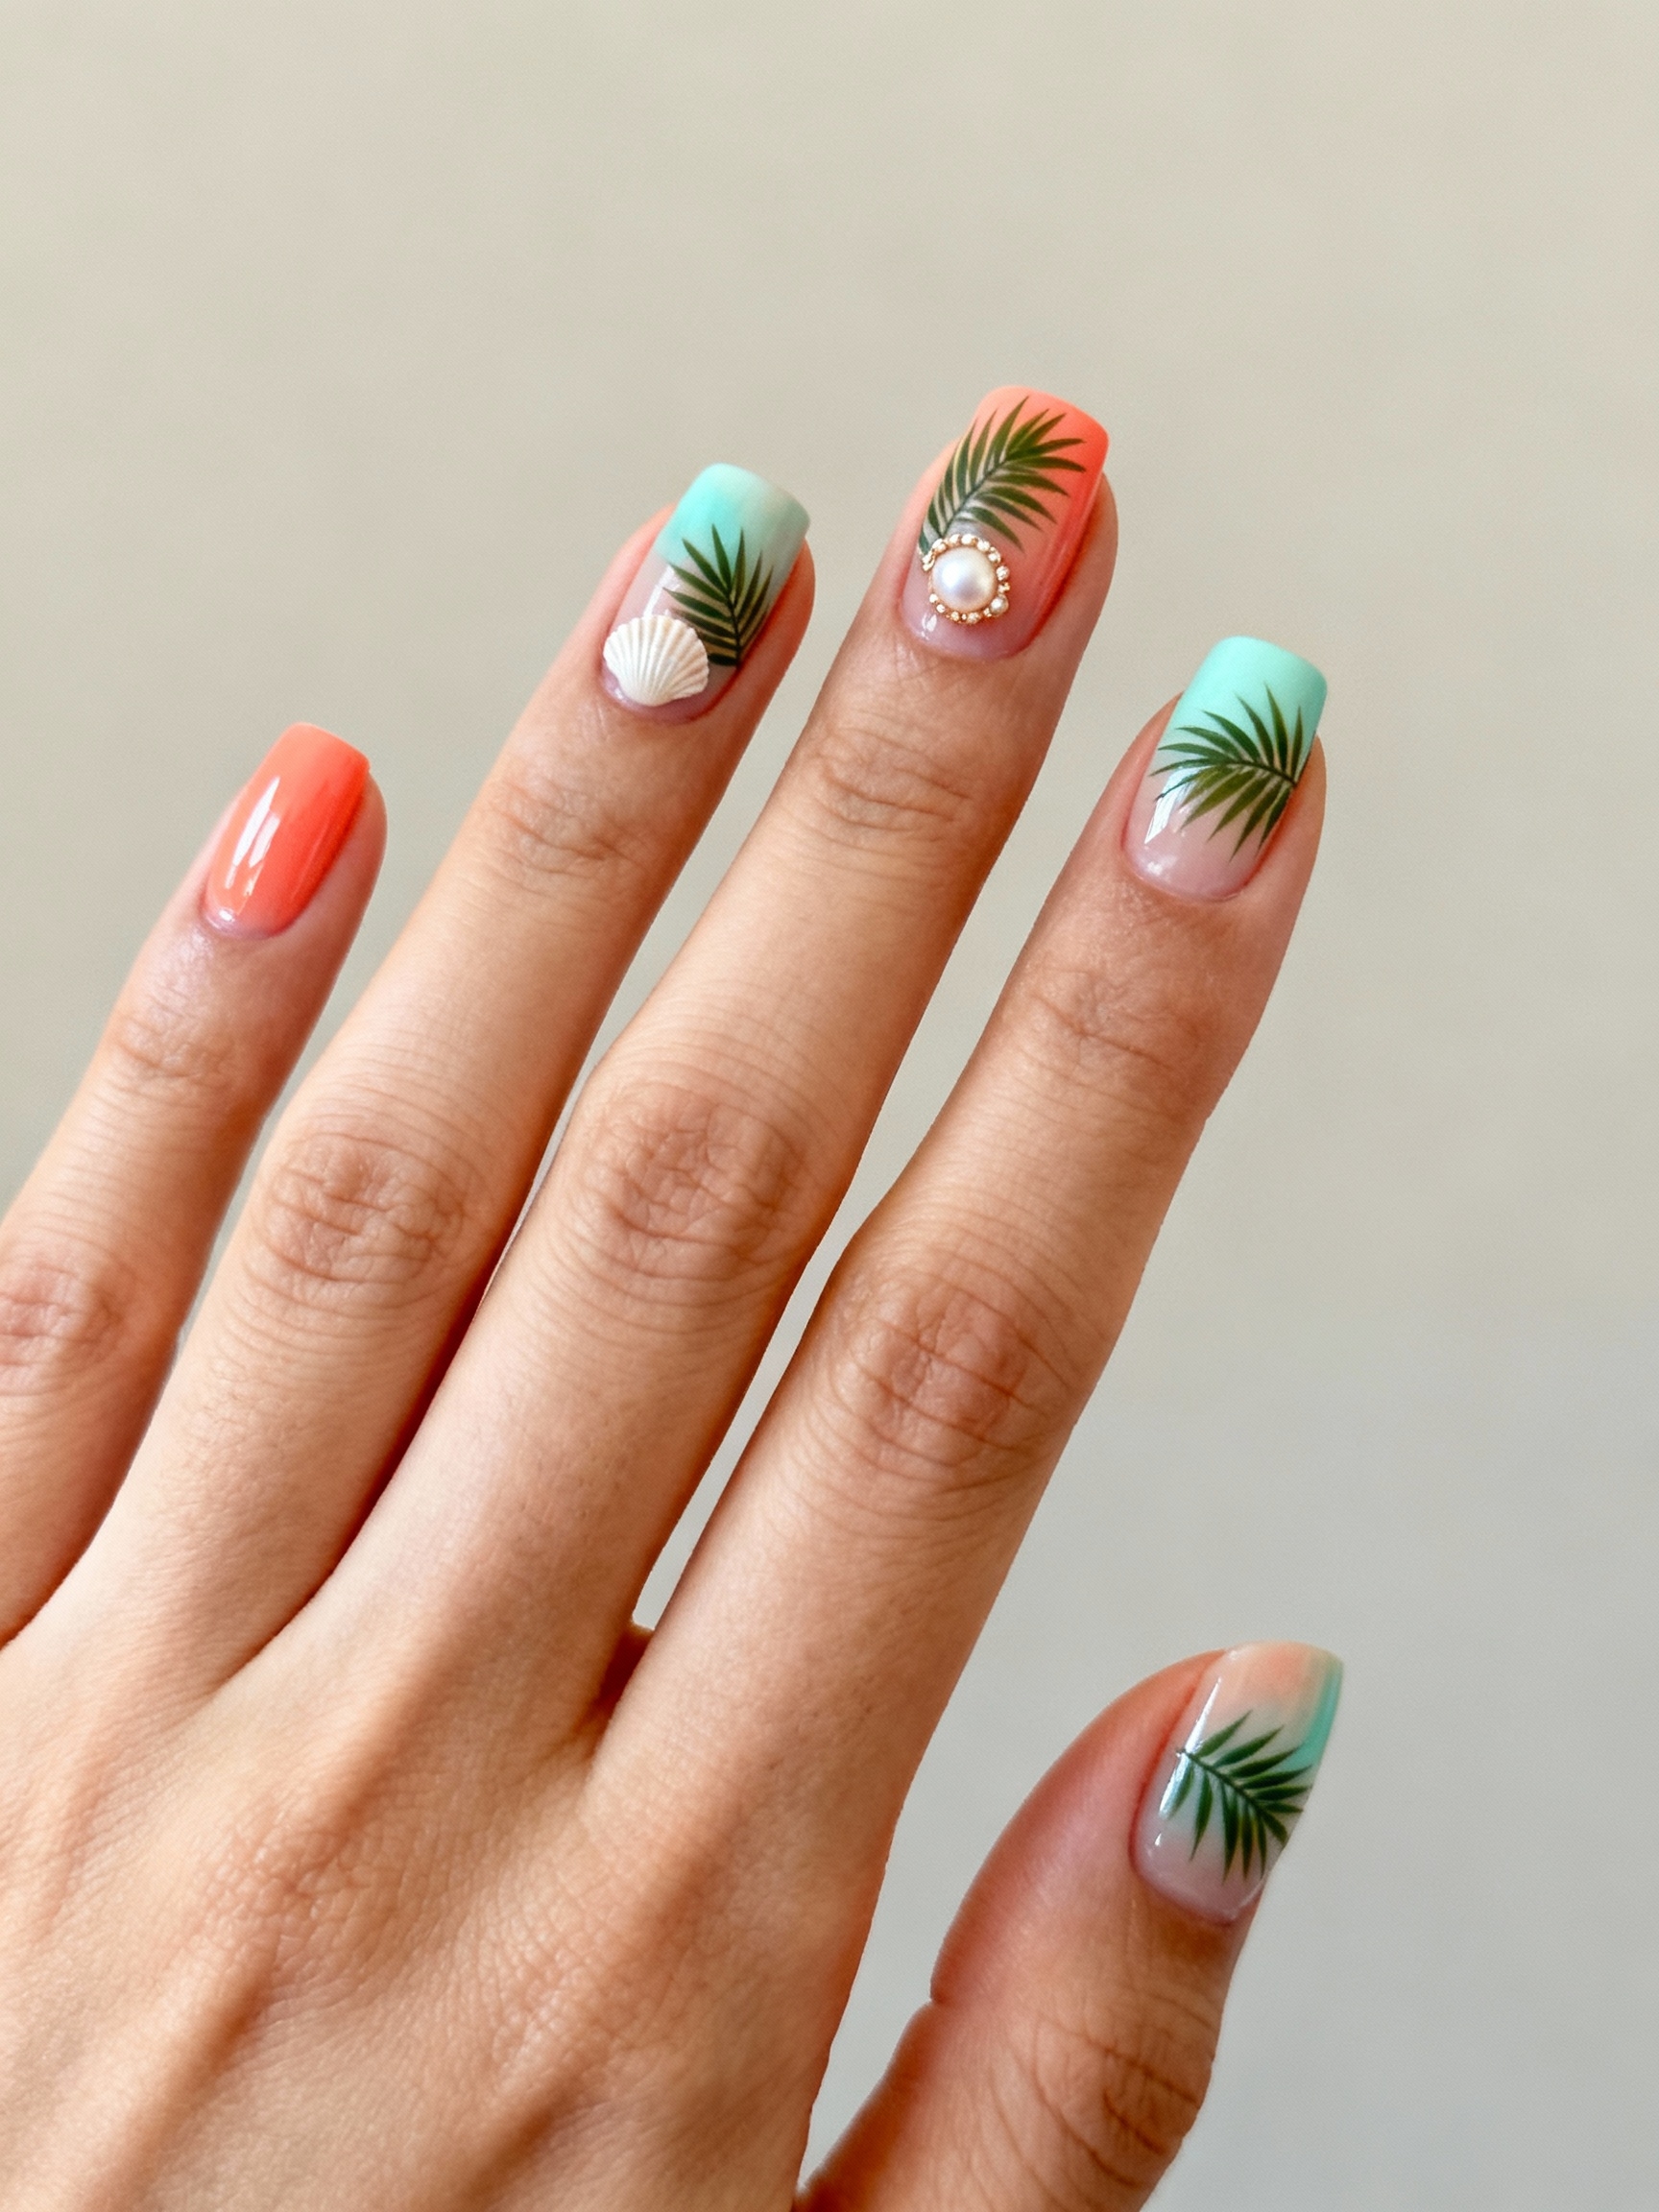
This is coastal polish for people who find painted fruit a bit much. A blush nude base, tiny pearl clusters at the cuticle, and one gilded shell accent give instant beach elegance without a single bright color. Build it in this order so the placement stays balanced:
- Lay the blush nude base and cure it fully before any 3D work
- Set tiny pearls in a small cluster at the cuticle, weighting one corner so it looks intentional
- Frame a French tip or two with micro-pearls for extra glow
- Press a single gilded shell on an accent nail, then flood gloss around it so nothing catches
Pastel Tie-Dye Beach Waves
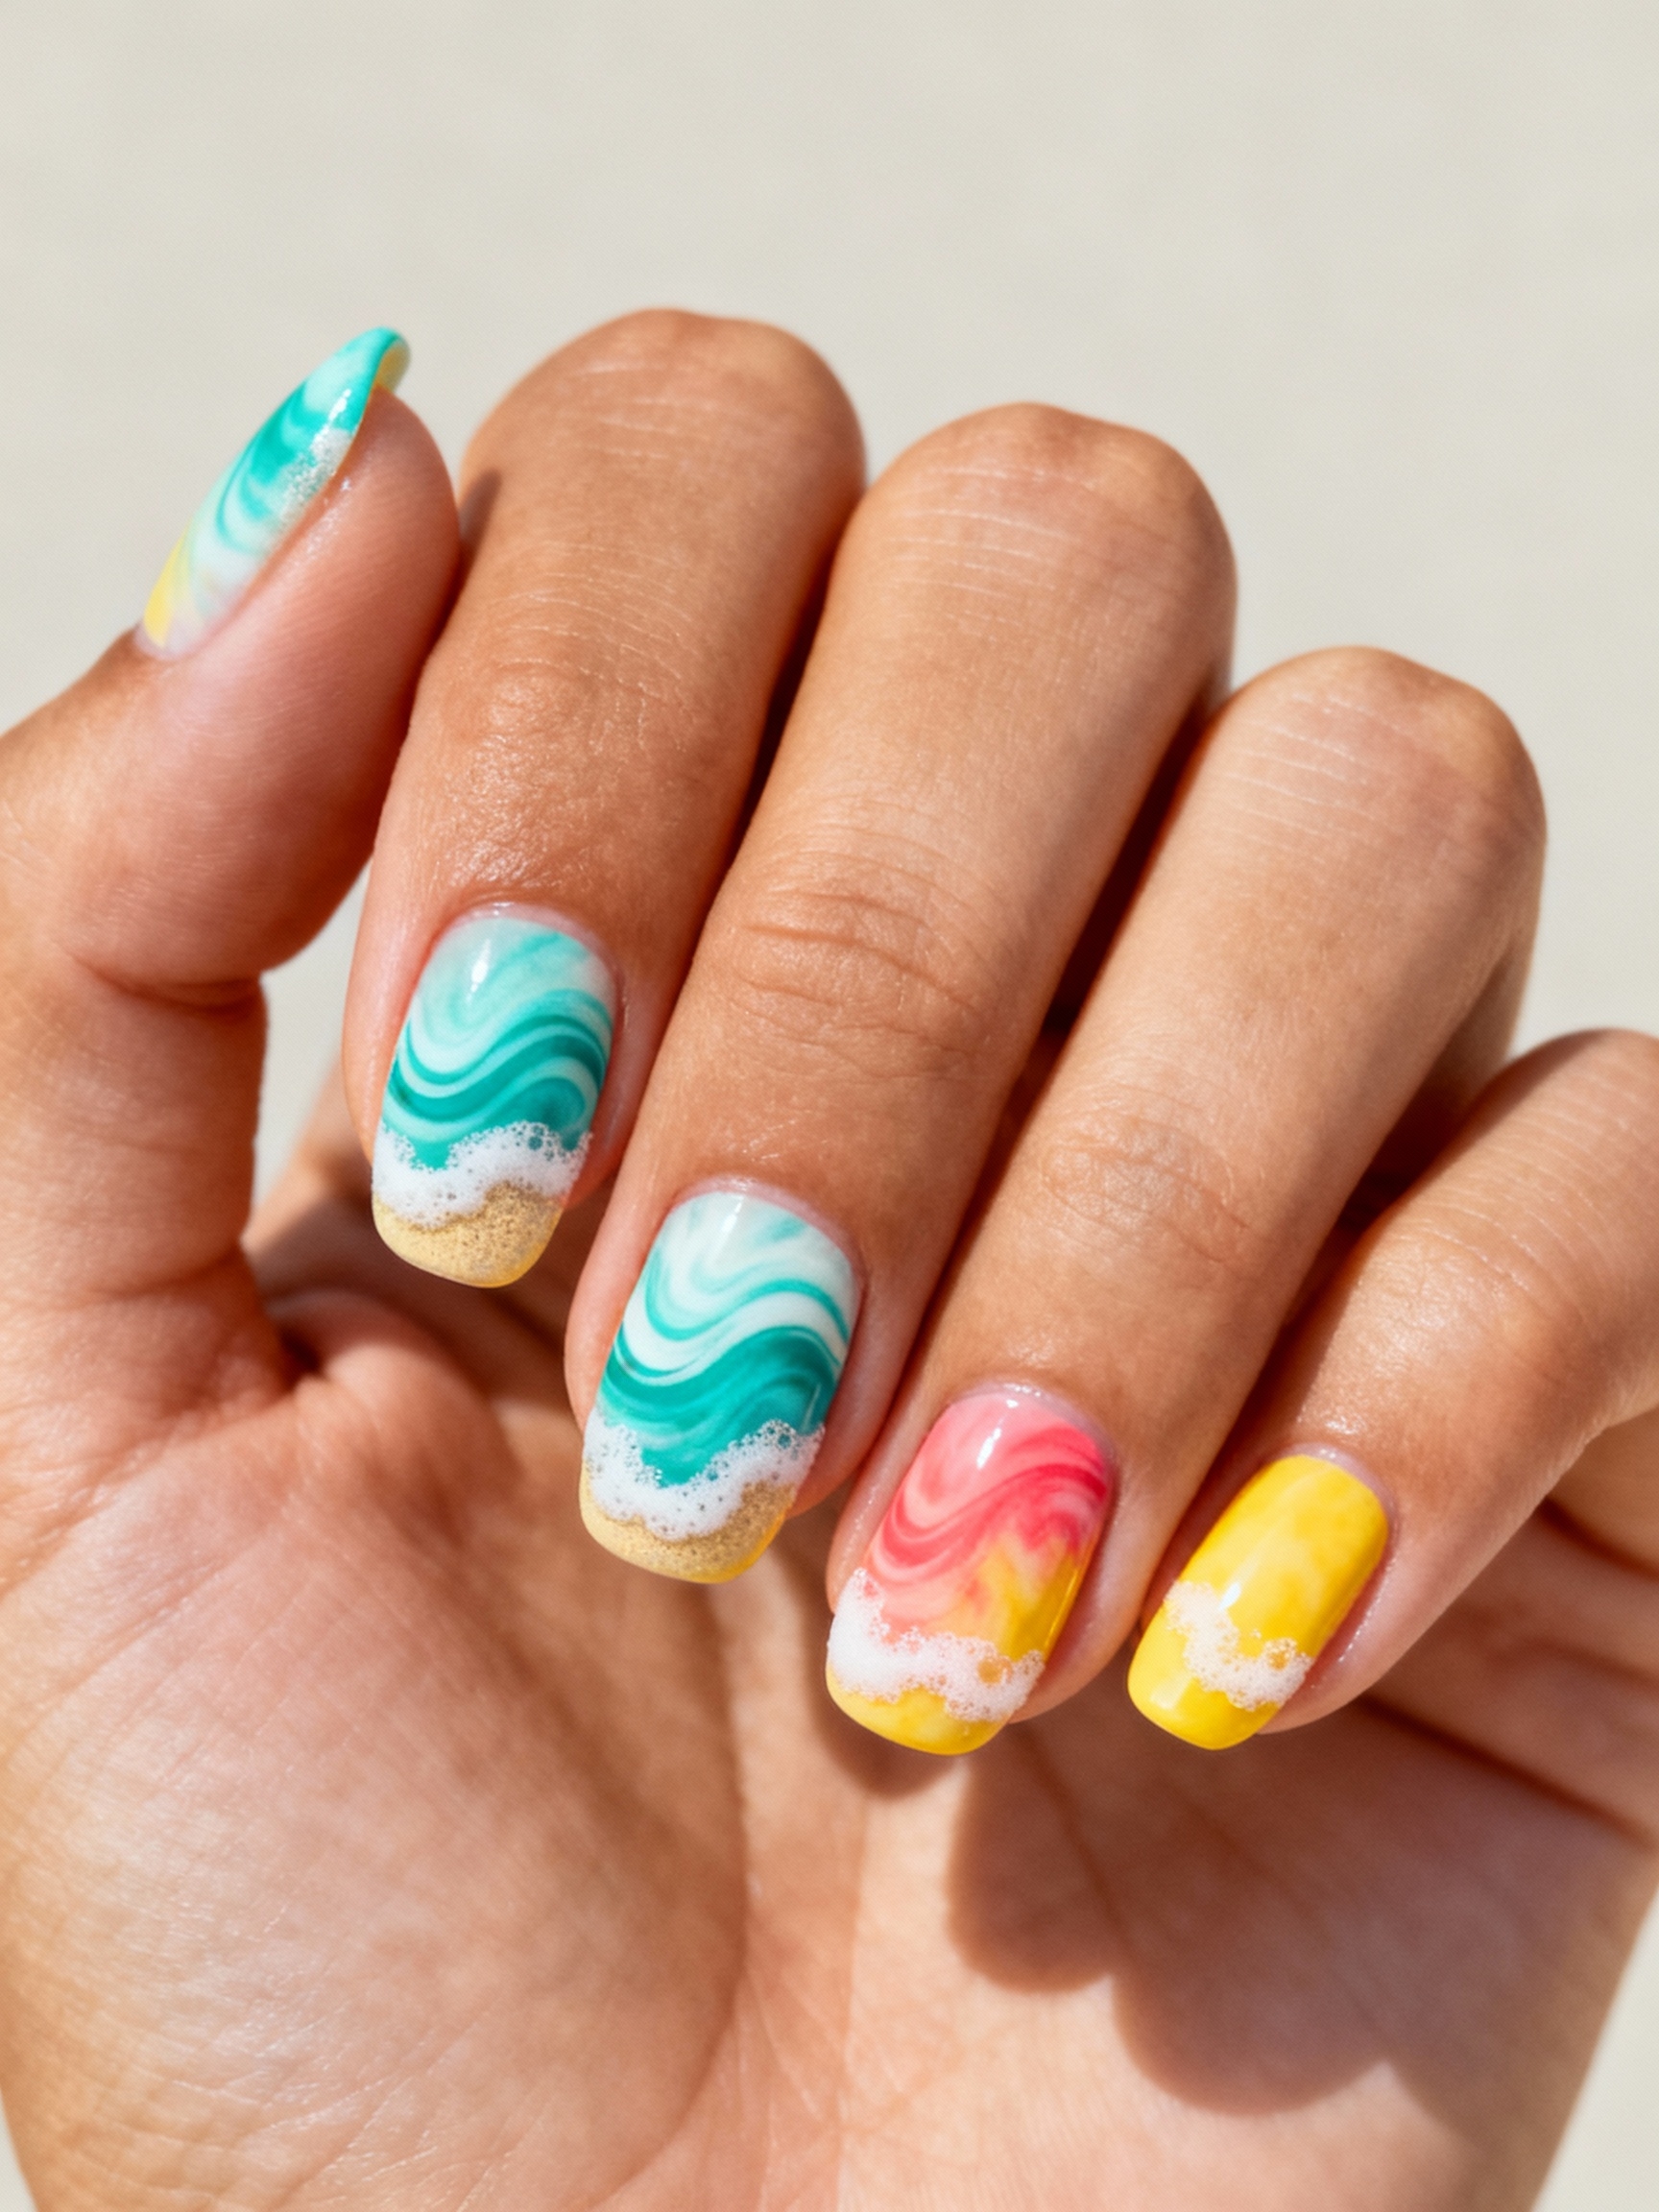
Tie-dye sounds loud, but in sun-faded pastels it turns soft and dreamy, like shoreline foam pulling back over sand. I brush wispy swirls of coral, seafoam, and lemonade, then seal them glossy so they glint at golden hour.
Work It Wet-on-Wet
The blur is everything, and it only happens if you work wet-on-wet. Drop two or three pastels next to each other before any of them set, then feather the borders wet-on-wet with a clean fine liner so they bleed like watercolor. Let one dry first and you get stripes, not waves.
Almond tips suit this best because the long curve gives the swirls somewhere to travel. A micro-shimmer topcoat adds the final golden-hour glint, and it sits closer to the polished end of bright summer nails than the messy one.
Tropical Parrot-Inspired Nails
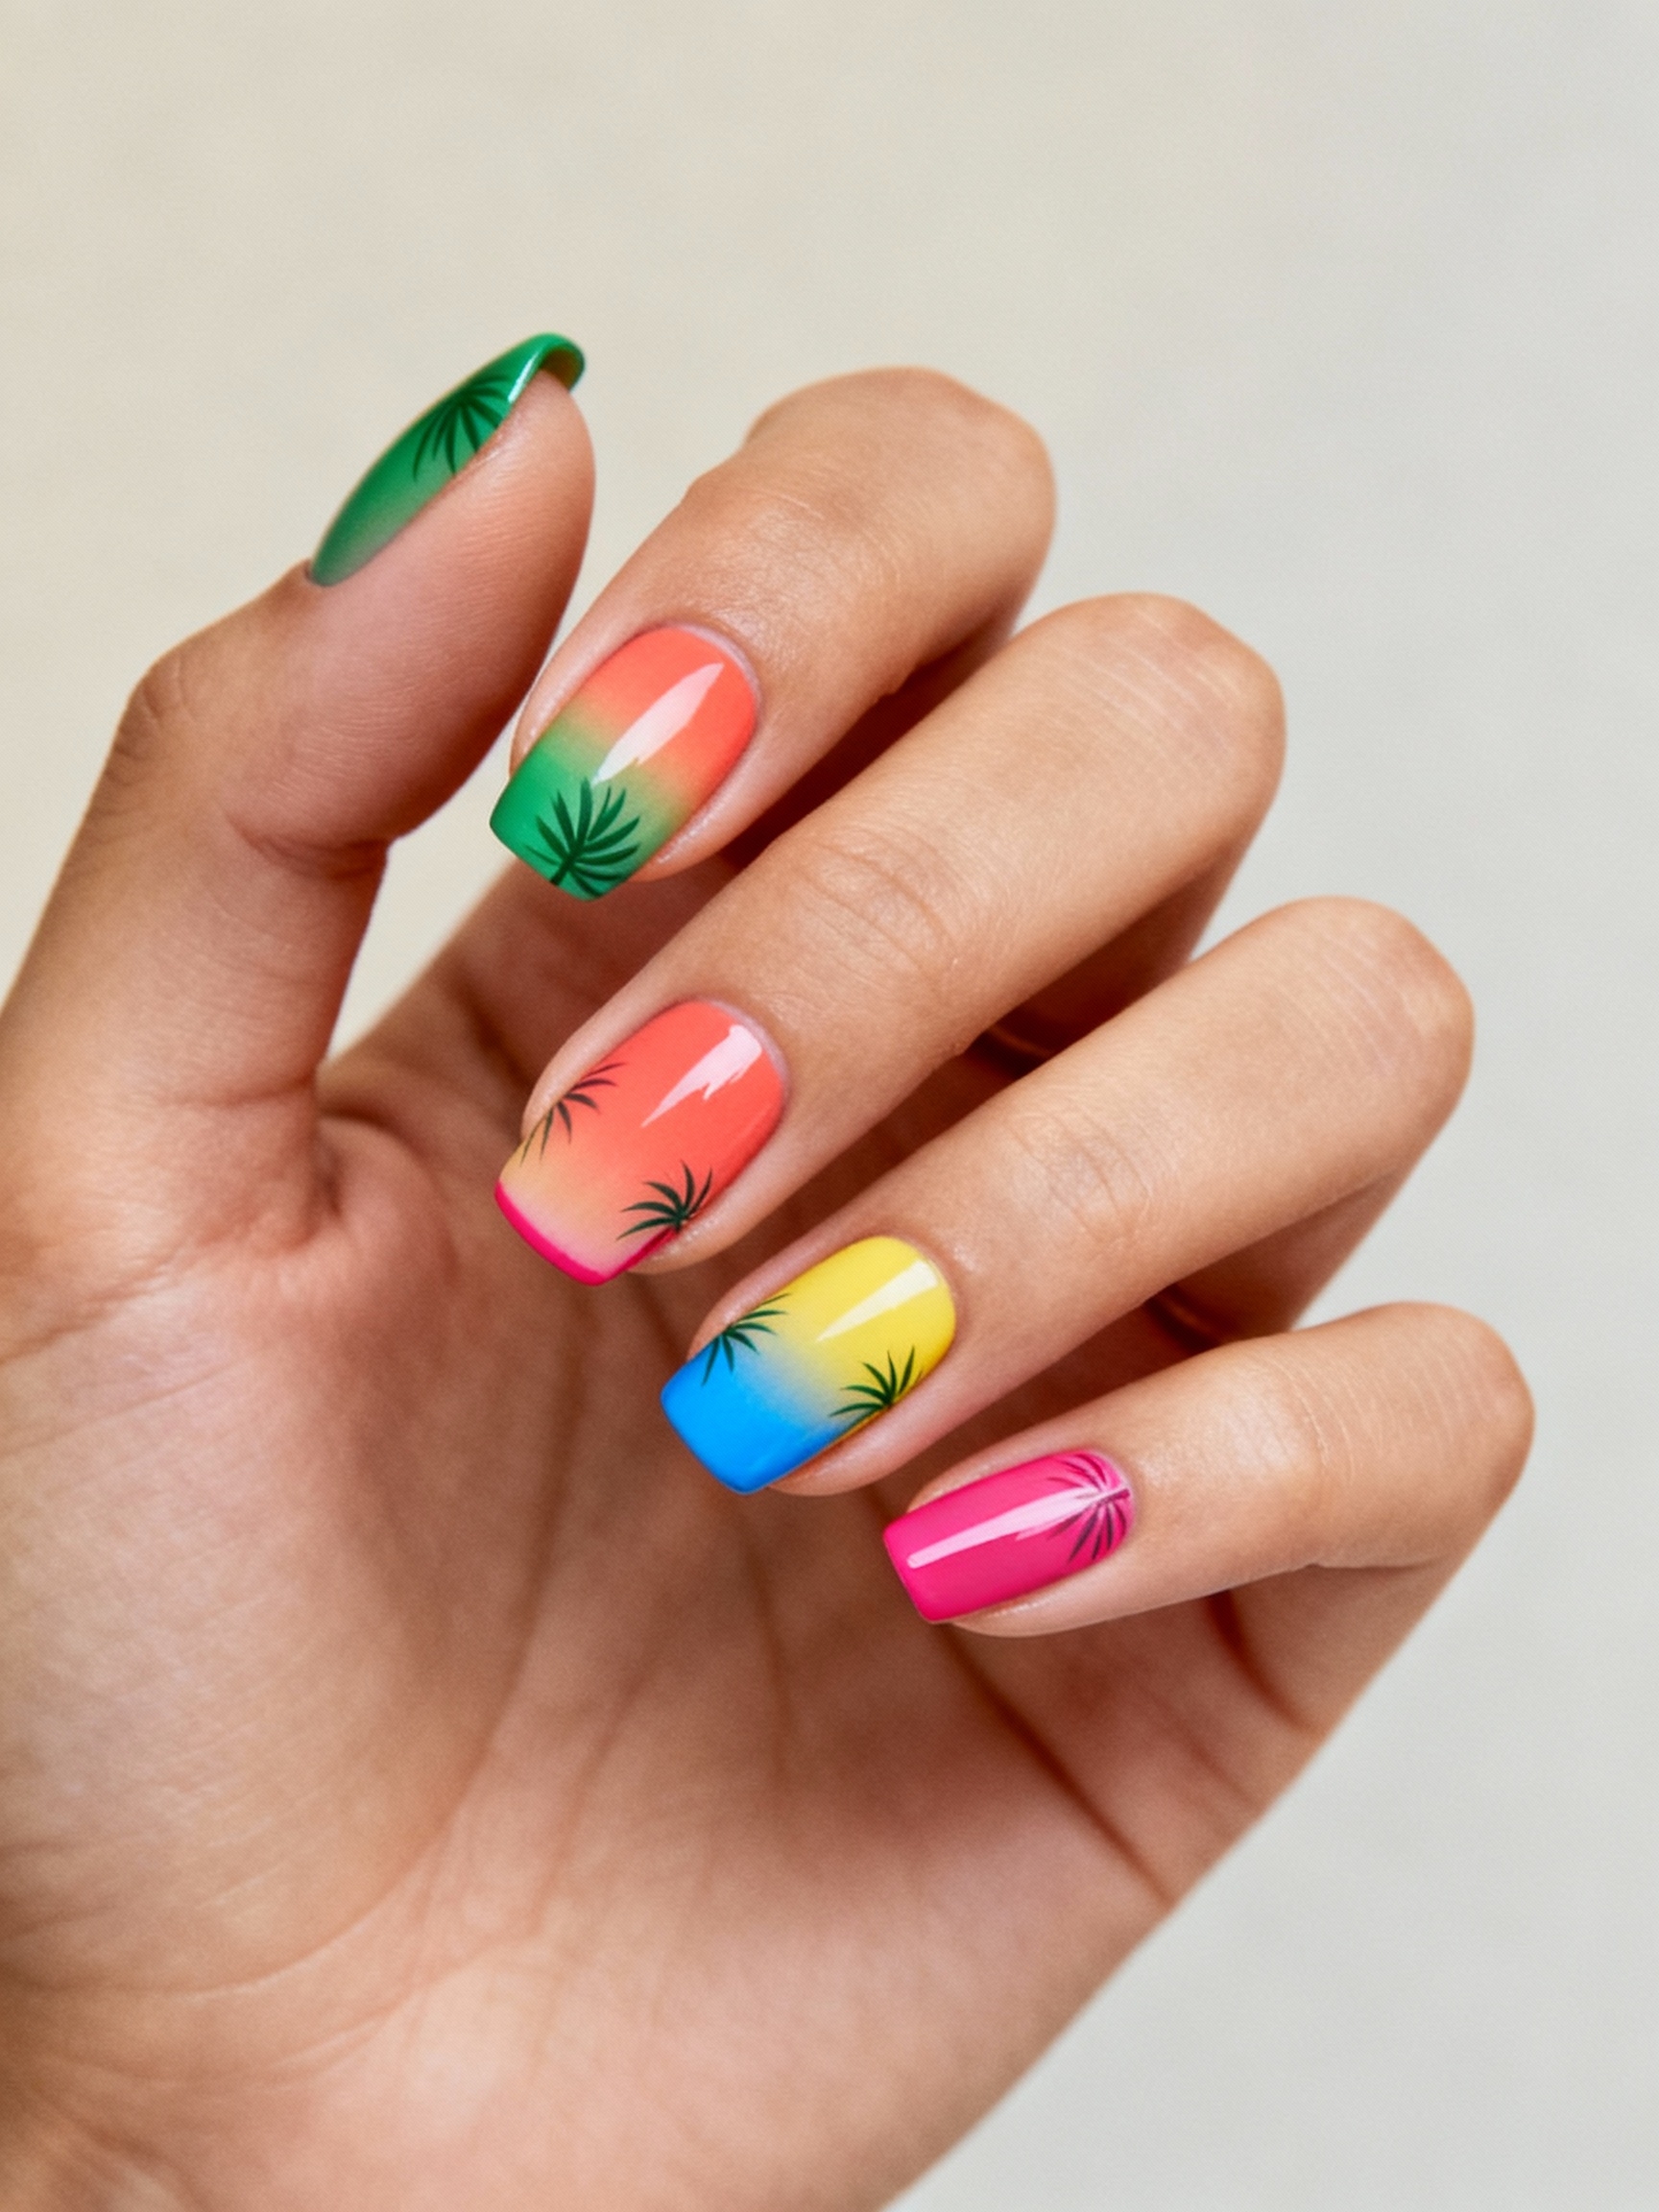
The parrot palette is the maximalist finale: jungle green, mango, hibiscus pink, and electric blue, all anchored by a glossy coconut white so the brights have somewhere to land. It is lively without sliding into chaos, mostly because the white block keeps the colors organized.
Loud, but Still Wearable
Structure is what saves a busy palette. I lean on sleek French tips with bold color blocks, a few micro-feather accents, and a single chrome dot per nail to tie the hand together. Every color gets its own job rather than all shouting at once.
This one pairs better with city outfits than you would guess, which makes it a satisfying souvenir to wear home. Keep the shape clean and the gloss high, and the loudest set in the room still looks deliberate.
Maintenance & Care
Tropical sets meet their three worst enemies on the trip itself: sunscreen, salt water, and pool chlorine. Sunscreen oils can lift a gel edge, salt dries the cuticle, and chlorine slowly bleaches bright color. None of it is fatal, but it speeds up wear, so a gloss top coat reapplied mid-trip buys you several more days of shine.
The art always chips before the base, usually at the free edge. That is why I send clients home with a tiny bottle of the brightest color in the design for a thirty-second touch-up. Oil the cuticles every night, keep hands moisturized against salt, and book your fill every two to three weeks once you are back. Treated gently, a good set easily lasts a one or two week vacation.
Tropical Nails, Answered
?How long do tropical nails last on vacation?
A gel set holds two to three weeks, which covers most trips. The hand-painted art chips first, usually at the tips, so bring a small bottle of the main color for quick fixes. Sunscreen, salt, and chlorine all speed up wear, so reapply a glossy top mid-trip.
?What is the easiest tropical nail design for a beginner?
Palm-frond silhouettes on a single accent nail, or a sheer aqua jelly across the whole hand. Both forgive an unsteady hand: the fronds are loose by design, and the jelly hides ridges and chips. Save sunset ombré and neon for when your topcoat technique is solid.
?How much does a tropical nail set cost?
A plain gel base runs about $40-60. Hand-painted art adds roughly $15-40 depending on detail and how many nails get it. Press-on tropical sets are the budget route, often $8-15 for a design you apply yourself for about a week.
?Will bright tropical colors flatter my skin tone?
Almost certainly, if you choose saturated over chalky. Deep and cool-toned skin looks striking in true corals, fuchsias, emeralds, and bright metallics. Warm and fair skin can lean into peachy corals and lemon-yellows. The shade to skip for anyone is a muddy, grayed-down pastel, which tends to look ashy.
?Can I do tropical nails at home without a gel lamp?
Yes, with regular polish and a glossy top coat, though it will not last as long. Decals and press-ons make the art far easier than freehand. For ombré, a small makeup sponge dabbed with two colors and a quick topcoat gets you most of the way there.
Pack Light, Paint Bright
You do not need all twelve of these on one hand. The best tropical manicure is usually one strong idea, a sunset fade or a single hibiscus, kept glossy and clean so it carries the whole look. The loud sets photograph well for a day; the considered ones last the trip and still feel right at the airport on the way home.
So pick the one that matches your week, ask your tech for a tiny touch-up bottle, and let your hands do a little of the vacationing before you even leave. Half the fun of a getaway set is looking down at it on the plane.
Next Up