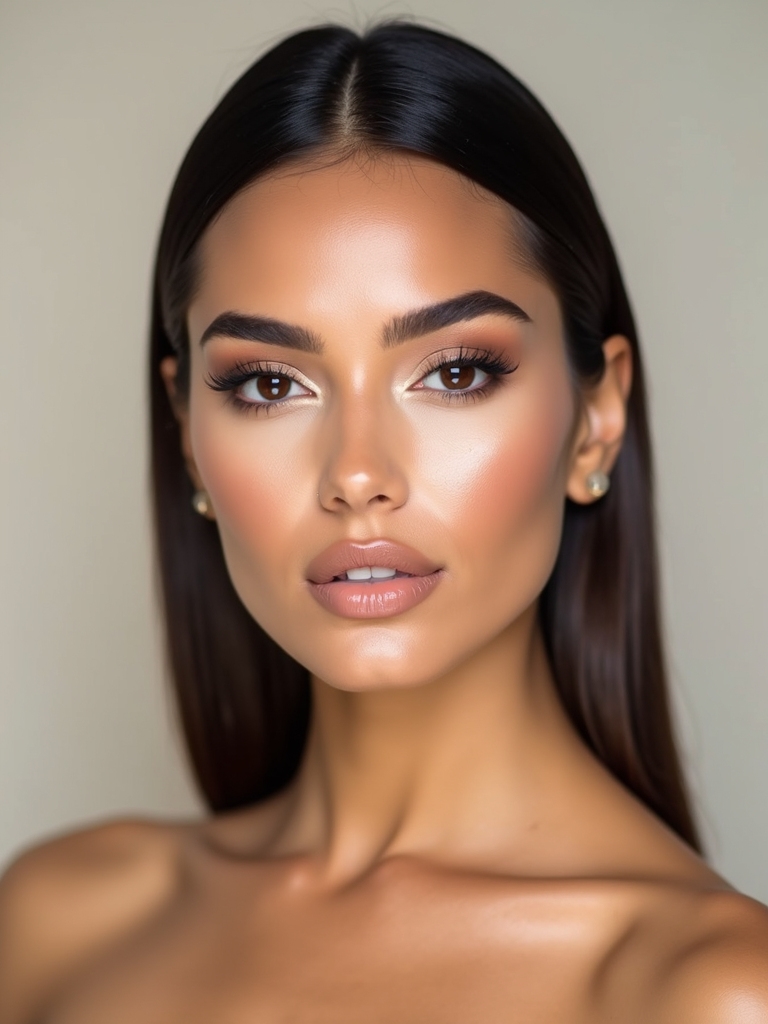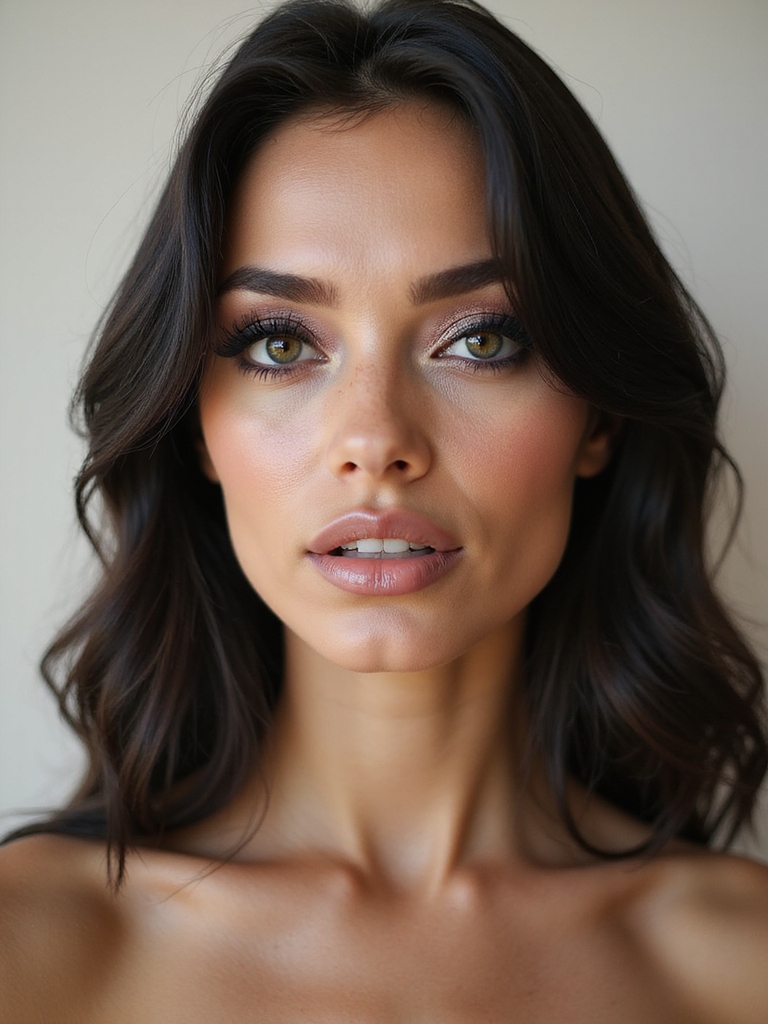
Drag makeup is the most technical, theatrical makeup there is, built to read from a stage and hold up under hot lights for hours. The techniques behind it, the carved cut crease, the sculpted contour, the baked, locked-in base, are skills anyone can borrow whether you perform or just want your boldest glam to last all night. It is artistry, plain and simple.
The fifteen looks below break drag glam into its signature moves, from the sharp wing to the chrome lip. For each I will tell you the technique, the products that make it last, and how it adapts to different skin tones, since stage-ready color and contour both need adjusting to flatter you.
The Quick Version
- Drag makeup is about exaggeration and longevity: bold color, sharp lines, and a base that holds for hours under lights.
- The core skills, cut crease, contour, baking, and oversized lashes, transfer to any bold glam look you want to last.
- Bold, saturated color and metallics look spectacular on every skin tone; choose pigment payoff over sheer formulas.
- Use eye-safe, cosmetic-grade products for glitter and lashes, and set everything well so it survives heat and sweat.
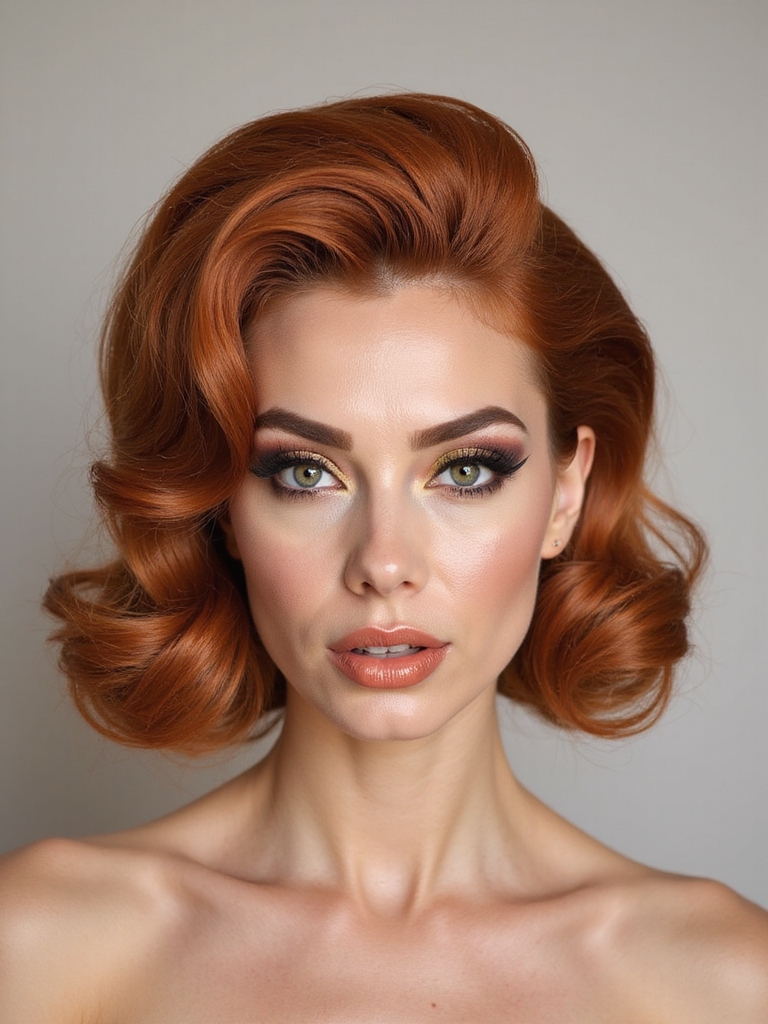
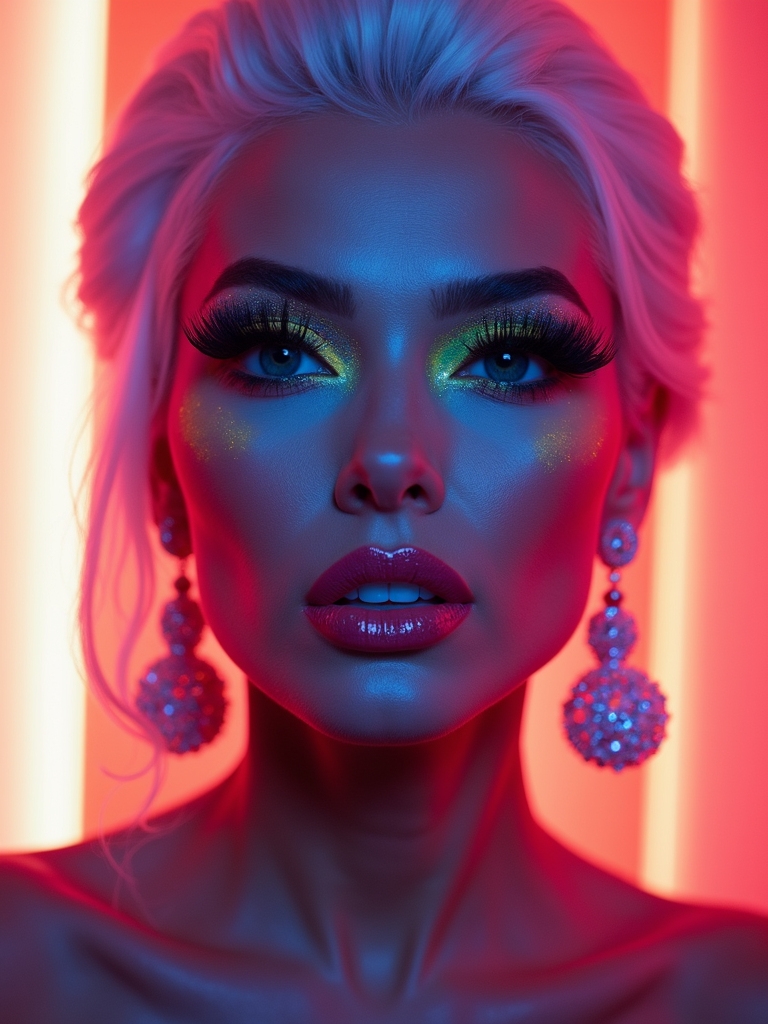
Neon Cut Crease

The cut crease is the first skill I teach anyone moving into bold glam, the cornerstone drag eye, a razor-sharp line of contrast carved into the crease so the lid pops, and in neon it turns electric and stage-ready. The crisp cut is what makes the eye read from across a room, which is the whole point of drag.
Carve the crease with concealer on a small brush, then pack a saturated neon onto the clean lid below so the line stays sharp. Build the color in layers for full opacity, since drag is about payoff. Neon brights look spectacular on every skin tone, and the saturated color reads almost luminous on deep skin where a sheer formula would fall flat.

Lifted Sharp Winged Lashes
Drag is all about lift, and an elongated razor wing paired with oversized lashes stretches the eye up and out for maximum drama. The wing and lash work together to fan the whole eye upward, which is what gives drag its fierce, lifted look.
How to build the lift:
- Draw a long, sharp liquid wing angled steeply up toward the brow tail.
- Stack two or three pairs of dramatic lashes, building density toward the outer corner.
- Use a clear lash glue and let it get tacky before pressing, so the stacked lashes hold all night.
Heads-Up
Only use cosmetic-grade, eye-safe glitter and pigments near the eyes; craft glitter can scratch the eye and cause real damage. Let lash glue get tacky before pressing on stacked lashes, and remove everything gently with an oil cleanser or balm at the end of the night rather than rubbing.
Long-Lasting Glittered Lids
Glitter is a drag signature, and I tell every client the trick to keeping it on the lid and off the cheeks is layering it onto a tacky base. Done right, the glitter looks dense and lit, and it survives a whole performance. Here is the method:
- Press a glitter glue or tacky primer onto the lid and let it go just sticky.
- Pack cosmetic-grade glitter on with a flat brush or finger, pressing rather than sweeping.
- Seal the edges with a little more glue so no flecks migrate. Use only eye-safe glitter near the eyes.
Crisp Sculpted Contour

Drag contour is bold and crisp, carving the cheekbones, jaw, and nose far more dramatically than everyday sculpting. The exaggeration is deliberate, since soft contour disappears under stage lights.
Use a cool-toned contour several shades deeper than your skin, place it sharp under the cheekbone, and blend just enough to soften the hardest edge while keeping the line defined.
Bake the area afterward to set it. Match the depth to your skin so it still reads as shadow: a deep cool brown on deep skin, a cooler taupe on fair skin. The dark feminine makeup guide covers cool contour in more detail.
Drag taught me that bold and long-wearing are the same problem solved twice. Sharp lines mean nothing if they slide off by the second number.
Gradient Blurred Lips
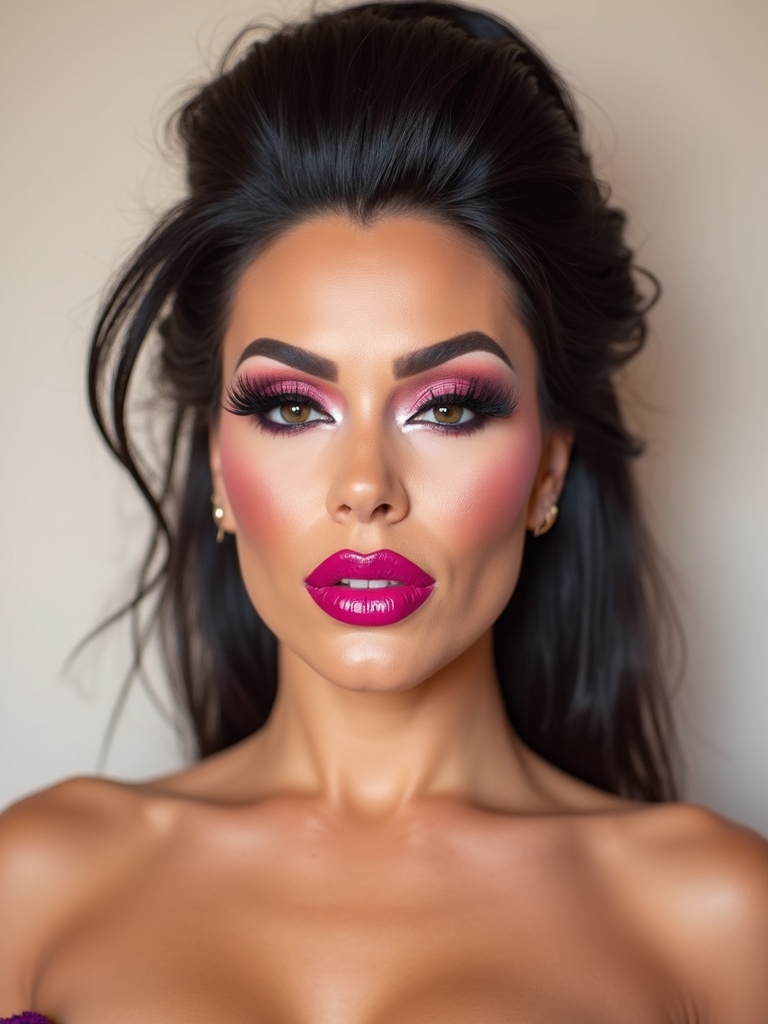
Drag lips are big, plush, and dimensional, often overdrawn and built with a gradient so they look impossibly full. The gradient and overlining together fake a much bigger lip, which balances the dramatic eye.
Build the plush lip like this:
- Overline the lips well past the natural line and fill with a deeper shade at the corners.
- Add a brighter or lighter shade in the center and blend the seam for that gradient pout.
- Top with gloss for plumpness; on deep skin, a deep berry-to-bright gradient looks especially rich.
Bold Single-Shade Glam
Sometimes the boldest drag move is committing to one electric shade across the whole eye and lip, a monochrome wall of color that looks loud and graphic. It is striking and surprisingly simple, since you only need one hero shade. The steps are simple:
- Choose one saturated color and wash it across the lids up to the brow.
- Echo it on the lips for a full monochrome statement.
- Keep the skin smooth and neutral so the single color is the whole show. Bright shades pop hardest on deep skin.
Good to Know
Drag color is built in thin, packed layers rather than one heavy coat because stage and camera lights blow out anything sheer. The same logic explains overdrawn lips and oversized lashes: features have to be scaled up to survive the wash-out of bright light and distance.
Wearable Bold Eye Art
Not all drag has to be full stage. A precise piece of graphic eye art, a bold line or shape, gives the drag-influenced edge in a version you could actually wear out. It is the gateway between everyday and full drag.
- Draw one clean graphic element, a floating line or a bold geometric shape, with a steady hand.
- Keep the rest of the face simple so the art is the focus.
- Use a saturated liner or wet shadow for crisp, opaque color that shows on any skin tone.
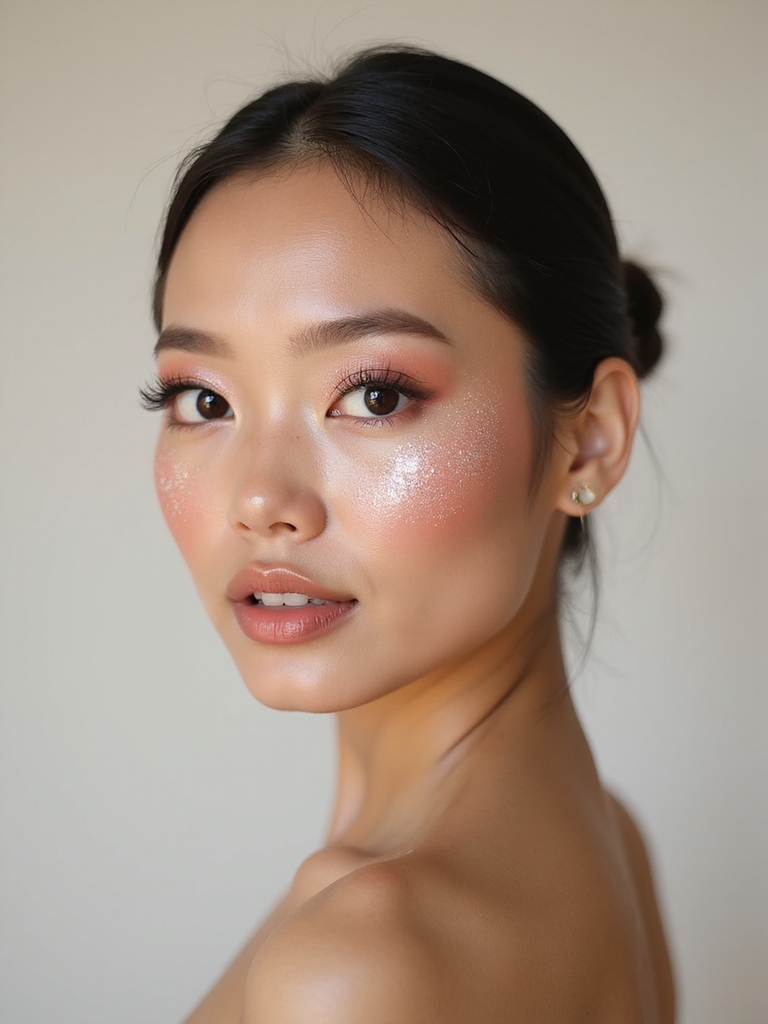
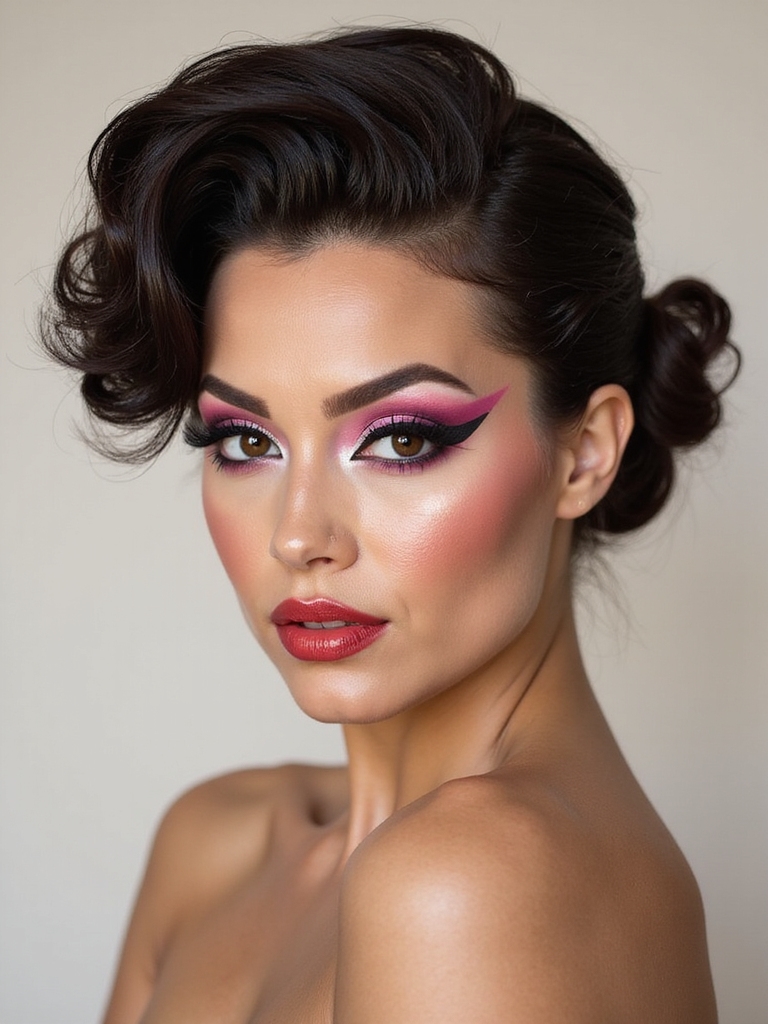
Sparkle Placement Technique
Where you place sparkle matters as much as the sparkle itself, and drag uses it strategically, on the inner corner, the center of the lid, the high points, to catch light exactly where you want it. The placement is what makes it look intentional rather than scattered.
- Concentrate sparkle on the center of the lid and inner corner, where it catches the most light.
- Use chunkier glitter for the lid and a fine shimmer for the high points of the face.
- Press it on over a tacky base so the texture stays put. Eye-safe formulas only near the eyes.
Not sure where to start? Pick by your goal.
🎯Full stage or costume drama
A neon cut crease, stacked lashes, and an overlined gradient lip
🎯Drag edge you can wear out
Wearable bold eye art or a single graphic element over simple skin
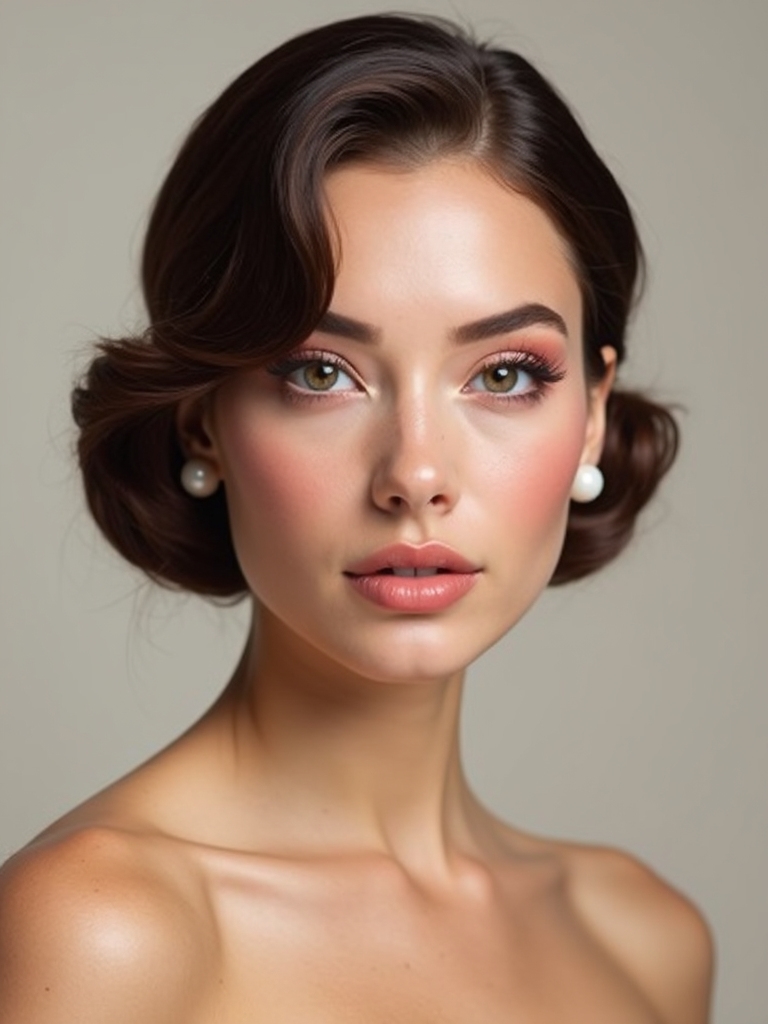
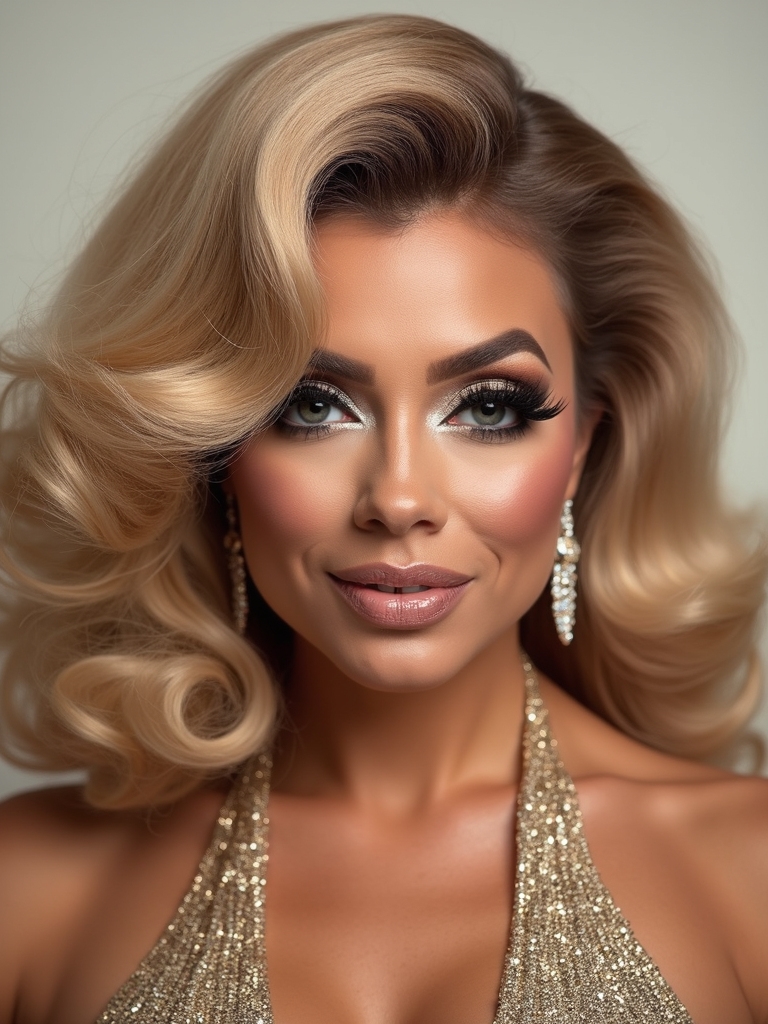
Sculpted Pin-Up Glow
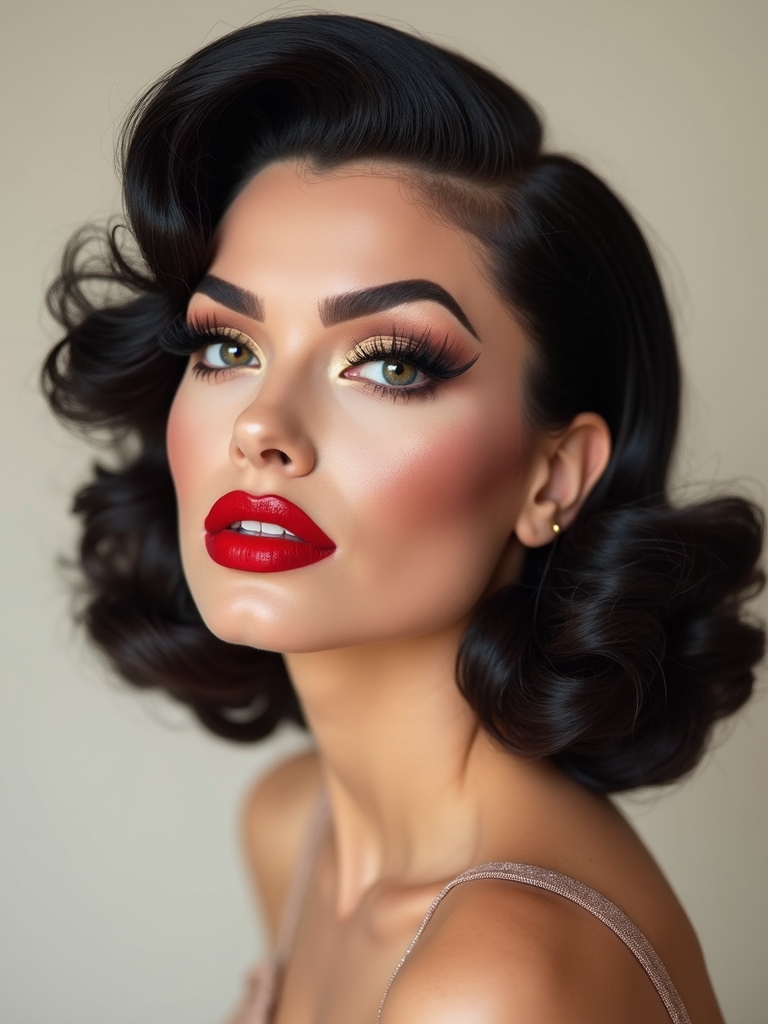
This is the one I build for pageant clients, vintage pin-up with a glowing, sculpted base, a soft winged eye, and a classic red lip, all dialed up to drag intensity. The porcelain glow here means smooth and luminous in your own depth, never a shade lighter, which is what keeps a sculpted base looking like skin rather than a mask.
Build a smooth, glowing base matched to your skin, sculpt the cheekbones, and add a precise wing and a bold red lip. Bake the under-eye and T-zone so the glam lasts. Reach for a warm red and a rich base in your true depth; a too-light base turns ashy on deep skin under the polished pin-up finish.
Stage-Ready Smoky Eye

The drag smoky eye is a regular smoky eye blown up to dramatic scale, extended well above the crease and out toward the temple so it looks huge under lights. It is all about size and blend, taking up far more of the lid than an everyday version.
Get the blown-out smoke right like this:
- Build a dark shade across the lid and blend it up past the crease toward the brow.
- Extend and diffuse the smoke out toward the temple for that oversized drag scale.
- Pack the color in layers for opacity, since stage lights wash out anything sheer. It suits every skin tone.
Color-Blocked Brows and Lids
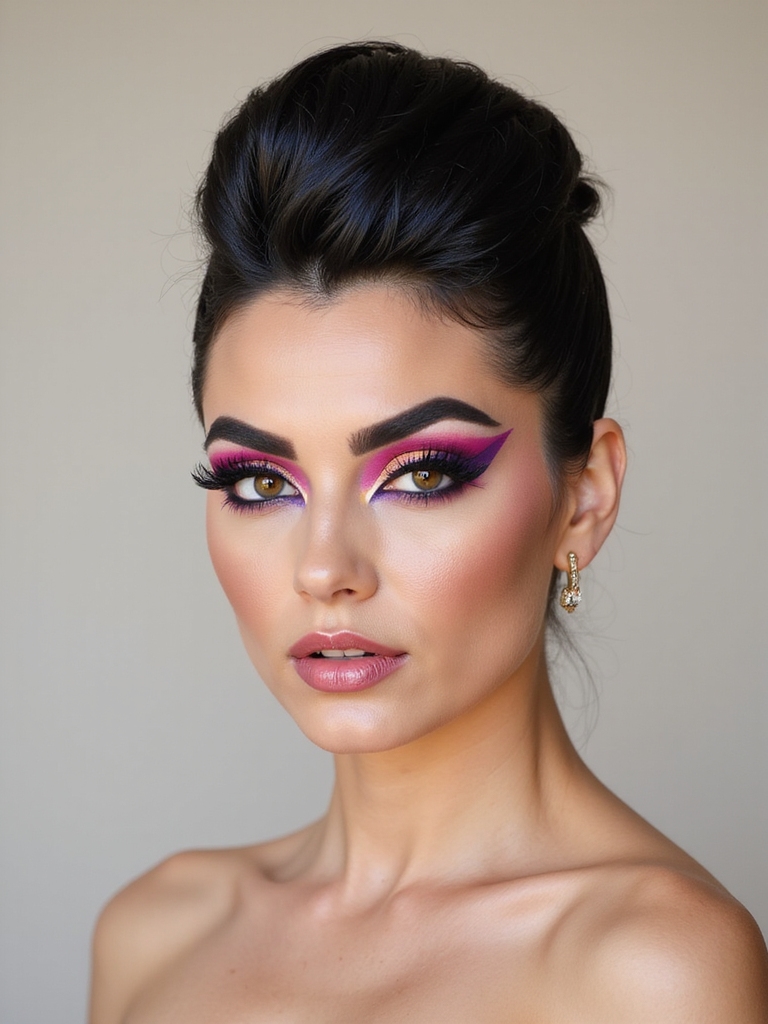
Color-blocking pairs bold, often matching or contrasting bright shades on the brows and lids for a graphic, editorial drag look. Blocking solid color this way reads loud and modern, the opposite of a soft blended eye.
A few pointers for clean blocks:
- Block the brows in one bright shade and the lids in another, keeping the edges clean and opaque.
- Use a saturated cream or pressed pigment so the blocks read solid, not patchy.
- Bright color blocks look incredible on deep skin; keep the rest of the face neutral so they dominate.
Liquid Chrome Glam
I love what liquid chrome does to the lids, turning them into a metallic mirror, the wet, reflective finish looking futuristic and high-impact under lights. It is among the most striking drag eye finishes, and a little goes a long way. Do it this way:
- Lay a base shade, then press a chrome or foil pigment over the top until it turns mirror-bright.
- Tap rather than swipe to keep the metallic finish intense and even.
- Seal the edges so it does not migrate. Chrome glows on every skin tone, and warm chromes suit deep skin beautifully.
Pastel Lilac-Mint Dream
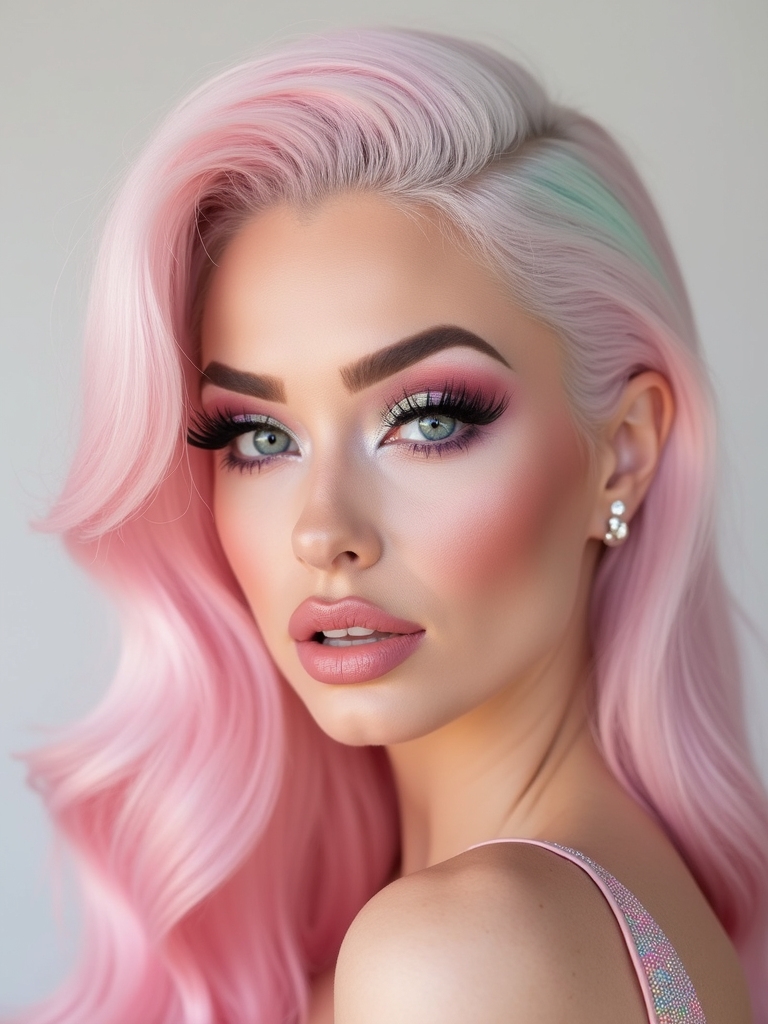
Drag does not have to be dark or neon; a dreamy pastel pairing of lilac and mint gives all the scale and blend of drag in a soft, fairy-tale palette. The pastel tones keep it sweet while the drag technique keeps it dramatic.
Keeping Pastels Bold
Blend lilac and mint across an oversized, blown-out eye, keeping the colors saturated rather than sheer so they hold up under lights.
Add sparkle and big lashes for the drag finish. Pastels need real pigment to register at this scale; the palest washes tend to disappear on deeper skin. For more color play, see creative makeup looks.
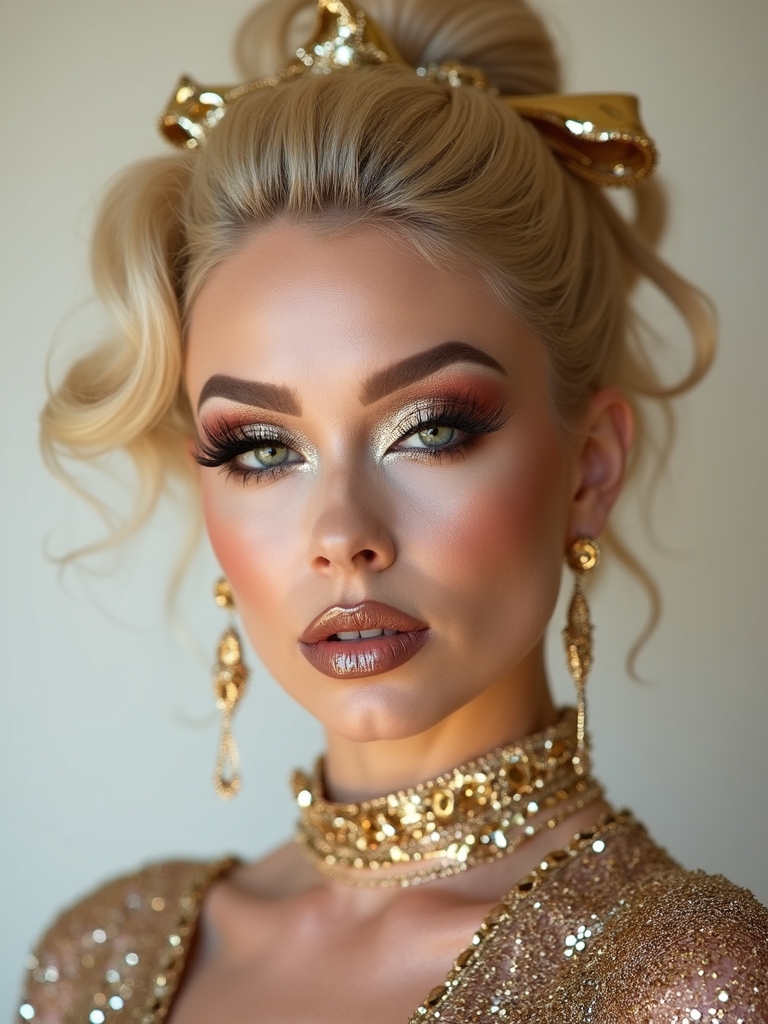
High-Gloss Pageant Glam
Pageant-style drag is the polished, symmetrical end of the spectrum, and the one I find hardest to get perfectly even, all crisp lines, even blending, and a glossy, beauty-queen finish. It is the most precise look here, prioritizing perfection over edge.
Build an even, immaculate base, a symmetrical defined eye, sharp brows, and a glossy lip, blending everything until there are no visible edges.
The precision is the point, so take your time on symmetry. It flatters every skin tone, and a glowing base in your true depth keeps the polished pageant finish from looking flat. The festival makeup guide has more bold-but-bright ideas.
Neon Blacklight Wing
Built for a blacklight stage or party, this uses UV-reactive neon that glows under blacklight while still reading bold in normal light. It is the most performance-ready look here, designed to electrify on a dark stage.
Lay the UV-reactive neon thick over a primer so it stays vivid, and draw a sharp, oversized wing or graphic shape. Test it under a UV light before the show if you can, since formulas vary in how strongly they glow. Neon is one of the very best palettes for deep skin, where the saturated color and the UV glow both pop hard against rich skin.
Who It Suits Best
Drag-inspired makeup suits anyone willing to commit, and you do not have to perform to wear it. The full looks are made for the stage, photoshoots, costume nights, and themed parties, where bold color and dramatic scale read as intended. The individual techniques, though, the cut crease, the sculpted contour, the long-wear base, transfer beautifully to any time you want your boldest glam to last for hours and photograph well.
The one rule that matters most is longevity, since drag is built to survive heat, lights, and sweat. Prime, layer, and bake everything: a gripping primer, color built in thin layers for opacity, and a translucent powder pressed into the under-eye and T-zone to lock it down.
Use eye-safe, cosmetic-grade products for glitter and lashes, and a setting spray to finish. Whatever your skin tone, lean into pigment payoff and the right depth of base, and the artistry will read exactly as bold as you intend.
Borrow the Artistry, Set It to Last
Drag makeup is the deep end of the makeup pool, and even if you never step on a stage, its techniques are worth stealing. The cut crease, the sculpted contour, the baked base, and the layered, locked-in color are exactly what make any bold look last and photograph well, which is why pros and beginners alike study drag artists.
Start with one technique that appeals to you, maybe a sharp wing or a sculpted cheek, and build from there as your confidence grows. Lean into pigment, set everything to last, choose your shades for your own depth, and you can wear as much or as little of the drag drama as the night calls for.