Which braid can you actually finish before the coffee goes cold? That is the real test of an easy braid, not whether it looks good in a tutorial, but whether you can do it on yourself, half-awake, without a second mirror. Most of the braids people call easy are not. The truly fast ones share a few traits: forgiving tension, no perfect parts required, and a shape that still reads good when it goes a little loose.
The twenty-three styles below run from a five-minute french to a few that take practice but reward it. For each I will tell you how hard it actually is, who the hair type suits, and the one detail that makes or breaks it. A quick note up front: tight braids on coily or relaxed hair need gentle tension at the hairline, which I will come back to, since a braid is never worth a sore scalp.
Braids at a Glance
| Braid | Difficulty | Best For |
|---|---|---|
| Classic french | Beginner | Everyday, any length |
| Bubble braid | Beginner | Fast, no braiding skill |
| Fishtail | Intermediate | Casual, longer hair |
| Halo / crown braid | Intermediate | Events, medium-long hair |
| Four-strand | Advanced | Showing off the detail |
The Timeless French Braid

Every other braid is a variation on this one, so it is worth getting right first. A french braid gathers hair as you go, keeping it flat to the head, and it works on almost any length past the shoulders. The only real skill is adding small, even sections each pass.
- Start with three strands at the crown and cross outer over middle.
- Add a small new section to each outer strand before every cross.
- Keep the tension medium, not tight, so it sits flat without pulling. New to it? The french braid walkthrough goes slower.

Dutch Braid Rhythm

A Dutch braid is a french braid turned inside out: you cross strands under instead of over, so the braid sits raised on top of the hair instead of sunk into it. That pop is why it photographs so well. Once your fingers learn under instead of over, it is no harder than a french.
- Cross each outer strand under the middle, not over.
- Add hair the same way you would for a french as you go down.
- Pull the edges gently at the end for a fuller, raised braid. See the dutch braid guide for the hand motion.
A few braid terms that come up constantly:
📖French braid
Strands crossed over the middle while gathering hair, so the braid sinks flat into the head.
📖Dutch braid
The inverse: strands crossed under, so the braid sits raised on top.
📖Pancaking
Gently pulling braid loops wider after braiding to fake fullness and volume.
Messy Fishtail Braids

A fishtail looks complicated and is secretly the easiest braid here, because you only ever move two strands. Split the hair in two, then keep pulling a thin piece from the outside of each side over to the other. That is the whole thing. The trade-off is time: it is slower than a french because the pieces are small.
The messy version is more forgiving than a sleek one, so this is a great first braid for anyone nervous about neatness. When you finish, gently tug the sides to loosen and widen it. The looseness hides any uneven pulls.
It suits longer, all-one-length hair best, since heavy layers tend to slip out of the two-strand hold. A little texturizing spray beforehand gives fine hair the grip it needs.
Triple Braid Faux-Hawk

This is the bold one, and it is more about assembly than braiding skill. You braid three sections down the center of the head, then pin them up and into each other so they read as a soft faux-hawk. I tell clients it is the festival look that survives a long, sweaty evening.
Because the braids themselves can be simple three-strands, the effect comes from placement, not technique.
- Section three vertical parts down the middle and braid each tightly.
- Pull each braid wider, then pin the ends up and inward.
- Use a flexible-hold spray rather than stiff gel so it moves naturally.
The braid people call advanced is usually just the basic motion done upside down or one-sided. Learn the french cold and the rest is geography.
Sleek Twisted Rope

A rope twist is the fastest braid-adjacent look there is, and technically it is not even a braid. You twist two sections in the same direction, then wrap them around each other in the opposite direction, and the tension locks it in place. This is my ninety-second move on wet-ish hair, the one I do without thinking.
- Twist each of the two strands clockwise, hard.
- Cross them counter-clockwise so the twist holds itself.
- Secure the end; the opposing twists are what stop it unraveling.
Half-Up Crown Braid

A half-up crown takes small braids from each temple and joins them at the back, leaving the rest of your hair down. It is the one I book most for clients who want to look done without an updo, and it works on thick, thin, curly, or straight hair equally well.
Keeping the Crown Even
The trick is keeping the two side braids thin and level with each other, so they meet cleanly at the back. Bring a photo if you are asking a stylist, since how high you set the crown changes the whole mood.
If your ends are layered and slip out, a tiny clear elastic at each temple braid before you join them keeps everything in place.
| Hair type | Easiest win | Tip |
|---|---|---|
| Fine / thin | Pull-through or bubble | Pancake everything for volume |
| Thick | French or Dutch | Allow extra time, not effort |
| Coily / textured | Boxer braids as protective | Gentle tension, moisturize first |
| Long | Waterfall or bubble | Use length as the feature |
Pancake Braid Volume

Pancaking is not a braid, it is a finishing move that makes any braid look twice as full. After you braid loosely, you gently pull each loop outward to flatten and widen it. On fine or thin hair, this is the single best trick for fake volume.
- Braid loosely first; a tight braid has no slack to pull.
- Tug the outer edge of each loop, working top to bottom.
- Go gently and evenly so one side does not end up wider than the other.
Bohemian Side Braid

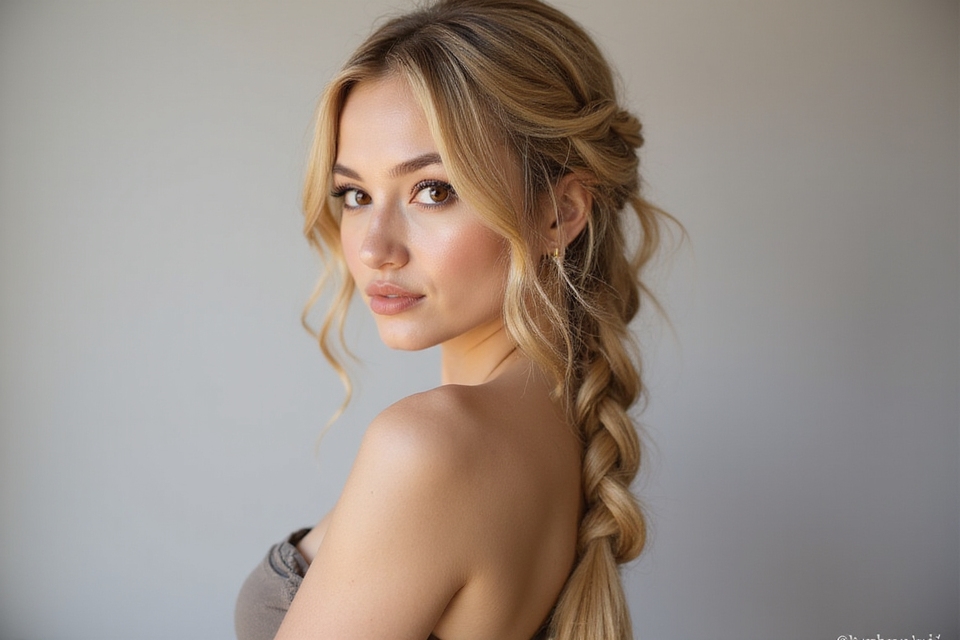
A side braid is the lazy-Sunday hero: a loose three-strand braid pulled over one shoulder, deliberately undone. It takes the pressure off neatness entirely, since the whole point is that it looks lived in and a little tousled. Pull a few face-framing pieces out before you start.
Because it sits to one side, it is also a smart way to deal with second-day hair without washing. The texture of unwashed hair actually grips better. Loosen the braid with a few tugs once it is tied, and finish with a light mist so the flyaways stay soft rather than frizzy.
🅰️French braid
Sits flat and sleek; better under hats and for a tidy, classic look.
🅱️Dutch braid
Sits raised and bold; better for photos and a fuller, standout braid.
Timeless Milkmaid Braids

Milkmaid braids wrap two braids up and over the crown like a halo, and they are far easier than they look because the braiding itself is just two basic plaits. The skill is in the wrapping and pinning, not the braid. This is a classic that reads polished for a wedding or a garden party.
A few things keep them from sliding:
- Braid each side, then cross them over the top of your head.
- Pin generously, tucking the ends under the opposite braid.
- A little hairspray on the pins stops fine hair slipping loose.
Quick Boxer Braids

Two Dutch braids running straight back, often called boxer braids, are sporty, secure, and great for keeping hair off your face through a workout or a long day. They take practice because you are braiding two sides evenly, but once learned they are properly fast.
On coily and tightly textured hair, these double as a protective style, and the rules shift a little:
- Keep a center part clean and even so the two braids mirror each other.
- Use gentle tension at the hairline; if it stings or tugs the edges, it is too tight.
- Moisturize first and braid on stretched, not soaking-wet, hair for the best hold.
Cascading Waterfall Braid

A waterfall braid is a half-up french with a twist: at each pass you drop the lower strand and pick up a fresh one, so pieces cascade down through the braid. The dropped strands are the whole effect, falling like, well, a waterfall.
It looks intricate but the motion is repetitive once you find the rhythm. The hardest part is keeping the braid level as it travels across the back of your head, which is why a mirror at your back helps a lot.
This one shines on straight to loosely wavy hair, where the dropped strands hang clean. On very curly hair the cascade gets lost, so a different style serves better. It pairs beautifully with long hairstyles.
Chic Braided Bun
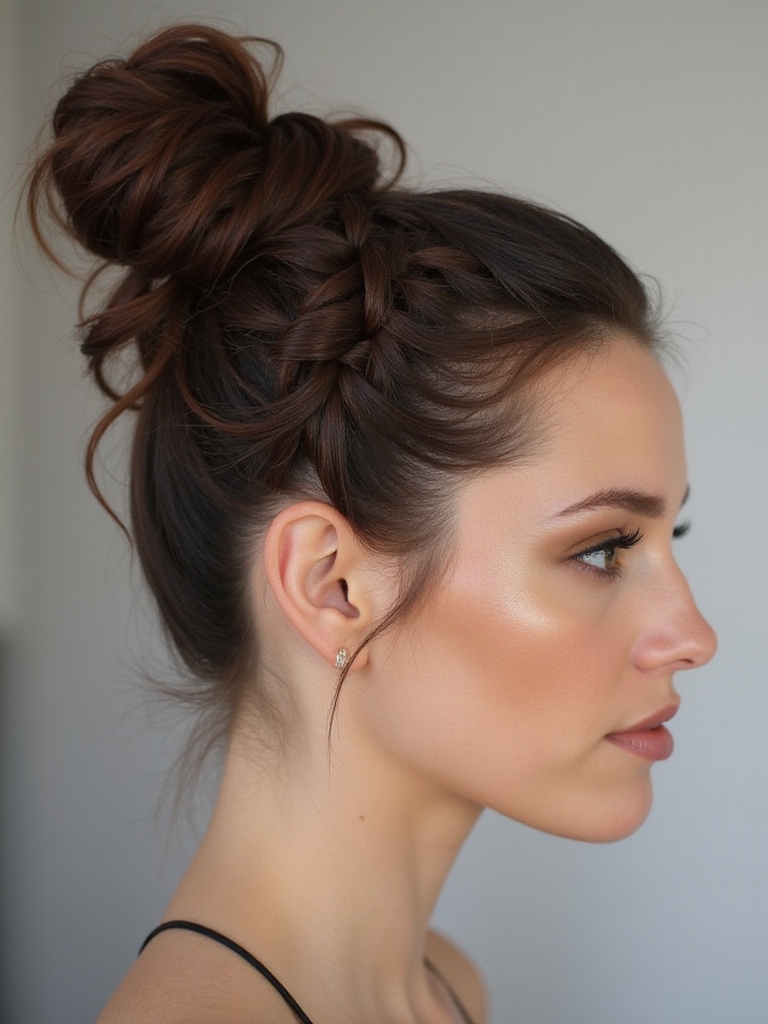
A braided bun is the fix for a bad-hair day that still looks intentional: braid a low ponytail, then coil the braid into a bun and pin it. The braid adds texture a plain bun lacks, and it holds far better because the plait grips itself.
It is endlessly customizable, which is half the appeal:
- Braid loosely and pancake it before coiling for a fuller bun.
- Wrap the braid around its base and pin as you go, not all at the end.
- Add a clip or ribbon at the base for an instant dressed-up version. More at easy bun hairstyles.
Simple Ladder Braid

A ladder braid sounds advanced but is really a side braid with a clever add-on: as you braid down a ponytail, you feed in small sections that lie across the braid like rungs. The result looks woven and detailed for very little extra effort.
- Start with a side or back ponytail for control.
- Braid a few passes, then lay a thin section across before the next cross.
- Keep the rungs evenly spaced so the ladder effect reads clearly.
Versatile Halo Braid

A halo braid is one continuous braid that circles the whole head, and it is among the most adaptable styles for events because it keeps every strand secured. It takes patience the first few tries, but it is the same french-braid motion the entire way around.
- Start at one ear and french-braid around the hairline in a circle.
- Keep gathering hair from the loose center as you travel.
- Tuck the final tail under the start and pin it invisibly.
Fast Four-Strand Braid

The four-strand is the one that makes people ask how you did it, and honestly it is the only braid here I would call honestly tricky. You weave a fourth strand into the pattern, over one and under the next, which creates a wider, almost ribbon-like plait. I have found it is worth the practice for the payoff.
- Divide into four even sections and number them in your head.
- Take the rightmost strand over, then under across the others.
- Go slow at first; the rhythm clicks after a few rows.
Twisted Braid Headband

A braid headband is the most functional style here: a thin braid that runs across the top of your head from ear to ear, holding your front pieces back while the rest stays loose. It learns in minutes and works for casual and formal alike.
- Braid a thin section from one temple across the crown.
- Pin it behind the opposite ear and hide the tail underneath.
- Leave the rest of your hair down or in soft waves.
Simple Pull-Through Braid

The pull-through is the genius cheat for people who cannot braid at all. You make a row of small ponytails down the back, split each one, and pull the next ponytail through the gap. No actual braiding happens, yet it looks like a thick, voluminous plait.
Because it is built from elastics, it is also one of the most reliable styles for an active day. It will not unravel the way a real braid can. The only catch is that the elastics can show, so use clear ones and tuck them as you go.
Pancaking each section afterward makes it look even fuller, which is why this reads so well on fine hair that struggles to hold volume.
Crowned Braid Ponytail

This blends two looks: a braid over the crown that flows down into a regular ponytail. You get the detail of a braid up top and the ease of a ponytail at the back, which makes it a great in-between for days you cannot decide.
- Dutch-braid the top section from the forehead to the crown.
- Gather the braid and the rest of your hair into one ponytail.
- Wrap a strand around the tie to hide the elastic.
Precise Parting for Pigtails

Double Dutch pigtails live or die on the part, so this section is really about the prep that makes any two-braid style look sharp. A clean, straight center part is what separates a polished set of pigtails from a sloppy one.
Use the end of a rat-tail comb to draw the part, and check it in a back mirror before you commit. A crooked part shows from behind even when the braids themselves are perfect. Clip one side away entirely while you braid the other so stray hairs do not cross over.
A smoothing serum on the ends keeps flyaways down for a sleek finish, especially on hair that frizzes. This same parting discipline carries over to nearly every braided style worth doing.
Knotted Braid Updo

A knotted updo takes two braids and ties them into each other like a loose knot at the nape, then pins the ends away. It is a deceptively simple formal look that holds for hours, which is why it is a reliable wedding-guest choice.
- Braid two low sections, one on each side.
- Cross and knot them loosely at the nape of the neck.
- Tuck and pin the tails so no ends show.
Bubble Braid Speed

If you want maximum impact for zero braiding skill, the bubble braid is it. You make a ponytail, then tie elastics down its length and gently puff out each segment between them into a bubble. There is no plaiting at all, which is why I hand this to total beginners first.
Spacing the Bubbles
The whole look takes about three minutes once you have your elastics ready. Space them evenly, an inch or two apart, and pull each bubble wide on all sides so they look round rather than pinched.
It works on every hair type and length past the shoulders, and it is especially fun on long hair where you can fit six or more bubbles. Clear elastics keep the focus on the shape.
Reverse Braid Crown

The reverse braid flips your head: you tip upside down and Dutch-braid from the nape up to the crown, then finish the leftover length in a bun or topknot. The braid climbing up the back of your head is a striking detail you rarely see.
Braiding Upside Down
It is more about comfort with braiding upside down than any new technique. Bend forward, braid against gravity, and stop at the crown where you gather everything into a bun. The first attempt feels awkward; the second is fine.
Because the braid is anchored from the bottom up, it holds remarkably well for dance, sport, or a long night out. Secure the bun with pins crossed in an X for the firmest hold.
Spiral Lace Braid

A lace braid is a french braid that only gathers hair from one side, so it can curve and spiral across the head in whatever path you choose. The one-sided gathering is what lets it travel in a spiral rather than a straight line.
Think of it as the artistic cousin of the halo braid. You pick up hair only from the side nearest your face, which frees the braid to wind around. It takes a steady hand and a clear idea of where you want it to land.
This is the one I would practice last, once the french and Dutch feel automatic. On fine to medium straight hair the lace effect is at its most delicate and visible.
Who It Suits Best
If you are new to braiding, start with the bubble braid, the rope twist, or the pull-through, none of which require actual plaiting, then graduate to the french and Dutch once your fingers trust the motion. Fine or thin hair benefits hugely from pancaking and from texturizing spray for grip; thick hair holds almost anything but takes longer; long hair gets the most from bubble braids and waterfalls where length is the point.
One honest note that applies across the board, especially for coily, relaxed, or protective styling: tension is not a measure of how well a braid will hold. Braids should feel snug, never painful. Tugging at the hairline, little bumps along the part, or a sore scalp that night all signal the braid is too tight, and over time that strain is what causes thinning at the edges. A braid that sits gently lasts just as long and keeps your hairline healthy.
Braiding Questions, Answered
?What is the easiest braid for total beginners?
The bubble braid, since it involves no actual plaiting, just a ponytail with elastics tied down it and each segment puffed out. The rope twist and pull-through are close seconds for the same reason.
?How do I keep my braid from falling apart?
Braid on second-day or lightly textured hair rather than freshly washed, slippery hair, use clear elastics top and bottom, and a light mist of flexible-hold spray. Pancaking also helps a loose braid grip itself.
?Why does my scalp hurt after braiding?
The braid is too tight. Braids should feel snug but never painful; tension at the hairline can damage edges over time. Loosen the braid near the scalp and aim for gentle, even pressure instead.
?Which braids work best on curly or coily hair?
Boxer braids and Dutch braids double as protective styles on textured hair. Braid on stretched, moisturized hair rather than soaking wet, and when you take them down after a few days, do it gently on damp, conditioned hair to avoid snapping the strands that have settled together.
?How long do these braided styles take?
The quick ones, bubble, rope twist, side braid, take three to five minutes. A french or Dutch runs five to ten with practice, and the four-strand or spiral lace can take fifteen until the rhythm is second nature.
Finding Your Go-To Braid
The braid worth learning is the one you will actually reach for on a rushed morning, not the most impressive one in a tutorial. For most people that is a french, a bubble, or a side braid, with a fancier one or two saved for when there is an occasion and a few extra minutes.
Pick one easy style and do it three days running until your hands stop thinking about it. That muscle memory is the whole game. Save this list, try the beginner picks first, and come back for the four-strand once the basics feel automatic.
Keep the Inspiration Going